


Formula Can Transformation to Tropical Bathroom Storage Caddy

8 Materials
$15
2 Hours
Easy
I'm sure there are many mothers out there with idle hands like me during our moments of down time. I like to spend my time doing things I enjoy like crafting and painting. My son was formula fed due to complications I had after his delivery. We recently made the switch to milk! Wahoo! I had mounting formula cans and I decided to hang onto a few because I knew I could transform them into something useful. In this tutorial I will show you how to take empty formula cans and transform them into a tropical bathroom storage caddy.
SUPPLIES:
- Empty formula cans or any medium to small cans with lids
- Mod Podge
- Paint brush 1.5 inch works well
- Scrapbook paper
- Acrylic Paint
- Hot Glue Gun
- X-Acto Knife
- Pencil
- Ruler (Optional)
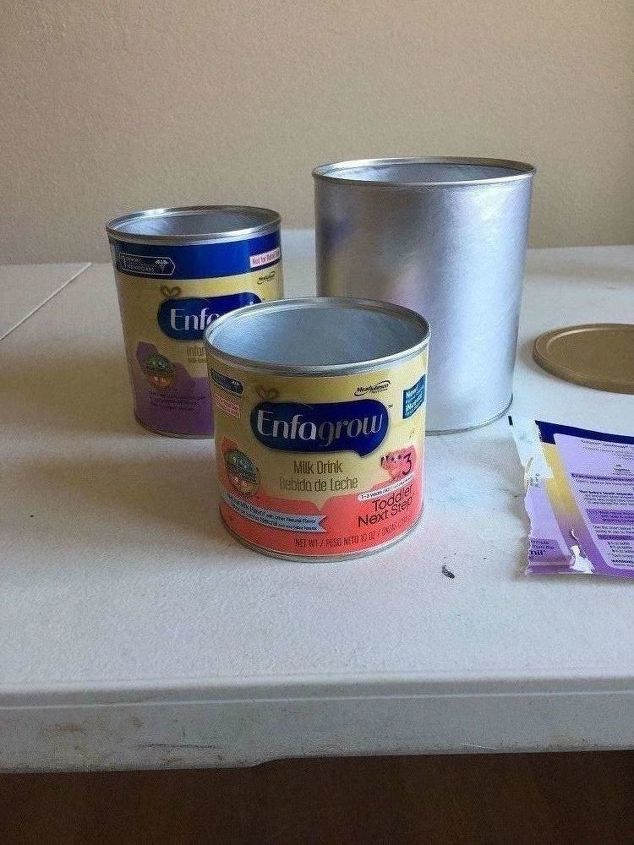
The first thing I did was take a wet wash cloth and wiped inside the cans to make sure they were clean. You want to do this because you will be storing things inside the cans and you don't want them covered in extra formula dust.

Secondly, I removed the labels from the cans and labeled them according to size: small, medium, and large. I didn't throw them away because I used them as a template for my scrapbook paper.
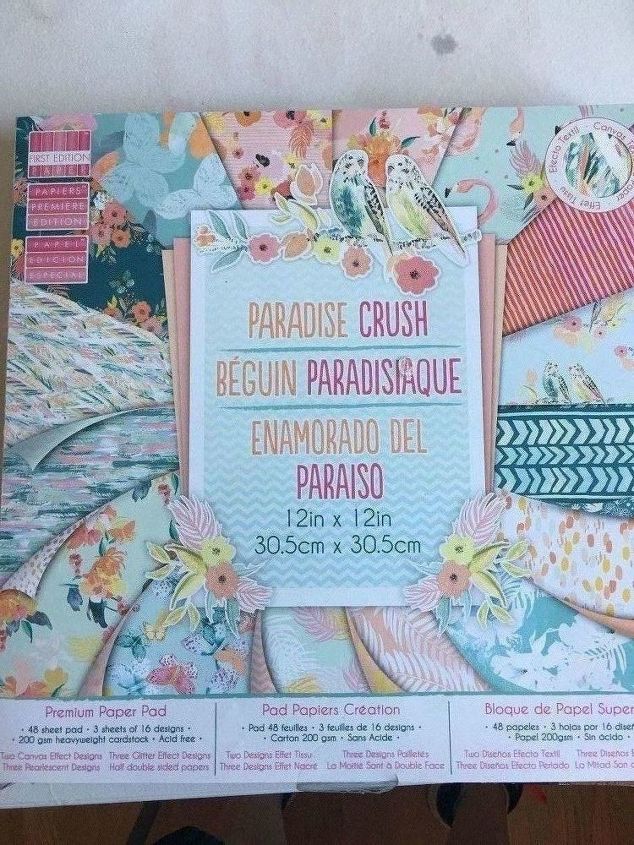
I picked out some fabulous tropical themed scrapbook paper that had a complimentary and similar color scheme.
I took my formula label marked with the size large and measured my scrapbook paper to fit the can. I had to cut two pieces because the scrapbook paper wasn't long enough to fit the whole label. When I laid the label on the scrapbook paper I made a crease in the label by folding it over the edge of the scrapbook paper pad. This showed me how much of an extra piece to cut.
I painted the small piece of paper, meant to make up the difference in the gap, with Mod Podge and placed it on the can. You'll want to smooth and flatten the paper and make sure the edges are completely glued down, so you don't have any corners of paper popping up. Then you'll do the same thing with the long piece of paper you've cut from the label template.
Repeat the steps outlined above for the medium and small size cans.
For the lid of the large size can: I traced the lid onto the scrapbook paper and from that cut a circle. I painted the circle and the top of the lid with light coats of Mod took my formula label marked with the size large and measured my scrapbook paper to fit the can. I had to cut two pieces because the scrapbook paper wasn't long enough to fit the whole label. When I laid the label on the scrapbook paper I made a crease in the label by folding it over the edge of the scrapbook paper pad. This showed me how much of an extra piece to cut.Podge. I pressed the paper to the lid and then turned it upside down and placed a river rock as a weight onto the lid to ensure a proper drying process.
After the paper has dried I painted the side of the lid with white acrylic paint so it would better match the cans as a whole. This is optional, you don't have to do it if you don't want to or if the color of the lid matches the paper that you are using. It's up to you.
- Note: Depending on what you plan to do with your can containers you can follow the steps for decorating the large lid for the smaller lids as well.
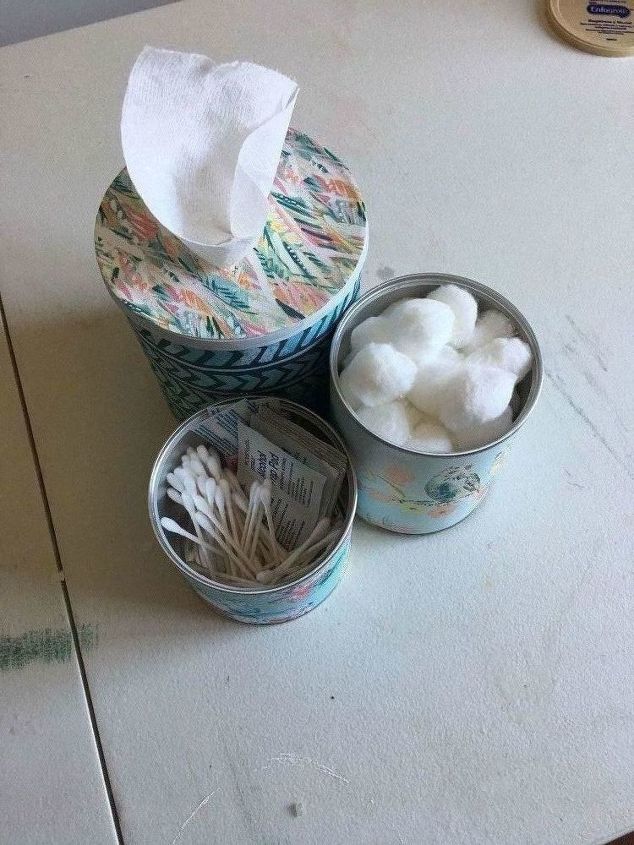
When the lid is dry, I took my X-Acto knife and cut a cross into the top. This allows for the container to hold tissue.
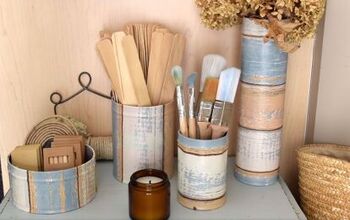
The last step is to glue the cans together in a cluster form. I took the medium sized can and used my hot glue gun to put a small strip on the top lip and bottom lip of the can where the scrapbook papers overlapped. I placed the can at an angle to the large can where the papers overlapped. For the smallest can, I put a strip of glue on the top and bottom lip twice about two inches apart width wise, because the small can is being "hugged" by the two larger cans.
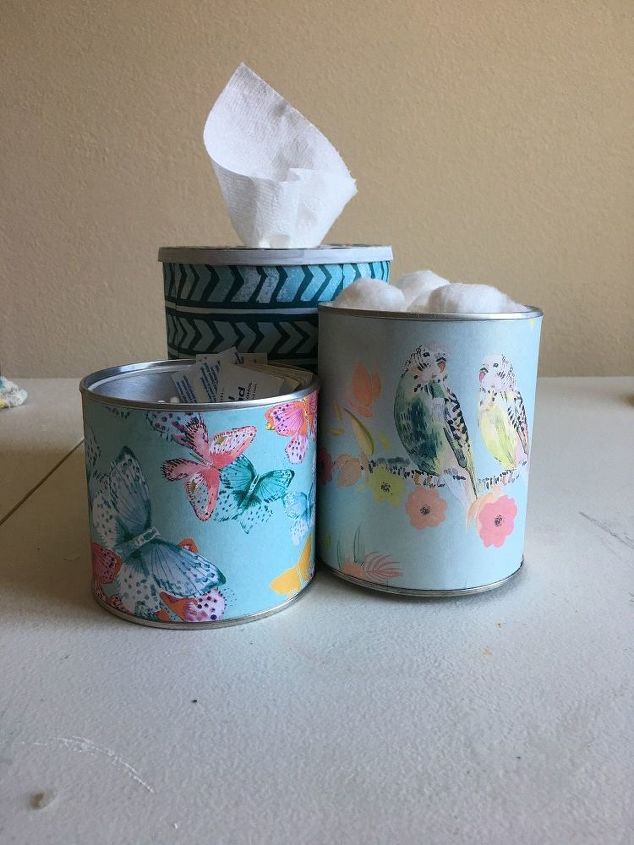
Congratulations you've not just recycled but you've up cycled formula cans into a bathroom storage caddy that is visually appealing and FUNctional. This caddy is multifunctional too! It can be used to store make up brushes and makeup or you could place it in your craft room for your crafting supplies. The possibilities are endless!!!
Comments
Join the conversation
2 of 26 comments
-
Thank you!
-
I already did,but didnt use no glue or paper!


Frequently asked questions
Have a question about this project?
Beautiful ‼️But, how did you get to Kleenex in the round can?