


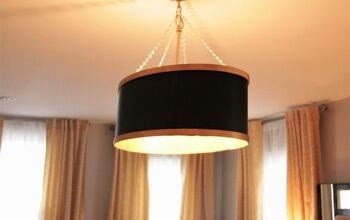
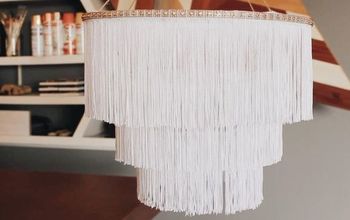
DIY Lighted Chandelier

12 Materials
$60
3 Days
Medium
This DIY uses products from the Dollar Tree as well as well as crystal garlands from Amazon and EFavorMart to create a Chandelier, the likes of which, no one has seen before! Enjoy!
Getting Ready
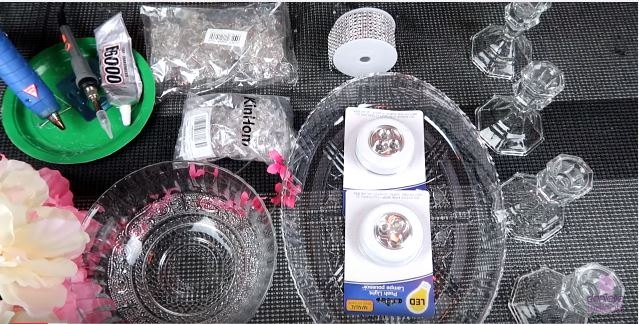
Supplies: The first thing we have to do is gather our supplies. 95 percent of the supplies came from the Dollar Tree. The crystal garlands came from Amazon and EFavorMart. I will place a more detailed list below.
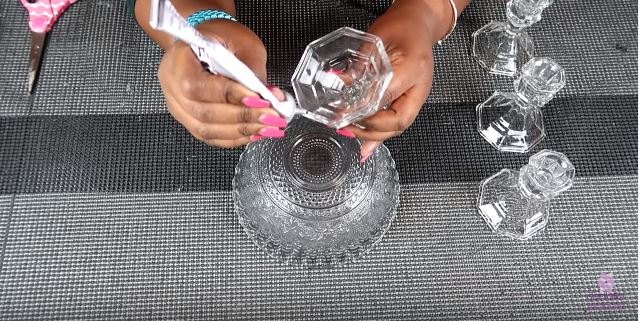
Step 1: Once we have gathered all of our supplies, it is time to make the base and stem. The base is created by gluing candlesticks together in succession: The first candle stick is glued to the bottom of the bowl, and set to cure for 12 to 24 hours.
Creating the base.
Step 1: Once we have gathered all of our supplies, it is time to make the base and stem. The base is created by gluing candlesticks together in succession: The first candle stick is glued to the bottom of the bowl, and set to cure for 12 to 24 hours.
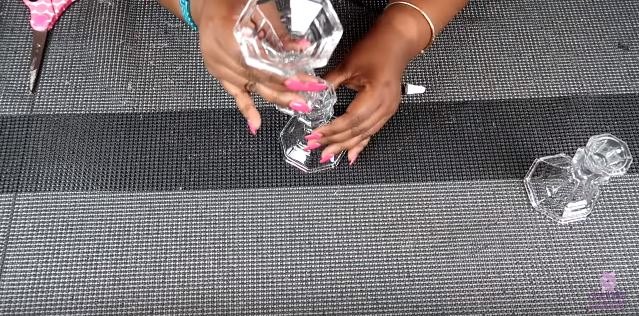
Step 2: Next we will glue two candlesticks together, one upside down on top of the hour. We will also allow this to cure for 12 to 24 hours.
Creating one portion of the stem.
Step 2: Next we will glue two candlesticks together, one upside down on top of the hour. We will also allow this to cure for 12 to 24 hours.
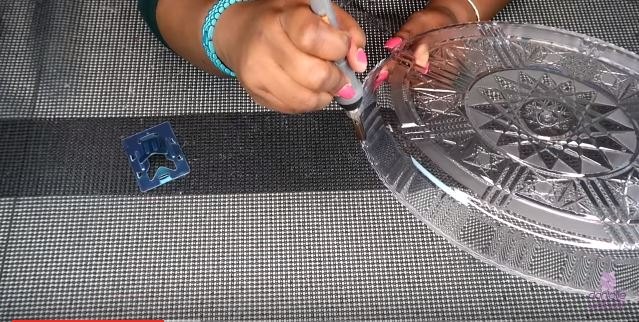
Creating the holes.
Step 3: Next we are going to use the pointed attachment of a soldering iron to bore holes into the plastic tray following the decorative pattern that is already there.
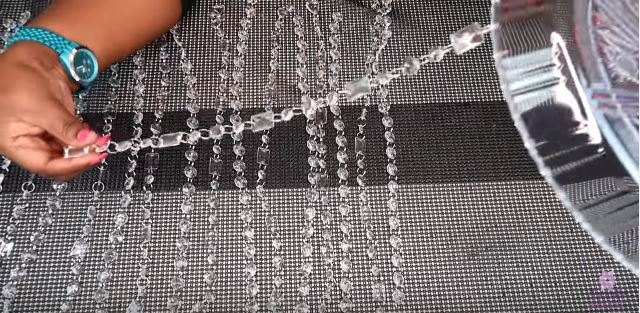
Attach Orings the
Step 4: Once all the holes have been prepared, it is time to place the O-rings of the crystal garlands through the holes. For the height of the base we created, we will need 21 crystals per strand - including the o-rings.
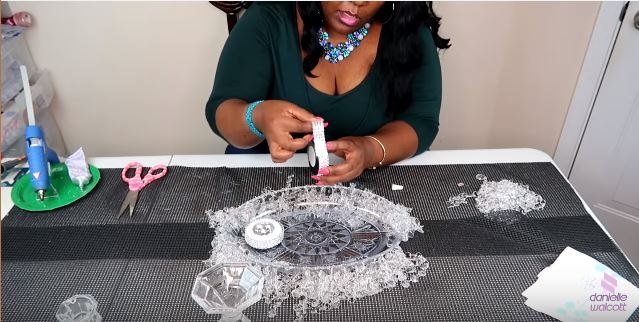
Affixing the lights.
Step 5: Now that we have hung all of our garlands, it is time to affix the lights. I am using push lights that have an adhesive backing on them. First I wrap each light in diamond wrap, and then I glue both lights down on opposing ends using a mixture of e6000 glue and hot glue.

Building up the base.
Step 6: Now that we have allowed our base and stem to cure, it is time to build. First, we are going to place the final candle holder on top of the candle holder that affixed to the bowl, and set that to cure for about 12 to 24 hours.
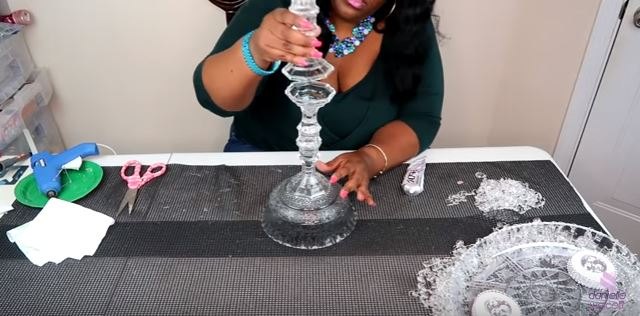
Base and stem completion.
Step 7: Finally, we can now add the final piece to the stem. Once glued, this too must sit for 12 to 24 hours to cure.
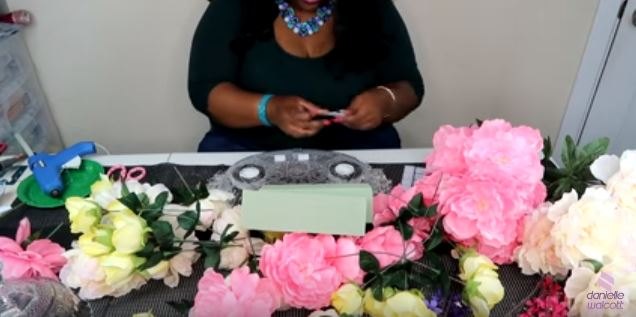
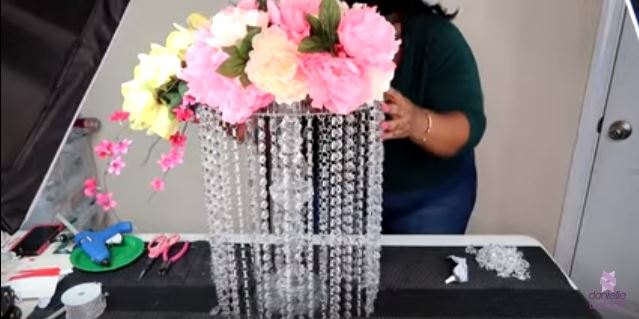
Optional: Decorating the top with flowers.
Step 8: In this optional step, we are affixing floral sponge to the top of the chandelier with Velcro and then creating a floral arrangement.
Mount the lamp shade.
Step 9: It is now time to mount the top of our chandelier to the base and stem. We do this by placing glue on the top of the candle holder and centering the platter on top if it. We will then set this aside for 12 to 24 hours to dry completely. We are finished!
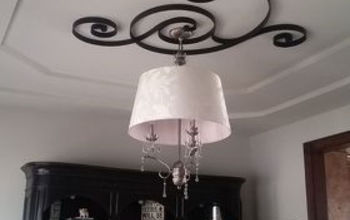
A sneak peak of the final project!
Step 10: Here is a sneak peak of the final project as created!
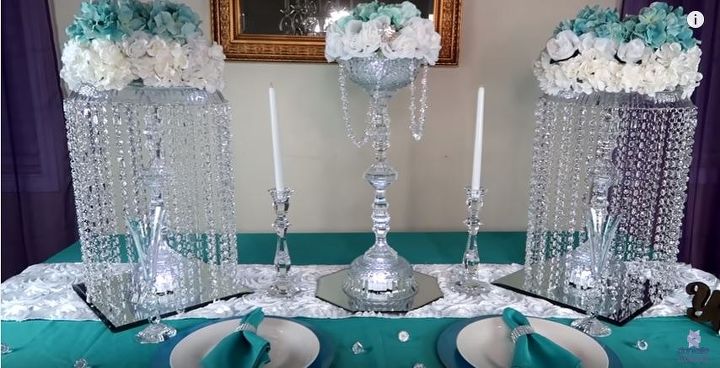
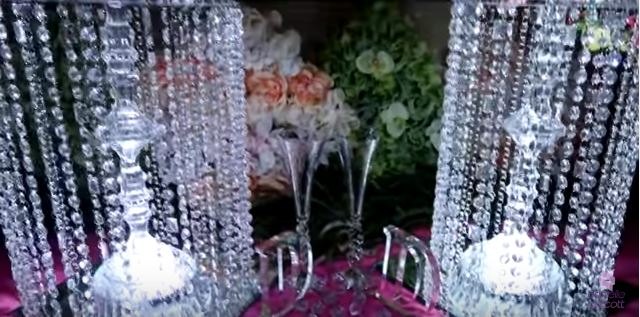
All dressed up for an event!
Step 11: Here is a final look of the chandeliers ready to be debuted at an event with a complimentary piece.
{
"id": "4012580",
"alt": "",
"title": "",
"video_link": "https://www.youtube.com/embed/OA4CMmFRj5o",
"youtube_video_id": "OA4CMmFRj5o"
}
{
"width": 634,
"height": 357,
"showRelated": true
}
Comments
Join the conversation
3 of 116 comments
-
Absolutely beautiful! I will try it, I’m not that creative, but love it & your instructions are easy to follow, so wish me luck!

-
I would definitely use it as a centerpiece on my dining room table. It’s classy.


Frequently asked questions
Have a question about this project?
Do you have instructions for the companion piece? I prefer it.
Not really a question but I clicked to follow you hoping to see what other really cool stuff you had... and I noticed this was your first Tutorial posted to home talk? I just wanted to tell you that it's amazing and you did a fantastic job and your tutorial is extremely well written, the pics are great and it's easy to follow. I just wanted to say thanks for sharing your talents and creative inspiration with the rest of us! I can't wait to see what else you have!!!! Thank you and seriously you did a fantastic job!!! Pat yourself on the back girl! You rock!!!
simply gorgeous! One question: what’s the total,length of the crystals needed,and cost of crystals
How do you get the round effect please send me information