


Removing a Builder's Wall Mounted Mirror

by
Amy Nahirny
8 Materials
$100
4 Days
Medium
When my sisters and I moved into our new home I was thrilled to have my own spa-like bathroom retreat. But the only thing I had a problem with was the HUGE builder’s wall mirror. It didn't reflect (ha ha) the artistic flair I wanted in the room. So I decided after a long time, like years, that I wanted to take the mirror down. I searched webpages for the best way to take it down but everything seemed so dangerous and beyond my skill set.
Thankfully I have a close family friend who used to be a home builder and I asked his advise. And I was right in my assumption that this task could be very dangerous. He said if I wanted to hire a professional handyman to do the job it would cost me around $1000. Since I don't have that kind of money laying around, he said he would help me do it in the safest way.
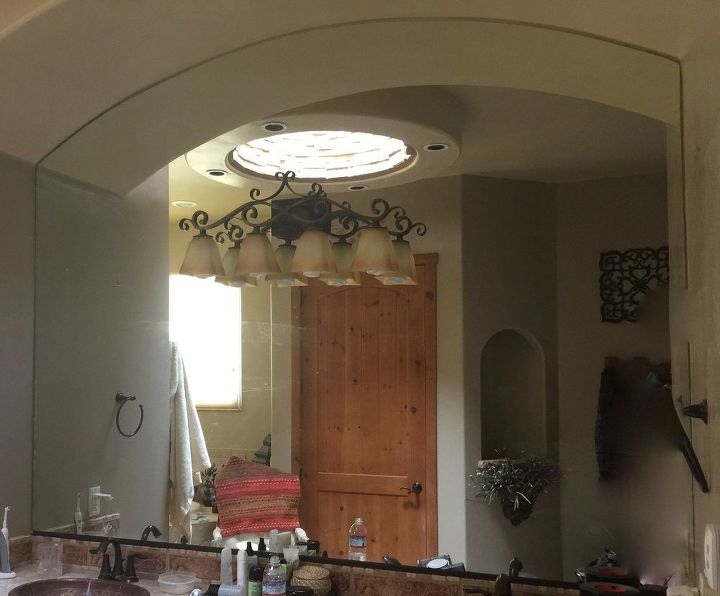
First of all, we had to take down the light that was attached to the wall through the mirror. Secondly we had to lay heavy fabric drop cloths along the top of the counter to protect it when we stood on it.
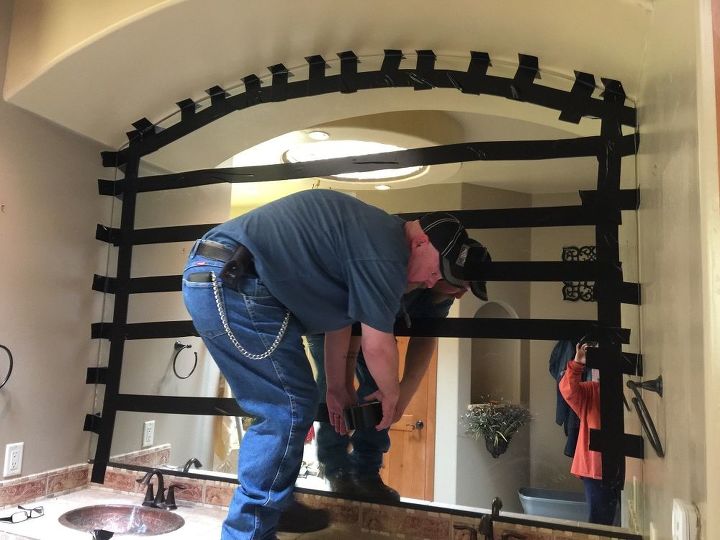
We got heavy duty electrical tape, we used a product called Gorilla Tape because it was extremely secure. Then my friend, Joel, taped the mirror in a small grid pattern attaching the tape to the wall (please note we taped the edges of the mirror to the wall so if the glue gave way while were were breaking the glass, the mirror wouldn't fall on us.)
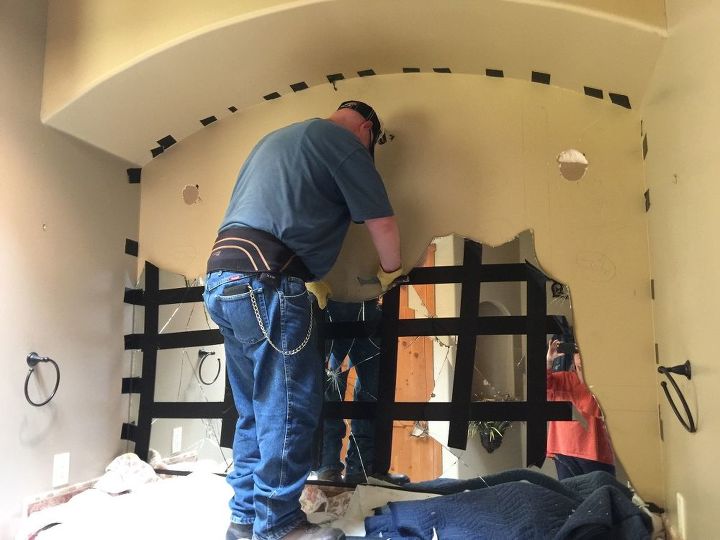
Once it was taped, we got our eye protection, and heavy work gloves to begin the breaking. We used a rubber mat, like the one to open jars or something similar, and placed it against the glass and hit the mat with a heavy hammer to fracture the glass. The mat helps prevent the glass from flying into your face.

You want to start at the top and work your way downward. This also helps prevents the mirror from falling off on top of you. I decided to keep the broken glass for another project I had in mind so we kept the pieces relatively small and placed them into a large Tupperware trunk. The process took about 2 hours to get completely down. You need to go slow and methodical.
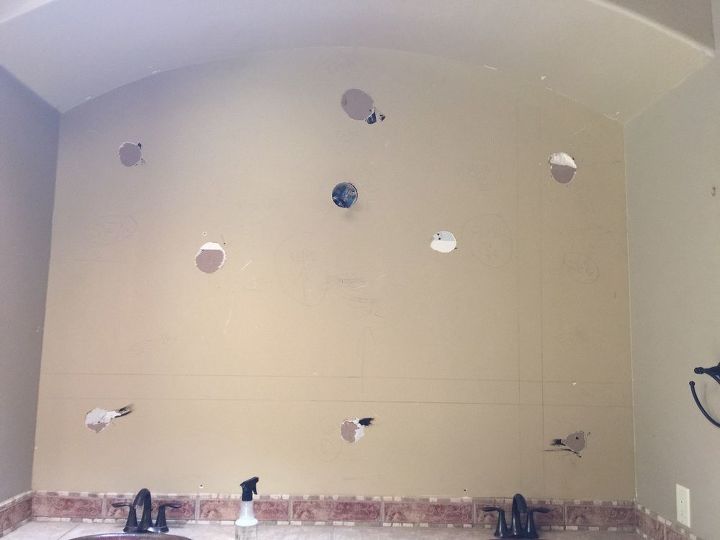
Personally I think It looks a whole lot better. Once the mirror is down, and you do a good, thorough clean up, you need to patch the walls where the builder glued the mirror up. Patching can take a couple of days to get right, since you have to fill the holes, patch, let dry and sand.
Once the wall is finished being prepped you are free to let your creativity go wild. I decided to do a metallic paint to enhance the colors of the beige and rusty tile. I’ve looked through a lot of home decor sites and they showed that metallics are right in trend this year, so I thought what the heck, lets try it.. I’ve never used metallic paint before but i got great advice from the paint desk at Lowes. I like using Valspar paint, its good quality and usually covers in one coat. With metallic paint you need a base coat as well as the metallic top coat. I used a paint color called Molten Penny.
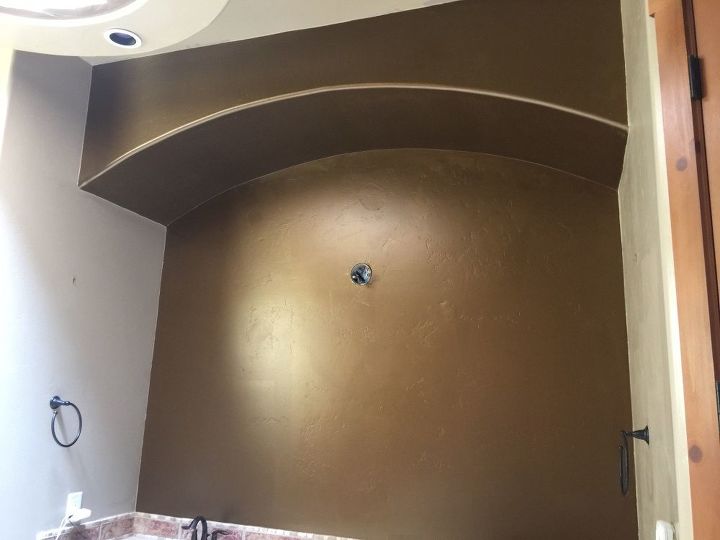
I’m not sure the metallic paint photographs really well but this was the end result. This is also why patching the wall is so important. My walls have a textured quality about them so the imperfections worked well for the end result.
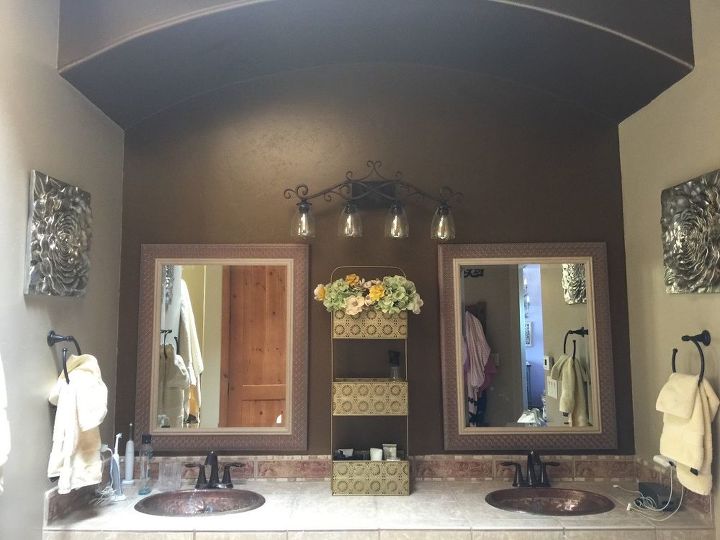
Next is the exciting part. THE DECORATING! I got two really cool art deco mirrors which were on sale at Home Goods, a great place to find affordable decor. My sisters and I are addicted to shopping there.
I wasn't particularly happy with the lighting fixture but not having a lot of cash on hand I decided the most affordable thing to do was change the glass globes to a clear glass and add vintage looking LED lights. My friend, Joel put up the light and then I added my own extra little finishing touches.
Resources for this project:
See all materials


Any price and availability information displayed on [relevant Amazon Site(s), as applicable] at the time of purchase will apply to the purchase of this product.
Hometalk may collect a small share of sales from the links on this page.More info
Comments
Join the conversation
2 of 134 comments
-
It’s stunning, just the way it is! I love that it’s unique to your tastes, and not another cookie cutter remodel! Very well done!
-
Oh my. You could have taken fishing wire and slide it behind the mirror to remove it without all that trouble.


Frequently asked questions
Have a question about this project?
Do you (or anyone) know if ALL wall mirrors without visible clips are glued to the wall? Is there always drywall behind wall mirrors? I have 1980's mirrored walls and hate them lol! 😎
What about using a glass cutter to cut the glass into small sections instead of using a hammer to break the glass taking it off the wall?
What is the finish of your sinks? It resembles a hammered copper.