


Rustic Grapevine Chandelier

by
Belle Jaeger
3 Materials
$150
4 Days
Advanced
I wanted to share how I created my own rustic grapevine chandelier for my dining room after I had seen one at a home furnishings store. The one in the store was way out of my price range, so with a little elbow grease and some scratches later, I could create my own version. I bought a light fixture from a home goods store and then the rest of the supplies to make it were from a craft store. I also mounted an antique ceiling tile with a custom wood frame around it before hanging it to give it a final touch. It turned out fabulous and you wouldn't believe the compliments! It's a conversation piece as well as being the perfect statement for our dining room.
Here are the steps I took to create my own rustic chandelier. I bought a giant grapevine wreath that I unwound (took apart) and then soaked overnight in a large tub of water. I did this for it to be more pliable and I could bend and wound it better throughout the light fixture. I started at the stem of the fixture and brought the vine out by encasing the form the fixture had. It would help if you have someone help at this point because once you cut several pieces to cover the stem, you will need to wrap twine at the top and midway to hold those in place. Once you’re done covering the light fixture frame, you will just cut random pieces that you will weave in and out until you get the desired look. At that point there will not be a need for twine anymore as the vine will stay in place on its own.
I then placed all the light bulbs back on and had my handyman husband hang it. That’s it! A “wow” factor at a great discount!
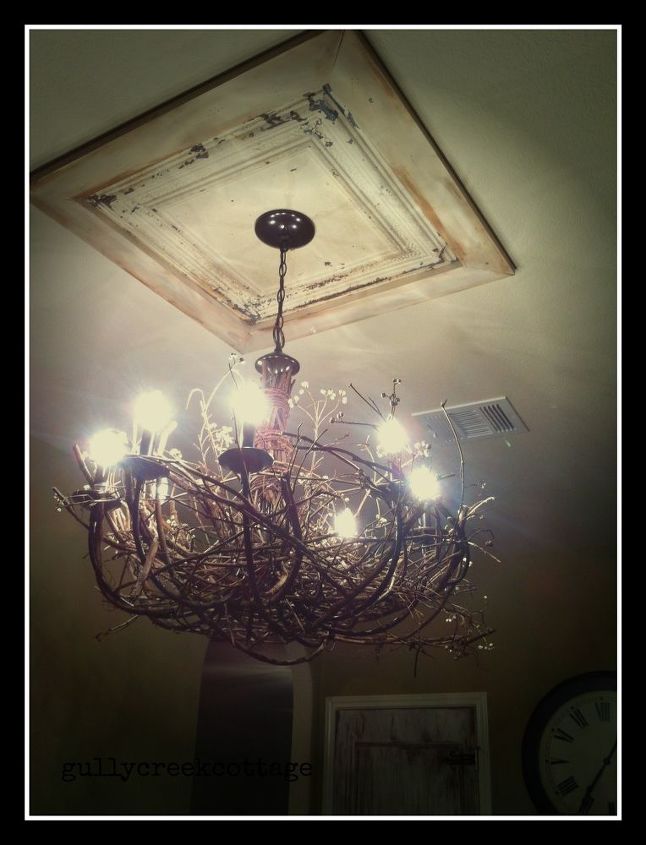
Final look of the light fixture I customized to make a rustic chandelier for our dining room! I used grapevine, twine, and lots of elbow grease!
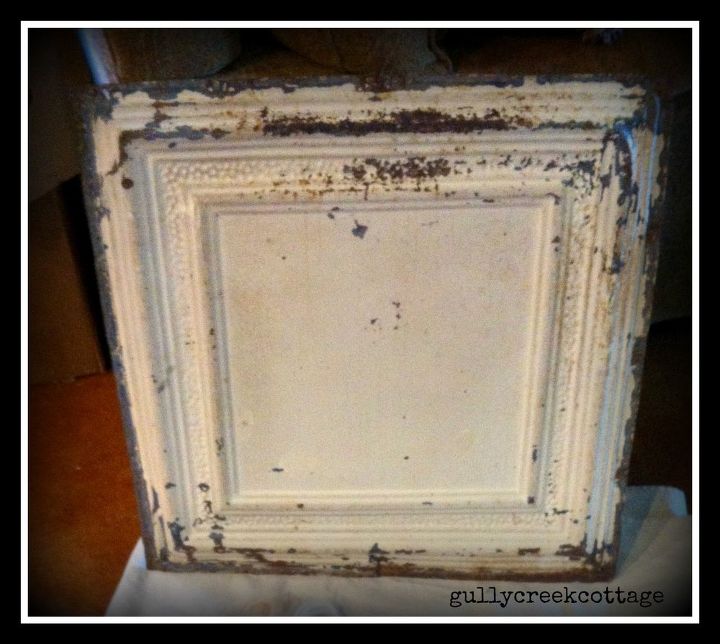
Antique ceiling tile that I mounted on ceiling prior to hanging the chandelier.
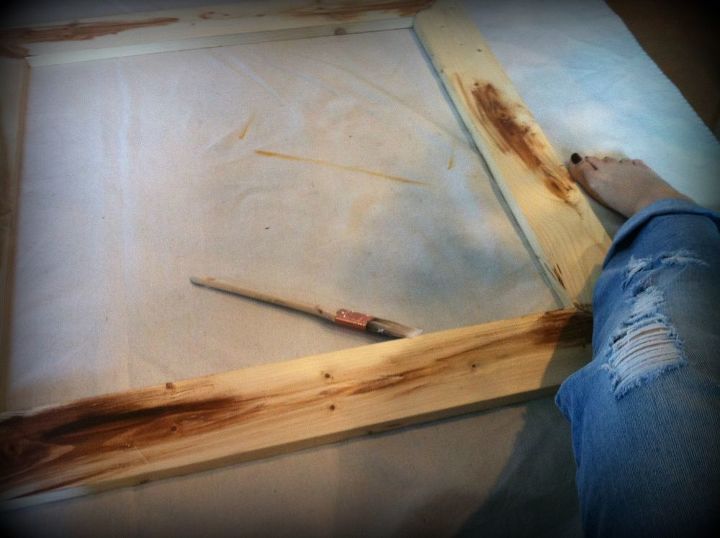
This is the wood frame I made, painted, and antiqued to frame the ceiling tile to mount on the ceiling.
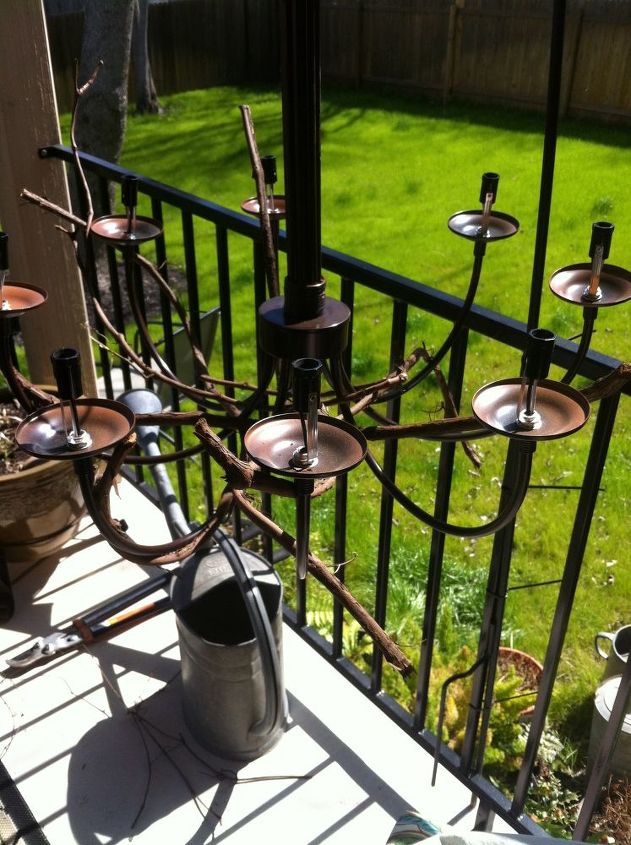
This shows how I wove the grapevine throughout the light fixture in the beginning stages.
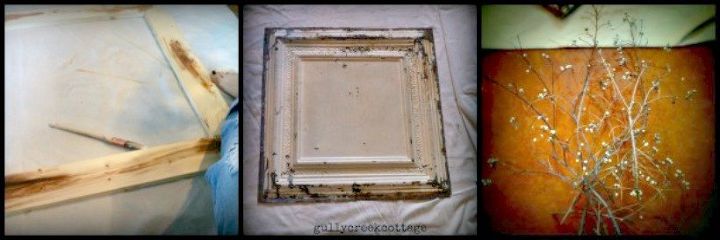
Other materials that I incorporated- along with the tallow tree berries!
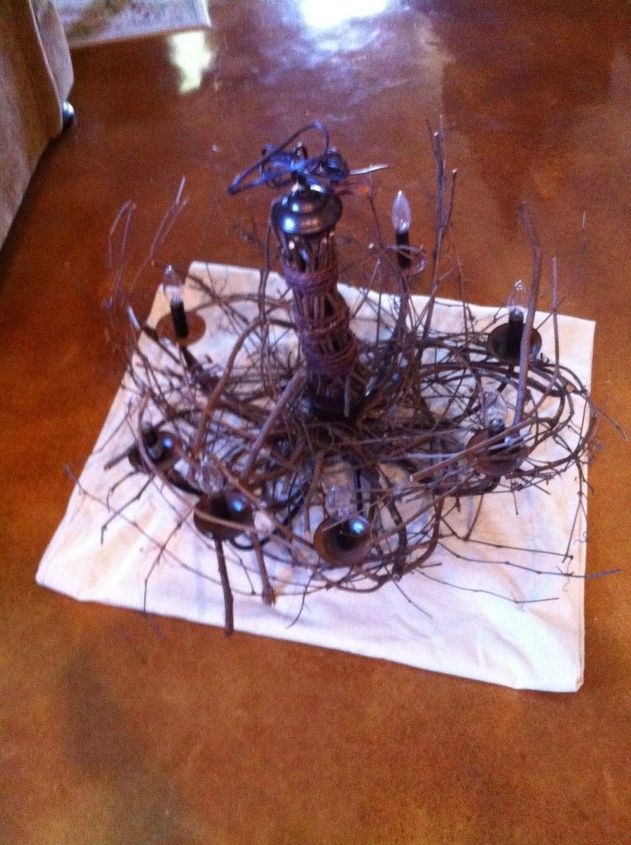
Done with the weaving!
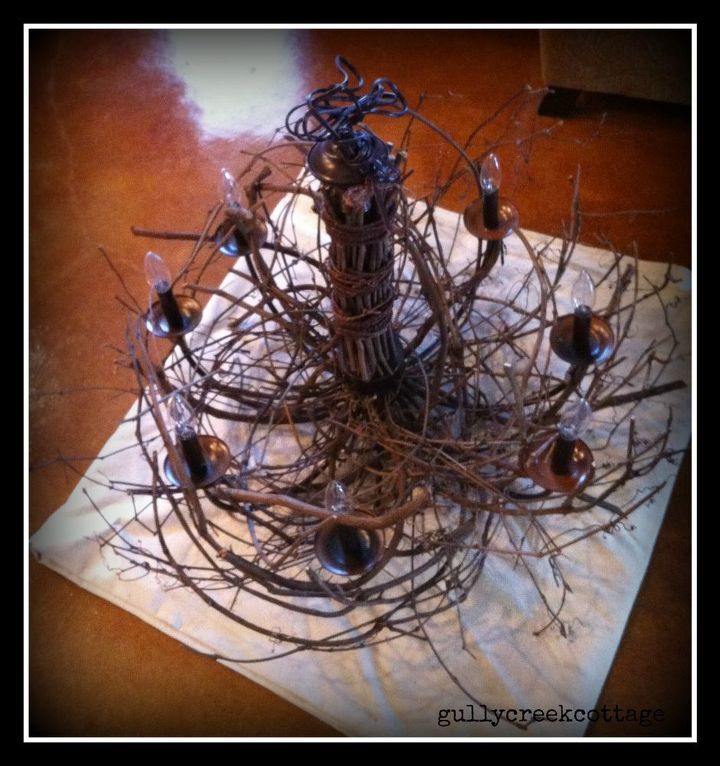
Missing a few touches before mounting!
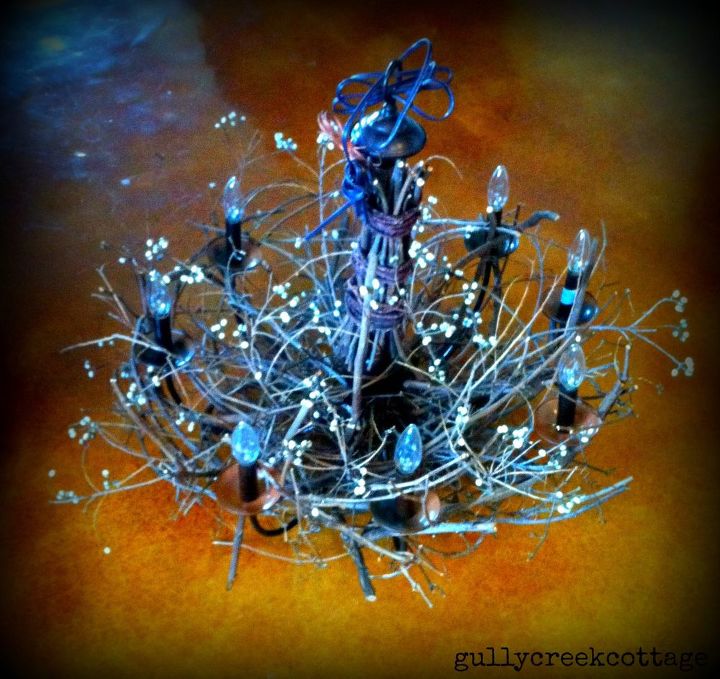
The final look! PS. - the only addition I didn't include are the white bud vines I wove sporadically in mine. I was driving along this back road one day and found this beautiful tallow tree that had it's berries. I talked my husband into asking the folks if they minded us cutting a couple of twigs off and they were so kind to oblige. (Just a fun- final touch!)
Want more details about this and other DIY projects? Check out my blog post!


Frequently asked questions
Have a question about this project?