


From Blah to Spa...Master Bath Renovation
4 Materials
$000
8 Weeks
Advanced
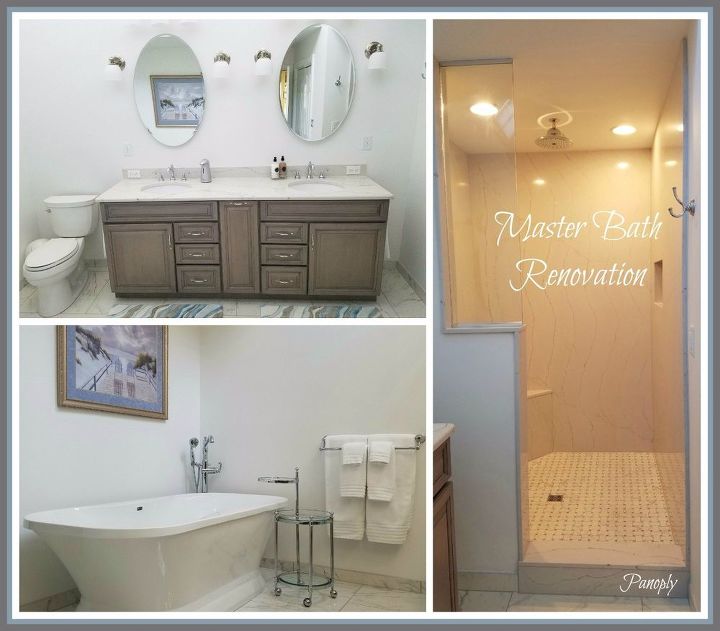
Our master bath has been transformed from its former, 1980s blah brown into a 21st century spa, and today I'm sharing that transformation with you. For complete details, see my blog post link at end of this Hometalk summary post.
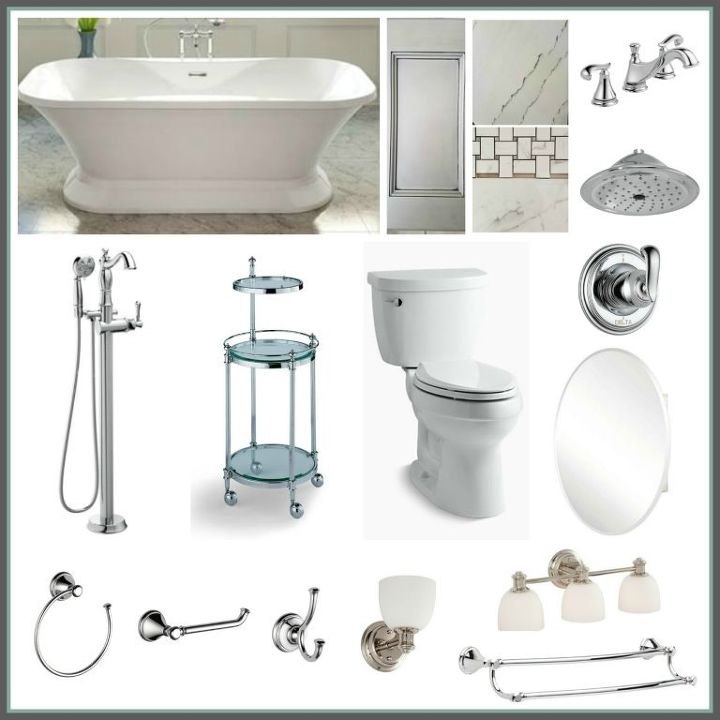
Design Board for Master Bath
While this job took a full nine weeks of workers present Monday-Friday, the actual construction was within the original estimate (6-8 weeks) the contractor provided. Project activities that consumed much of the time were the demolition, reconfiguring the electrical and plumbing lines, and framing/waterproofing the new shower. With so much marble tile and built-in framing around the previous shower and tub, it was nearly one full week to get everything out and down to the studs.
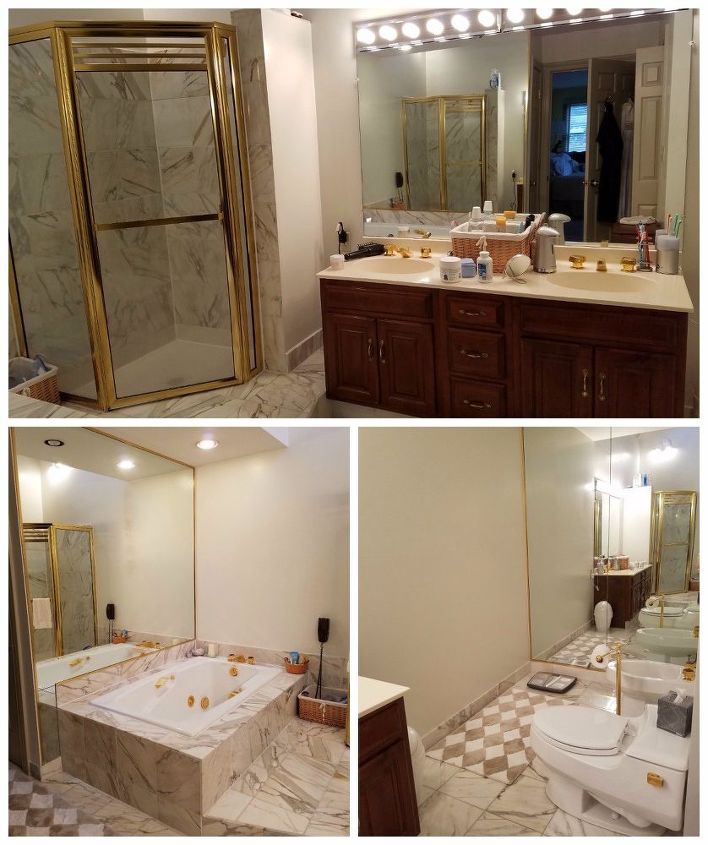
Master Bath Before Renovation
This entire project pretty much started with a vanity which was too low for my tall husband. The shower was never one I liked, as the only shelf was too high for me to reach. The Hollywood glamour lights were the tell-tale 1980s style.
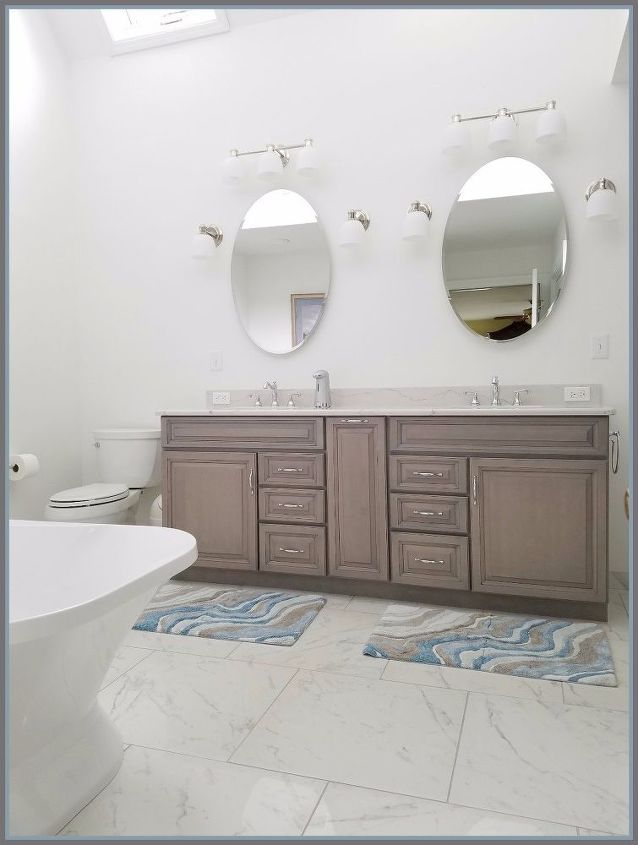
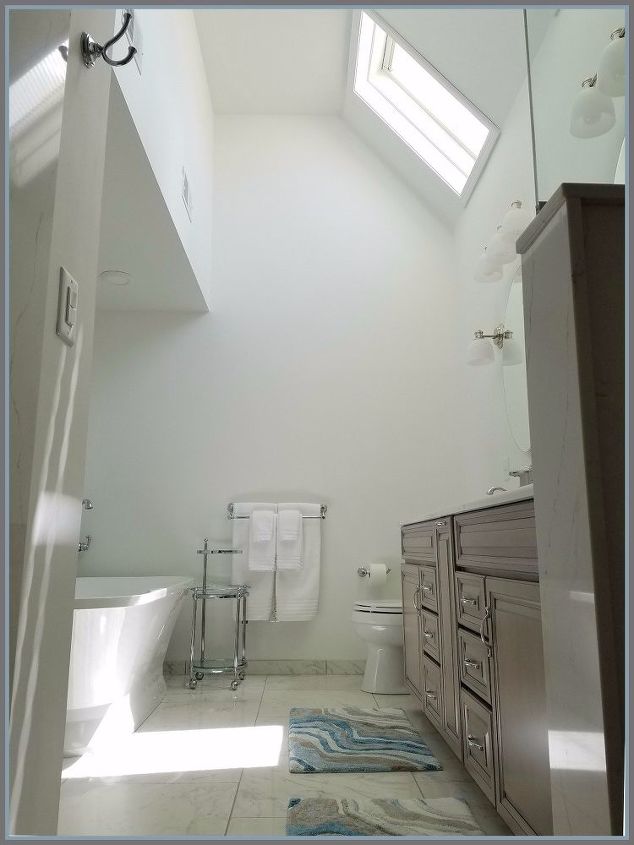
New Master Bath view upon entry
The new bath: the line of sight walking into the new bathroom is centered on the right-hand side of the vanity/mirror. The new vanity (Holiday Carlisle) is 84" vs. the previous 60". Radiant floor heating (Schluter®) was a luxury addition.

New Master Bath shower: solid quartz walls
If there is a showstopper element in this master bath, I would say the shower is it, just to the right of the new vanity. The shower is approximately 25 sq ft (except for angles where plumbing and seating are built into the design). This was custom designed, and built utilizing a trademarked waterproofing shower system (Schluter®) and custom fabricated, solid quartz walls (Cambria Ella). You should have seen the installation! It took five guys to carry in the largest wall (right side).
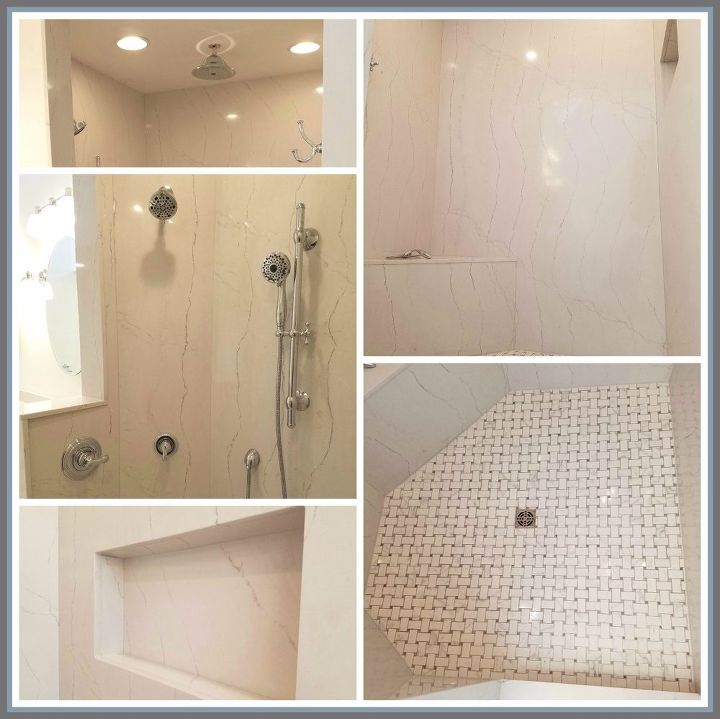
Master Bath Material Details
Above is a photo collage of some of the details we chose in our shower materials and selections. Starting clockwise, top L: Overhead showerhead (Raincan) & overhead vent fans/lights; Custom shower walls in solid quartz (Cambria Ella), with corner seat; Cancos Co Basketweave tile on shower floor; Built-In quartz niche shelf for toiletries; Shower water fixtures (Delta Cassidy).
Master Bath view from shower interior
When viewing the room's space from the shower, note the lofted wall/ceiling (original home design). The two skylights are original to the home's construction also, and there's a ceiling fan between them (we replaced the original).

Master Bath Accessories Selections
The photo collage above shows some of the details we chose in our materials and accessories selections. Starting clockwise, top L: Delta (Cassidy) tub filler; Park Harbor (Peebles) light fixtures (sconces are on his & hers separate, dimmable switches); Delta (Cassidy) faucet & towel ring, Cambria (Ella) vanity countertop & backsplash with cutouts for electrical outlets (his & hers); Frontgate (Belmont) rolling valet tucks nicely beside vanity when not in use; DecoBros mesh cabinet stacking organizer/drawer; a closer look at faucet; Rev-a-Shelf vanity grooming organizer.
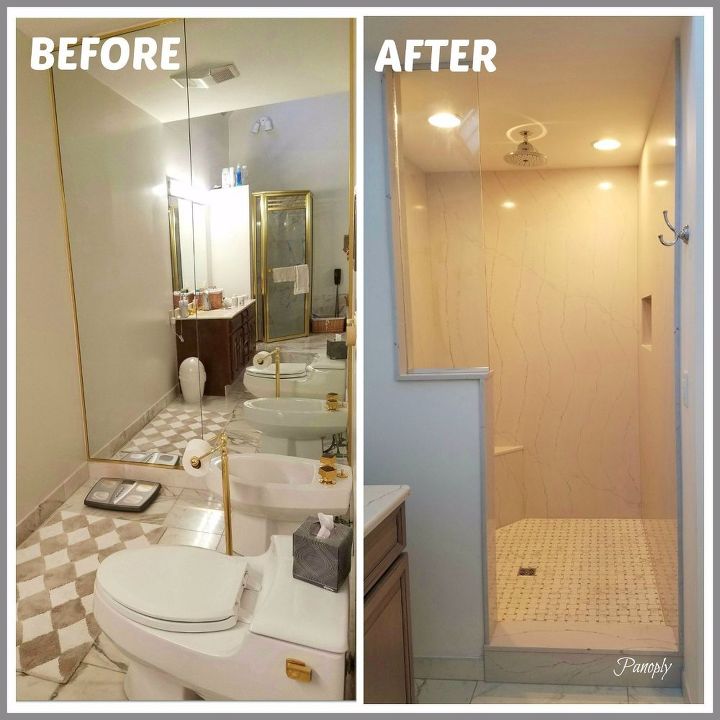
Before & After: Commode to Shower
What was previously the commode and bidet area is now the frameless, walk-in shower.
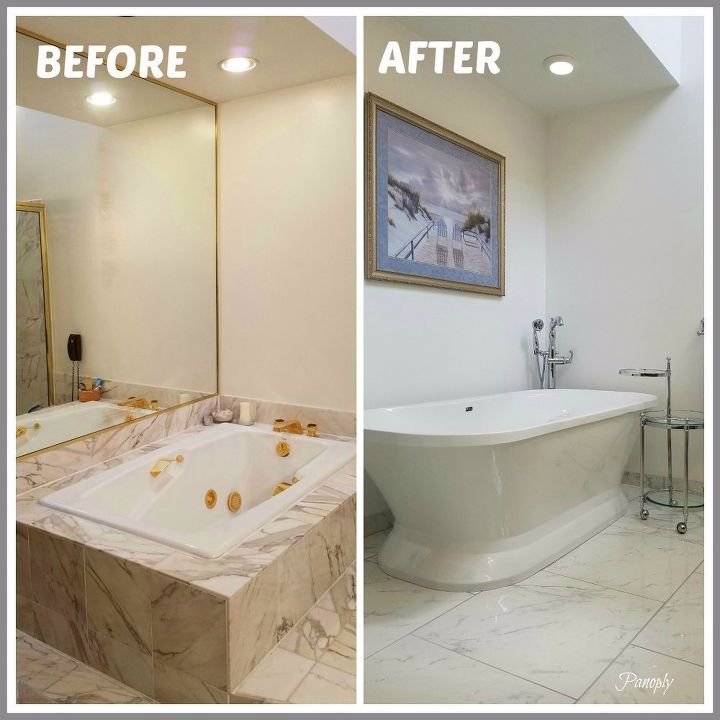
Before & After: Jacuzzi to Soaking Tub
The jacuzzi was replaced with a soaking tub.
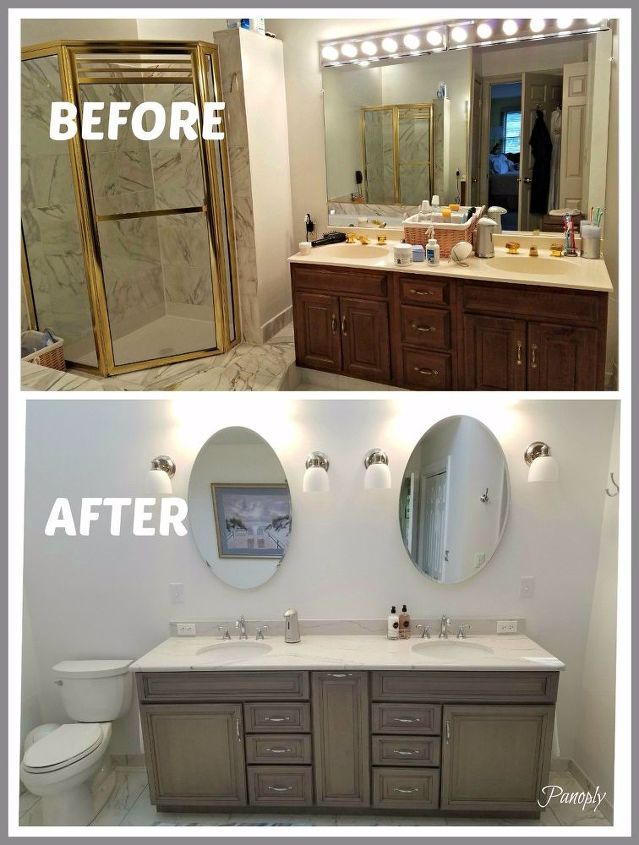
Before & After: Master Bath Vanity
Where the previous shower existed is now the commode area, and the vanity is longer and higher. His and hers mirrors are recessed, medicine cabinets. Fixtures on either side of mirrored cabinets operate separately and with dimmers for individual needs.
Master Bath Spa After Renovation
Our ultimate goals with the renovated bathroom were as follows:
- Update the overall appearance to a more current look (but still traditional), utilizing quality replacement materials
- Eliminate the vanity, bidet and jacuzzi tub
- Eliminate most, if not all, of the brass fixtures, Hollywood glamour lighting, marble tile, and wall mirrors
- Reconfigure the floor plan to take better advantage of the generous space (approx 135 sq ft, excluding closets)
- Raise the height of the vanity countertop from a too low 30" to 35"
- Improve focal lighting for close up activities (shaving, applying makeup)
- Create a walk-in shower, increasing the size to eliminate a door & accommodate a seat, multiple water sources
- Take measures for best possible waterproofing with the shower system
- Install a radiant heated floor
Mission accomplished.

Want more details about this and other DIY projects? Check out my blog post!
Comments
Join the conversation
4 comments
-
a breath of fresh air

-
This is not a DIY project. This is a job performed by an independent contractor for you. All the labor in this renovation was done by someone you paid. You may have selected the sinks, tub, tile, marble, lighting, etc. This is very nice, but it does not fall under the stated 8 hour project. Very deceiving to someone checking this post.


Frequently asked questions
Have a question about this project?