


Outdoor Business Sign . . . on a Budget!
7 Materials
$75
4 Hours
Medium
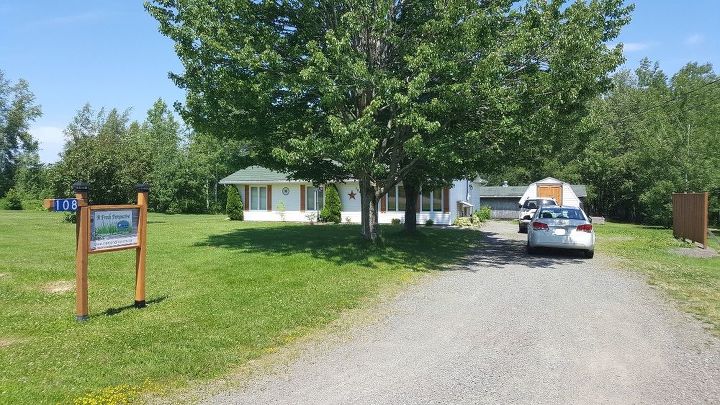
When your Interior Decorating business slogan is "Reflecting beauty within YOUR budget" and you run a DIY blog about how to do things as inexpensively as possible, your business sign out on your lawn should reflect those principles, right? I am right proud of how my sign turned out!

It all started last summer. I ordered my business logo on banners from VistaPrint. The banners are 20" x 36". The regular price is $26.00 for the banner itself then $10 extra for the outdoor material and another extra $10 for metal grommets. I bought during a big sale so I only paid $27.97 plus tax and shipping for TWO! (A little disclaimer here. I live in Canada so the prices I quote in this particular blog post are Canadian prices and the sites I purchased the items from are also Canadian.)
I really don't remember why I paid extra to have the grommets put in the banners. I did have a detailed diagram prepared for the exact cuts, etc, to build the sign but lost it over the winter so I had to start from scratch on my design again. This time around, I designed the sign where I was not going to use the grommets at all. So, I carefully measured the banners 2" in on each side just past the grommets and cut that portion off, bringing the length (or width, depending on how you look at it, LOL) down to 32".
Also last year, I had bought the rest of the materials needed to build the sign 'frame'. I only had to buy one post & metal spike because there was already one in the ground at the end of our driveway that the civic number was attached to. The year got away on me and the sign never got built and over the following months, the framing lumber I had bought got used in other projects so back to the hardware store I went to buy more framing lumber! LOL. I went to my local Home Depot to find the cheapest small lumber I could find and ended up buying 4 or 5 of the 1"x2"x8' framing lumber that was $1.04 each . . . but they were the only ones left and all warped so the guy sold them to me for half price!
I measured all the boards where I needed them to be cut, being careful on the warped boards to get the parts of the boards that were not as warped. LOL. My husband made all the cuts for me after he got home from work one day, on the table saw. He also cut a 20" x 32" piece of OSB board from some scrap we had.
After sanding to eliminate getting splinters, I used No More Nails glue and glued a banner onto each side of the OSB board. Then, I sanded each of the other boards and wiped the dust off before staining them. I used the leftover stain from when I built my shutters and my baby barn doors.
My dad came and painstakingly installed the second post for me. I say painstakingly because it was a super hot day AND the post was also slightly warped at the top . . . making it difficult to get levelled and spaced right.
I predrilled small holes in all the framing pieces and when my husband got home from work, he wrestled the warped boards into a straight line while I screwed them in. Here is a diagram showing how we assembled the frame to hold the banners. The caramel coloured "boards" represent the 1x4's and the black ones represent the 1x2's. The view in this diagram is looking down onto each piece.
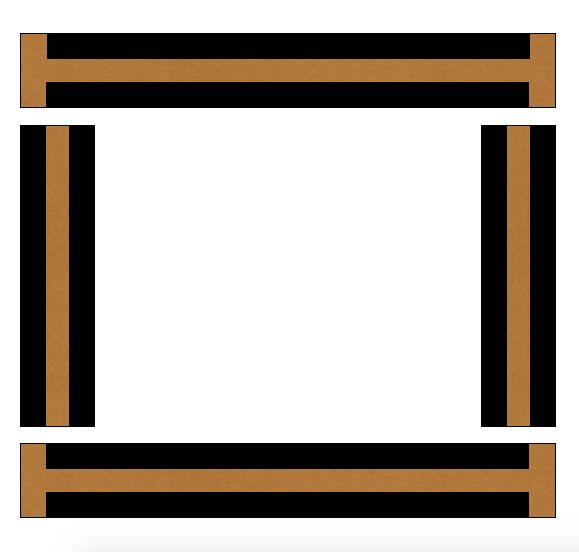
We screwed the bottom piece onto the side pieces and then screwed the side pieces onto the posts. We were then able to simply slide the sign down the slots. Once in place, we simply had to screw the top piece on, silicone all around the edges framing the sign and we were done!

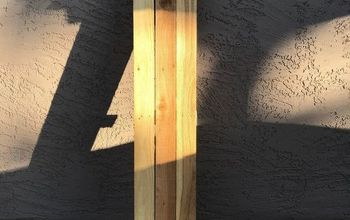
Although I did use a deck cleaner and scrubbed the old existing post a day or two before staining it, I didn't have the arm power to really get the old dead wood surface off so it ended up staining a little differently than the new post. Just sayin'
Overall, having already had some boards and one post on hand, it only cost me around $73 including the solar post caps and banners!
Before summer is out, I do plan to add a little landscaping under the sign. I will keep it simple and likely just do one nice big green hosta plant and either rocks or mulch around that. Then, I will add nice but inexpensive new civic number holder to replace the ugly blue one. I may even add a hanging plant under the civic number. Once that is done, I will update this post with the finished picture!

Want more details about this and other DIY projects? Check out my blog post!
Comments
Join the conversation
2 comments
-
great job! very professional and well explained


Frequently asked questions
Have a question about this project?