285 Views
How to Avoid Common DIY Tile Installation Blunders

by
Roberta Madison
(IC: blogger)
Unlike putting up new wallpaper or mountinga bookshelf, one cannot simply install floor tiles. More than plopping glazedceramic squares down on the floor, the process can be quite complicated.
Professionals who have had years oftraining and practice still make mistakes. Yet, the DIY homeowner, driven perhapsby challenge, creativity, costs, or a combination of all three, is still boldenough to take on the project.
Put down that trowel and spare yourself theheartbreak, frustration, and expensive repairs. Read through our list of commonDIY tile installation mistakes and avoid them.
1. Not knowing their limits.
Let’s be honest. DIYerscan be cocky at times. Self-confidence can be a good thing but it can lead tocostly mistakes if unchecked. Before even thinking of tackling a tileinstallation project, ponder on Socrates’ wise words and know thyself.
Yes, we’re not buildingthe Parthenon but a little introspection helps. “Do you have enough skills?”,“Doyou have the patience?”,“Do you have the time?” If you’ve answered “yes” to allquestions, it still doesn’t hurt to read up and study the intricacies of a tileinstallation job.
You will find that tidyingup the home with floor tiles is easy but the shower area is another matterentirely. This is one spot that theexpertise of a trained professional is required. Otherwise, get ready for waterleaching and other problems.
2. Not considering the quality of the subfloor.
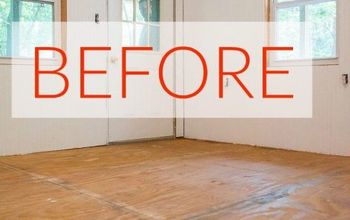
Good quality tileinstallation begins with a great foundation. However, DIY jobs fail to look atthe condition of the subfloors before commencing with the project. A common misconception is that all surfacesare suitable for tiles but it isn’t. Some surfaces will be rough and uneven andthen there are areas that may be too shaky to work on.
If the surface moves andshifts with weight, the final tile installation will be unstable and crackswill inevitably appear. Fixing it withextra grout or caulk will not work. The only solution would be to tear out thetiles and do the project all over again.
3. Underestimating the numberof materials needed.
Working with tilescan be tricky. Cutting the tiles and working around corners or irregular shapesmay be a difficult process for non-professionals. When purchasing materials;keep in mind that mistakes can happen. Save yourself the trip and buy about 10- 12 % more of the materials needed for the project.
4. Improper layout.
Uneven sizes and spacingare trademarks of an amateur. The asymmetrical layout is not only sloppy butcan also be straining to the eyes. Avoid errors by dedicating the extra time tomeasure, sketch, layout, and re-think the plans if needed. After, test the arrangement and layout thetiles according to the draft. To help you along, create a grid and use a longmeasuring rod to guide you into laying out the tiles in a straight line.Toavoid the awkward and irregular cuts, start in the centre of the room and worktowards the corners and edges.
5. Incorrect use of grout and adhesives.
Applying adhesiveor grout may appear to be the least complicated part of the entire project.However, spreading the adhesive too thin or mixing the grout with too much ortoo little water can have implications on your final work.
Inconsistentapplication of adhesives leads to uneven surfaces and will cause the tiles andgrout to break overtime. Similarly, grout that is too thick or too thin willlead to bumpy spots. Quick fixes won’t be sufficient to remedy this blunder andagain, you will have to rip out the tiles and start over again if this happens.
As you can see, installing floor or walltiles is not as easy simple as it looks. Not that we are discouraging you, onthe contrary, we are here to point out common blunders so you’ll not fall intothe trap and be caught in an even more expensive cycle of repairs.
A successful DIY project is satisfyingindeed even more so if it’s a complex project such as a floor or wall tileinstallation. If done right, then congratulate yourself and prepare to facemore intricate home projects.
Enjoyed the project?

Want more details about this and other DIY projects? Check out my blog post!
Published February 7th, 2014 5:20 PM
Comments
Join the conversation
1 comment
-
We have put down floor tiles and that is quite a job. We did a kitchen and had to think out a pattern for walking "around this" for the first day's work (we knew we would not finish in one day). Then the next week end, we put down the second group...third weekend finished it up. It nearly killed us. Will NEVER tile again. IT IS WORTH IT TO PAY A PROFESSIONAL TO GET IN THERE AND GET IT DONE IN ONE DAY! (Yes, all caps because I am SCREAMING this at folks! HA)
 Jeanette S
on Feb 08, 2014
-









Frequently asked questions
Have a question about this project?