


A Clock That Tells It As It Is!

by
Hillela G.
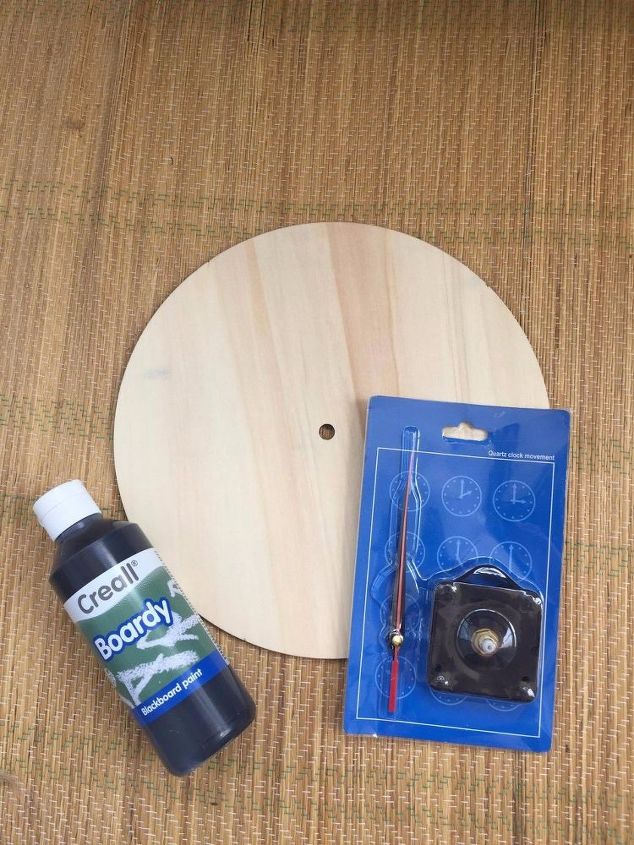
7 Materials
$20
2 Hours
Easy
I need to begin by giving a big THANK YOU to the Hometalk Community! I was a bit nervous about starting this project, I wasn't so comfortable with some of the materials, a bit of a newbie. I asked you guys for help on the DIY forum and got such great advice, it gave me the confidence to give it a go, so thank you!! 
I'll admit it....my husband and I have had some weird luck with clocks lately. The last 2 clocks we bought slowed and then stopped entirely after only a few weeks. And then, the same thing happened with out watches! So we decided it was time to take matters into our own "hands" (pun intended  ) And so... with some Harry Potter inspiration, I decided to make a personalized clock for our guest room.
) And so... with some Harry Potter inspiration, I decided to make a personalized clock for our guest room.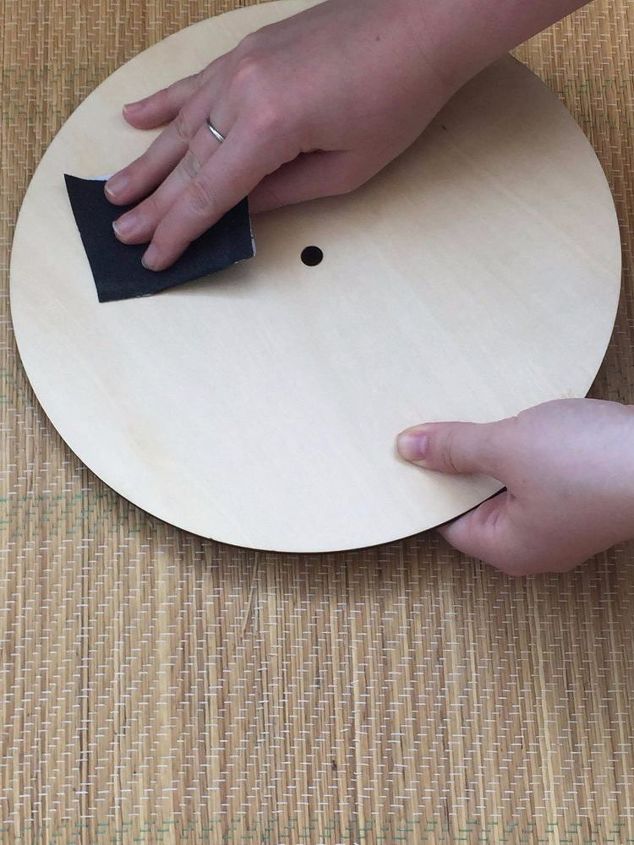
First, using a small piece of sandpaper, I sanded down the wood so that the paint would adhere better.
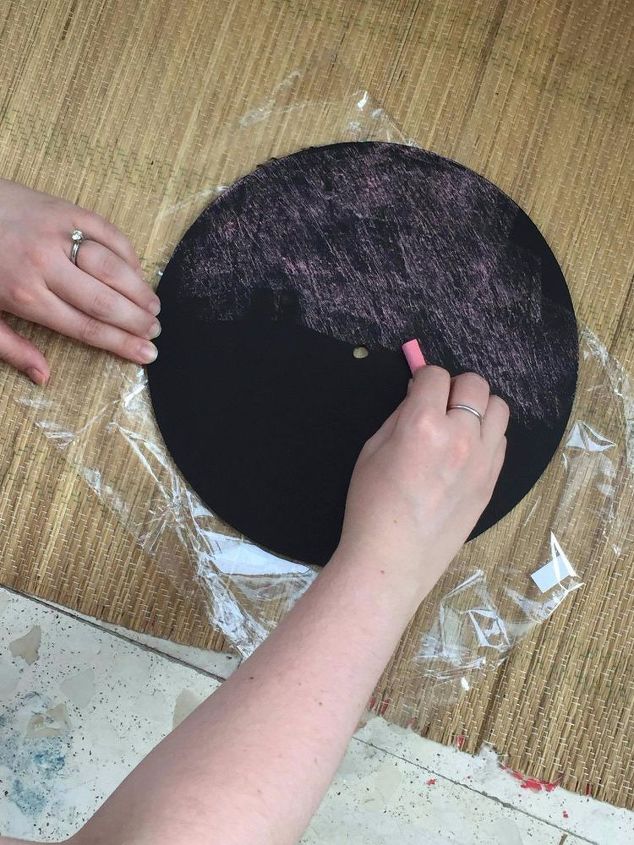
After 3 coats of chalkboard paint ( I think 2 would have been enough, but I wanted to be extra sure and it was a hot day, so the paint dried really fast), I cured the chalkboard by covering the whole clock face with chalk (*this is a really important, often overlooked step- if you skip this, then most likely, you won't be able to cleanly erase chalk marks later on).
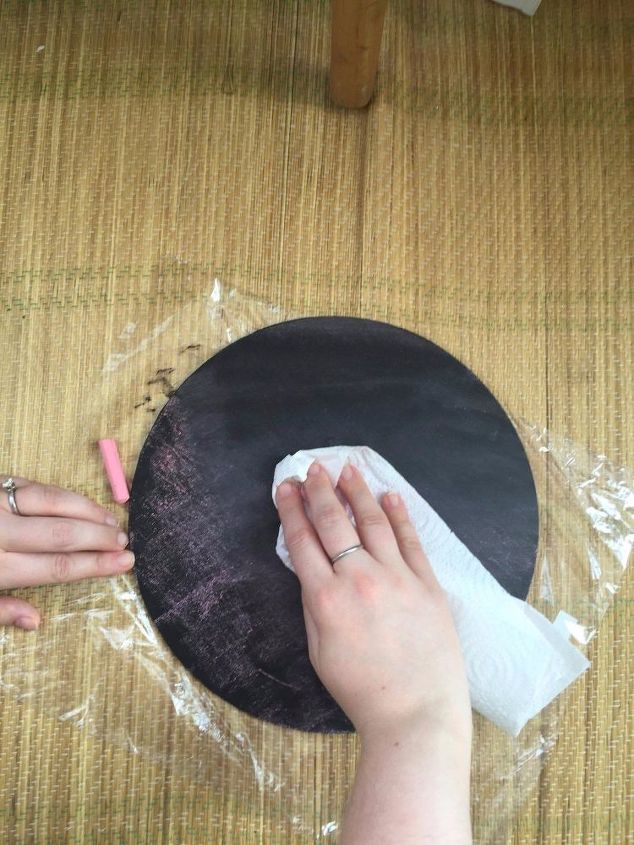
Then, using a paper towel or washcloth, gently wipe away the chalk. If you want a more rustic look, use a dry paper towel, it will leave a bit of chalk residue in the background. I got the paper towel ever so slightly damp (just barely) so that I could achieve a clearer look.
Next, I followed the directions on the clock mechanism kit and attached it to the clock face ( this was relatively easy and straightforward, took about 5 minutes).
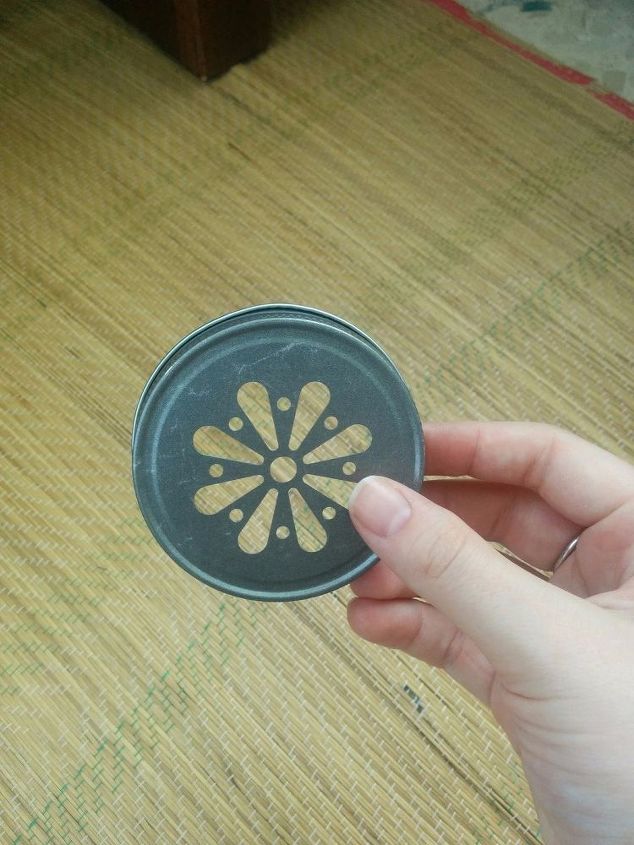
And, for the hook to attach it to the wall, I used a mason jar lid.
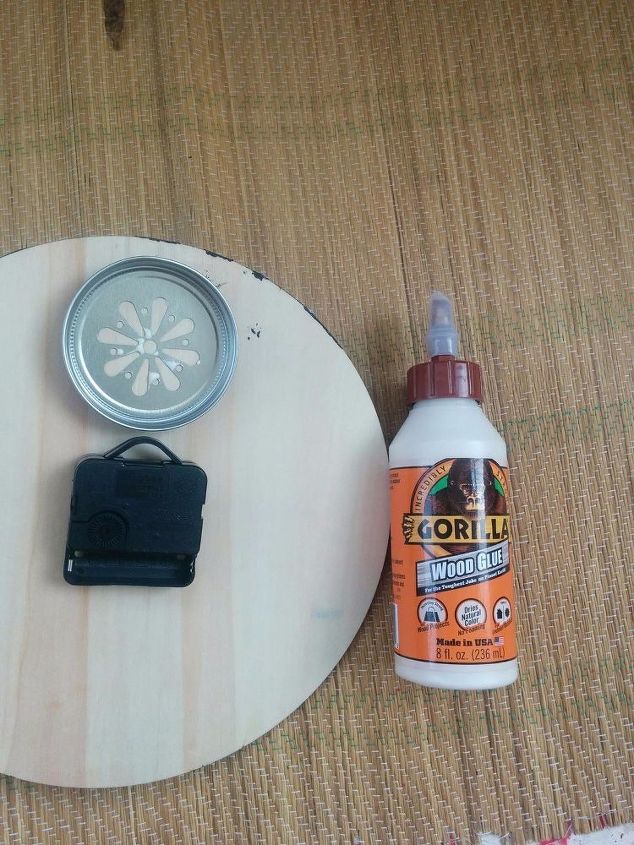
Being careful to center it over the clock back, I attached it with gorilla wood glue ( I love that stuff!!)
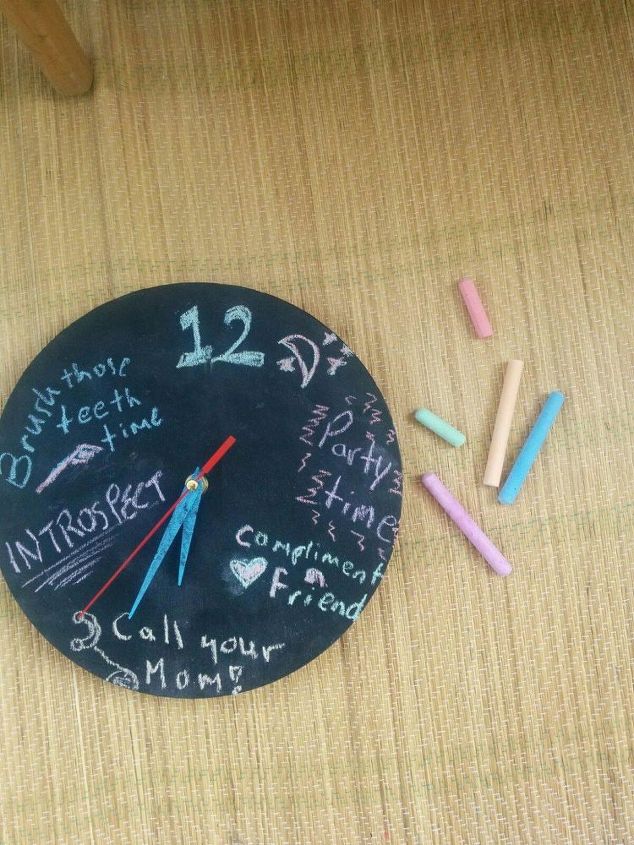
Next came the fun part....Decorating the clock face!! You can do whatever you'd like here. You can go classic and write out the numbers (roman numerals would be fun too). Or, you can play a trick on your guests and go ahead and write the wrong numbers in the wrong spaces. I decided to have fun with it.
You can change it by the season, or family celebration. Whenever you get sick of it...voila, new clock!!
Comments
Join the conversation
3 of 30 comments
-
Great job! What a fun clock this would be - especially for kids learning time and how that relates to life.
-
Love your chalkboard clock. That's such a neat idea


Frequently asked questions
Have a question about this project?
Which of the materials gave you the most anxiety? I have found wonderful stick on numbers in many designs at Wish.com. But I've been so afraid I would mess up the clock mechanism that I haven't even bought one yet. (We, too, had several battery-operated clocks of different ages that stopped working in just a short time.) Best wishes 😇