


Personalized DIY Glass Milk Bottles
5 Materials
$20
3 Hours
Easy
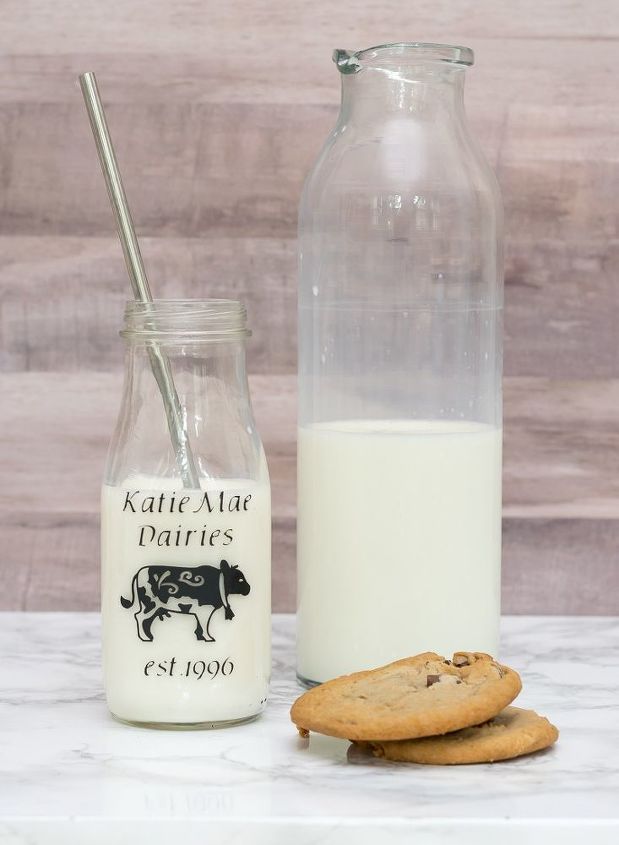
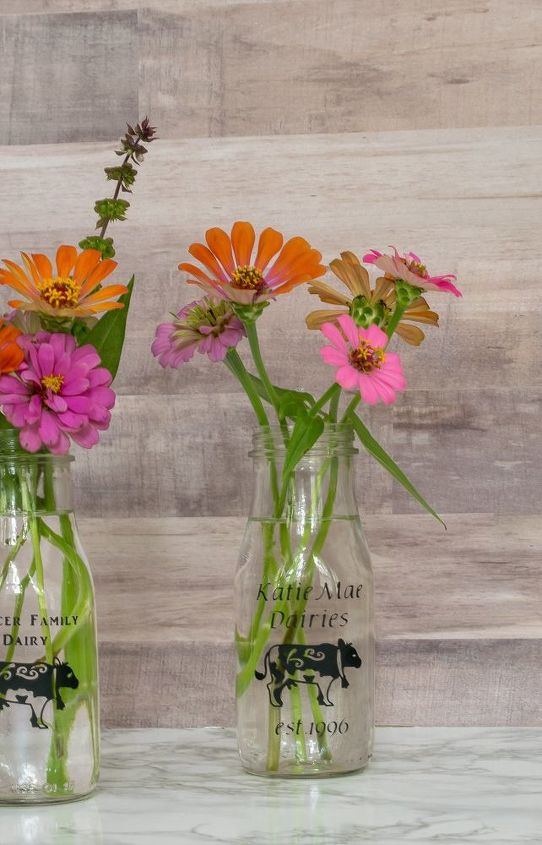
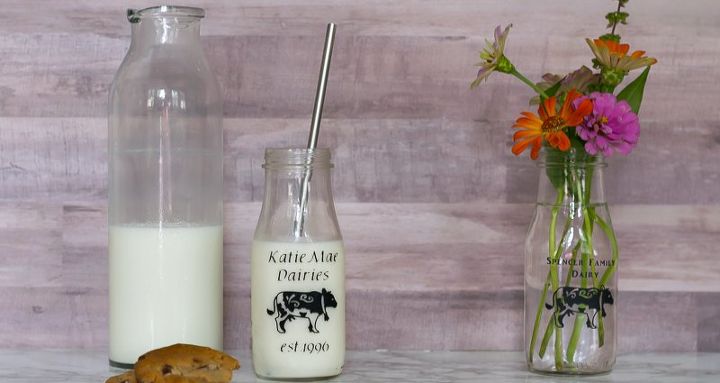
These little DIY glass milk bottles were so fun to make and made use of otherwise discarded glass bottles. They are perfect for your zinnia bouquet or for a special drink. What fun party favors they would be too!
I have mentioned many times before, but I am a firm believer in Kismet, which is simplydefined as destiny or fate.
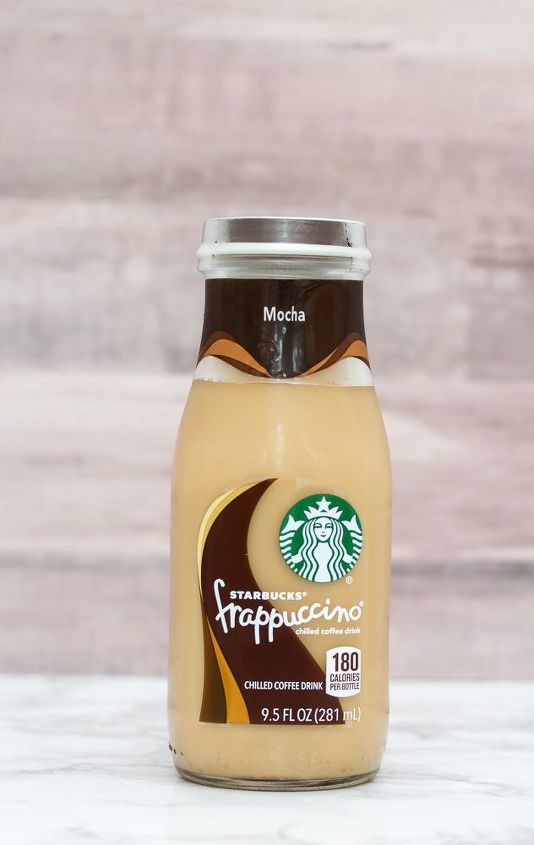
It was kismet that led my eyes to spy a case of Starbucks Frappuccino this past Friday whilst at Costco. I know my son truly loves iced coffee, but this truly falls into ‘frivolous’ spending to which I don’t typically succumb. But kismet prompted me to justify the purchase because a) it was on sale and b) I thought it’d be a fun ‘back to school’ treat. Then, as my son enjoyed these little beverage treats, it was that craft kismet that kept nagging me to do something with the cute little empty bottles.
At first I brushed away this little nag…I mean, my crafting to-do list is a mile long and I don’t really need to be collecting empty glass bottles. Afterall, I just emptied my drawers of too many glass bottles when I did my big declutter last year and so have been hesitant to start adding clutter back.
So into the recycling bin the first couple of glass bottles went.
But then…kismet got me thinking.
Those little glass milk bottles are fun for flowers and for beverages. And I could bump the ‘fun’ up a notch by personalizing the bottles by using my Cricut and stenciling a ‘label’.
So on a rainy Monday, while I had laundry to fold and paint to paint, I instead did what kismet prompted me to do…I dug through the recycling bin to find the discarded bottles and then fiddled, crafted and ‘created’ these little glass milk bottles.
What I Used to DIY Glass Milk Bottles:
How I Made the DIY Glass Milk Bottles:Cleaned bottles and removed label.I removed the label by heating in a pot of water over medium heat for about 30 minutes, then used Goo Gone to remove the rest of the residue. I cleaned off the Goo Gone residue with rubbing alcohol.I then washed the bottle well with Dawn to make sure it was completely clean.Then it was time for the fun. I designed the graphic using Cricut Design Space…the cow and fonts were free with my Cricut Access subscription.
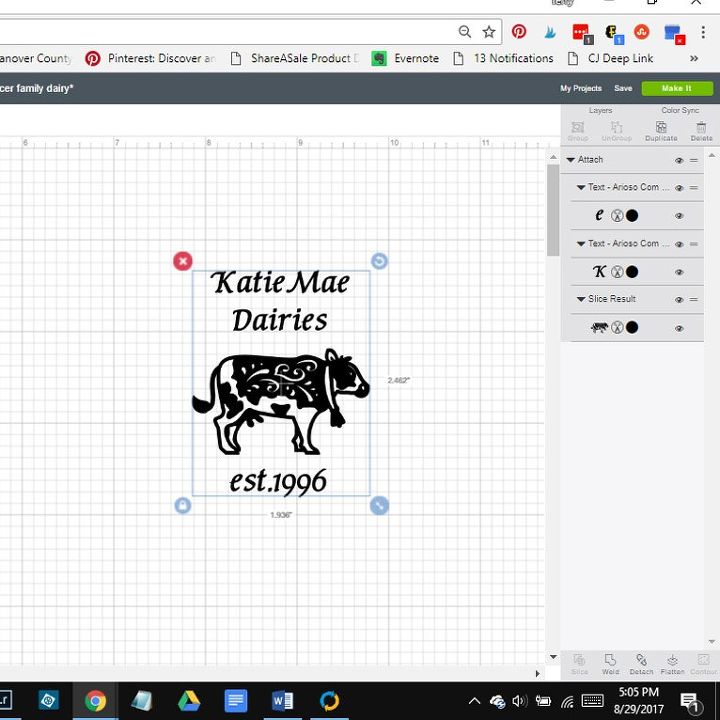
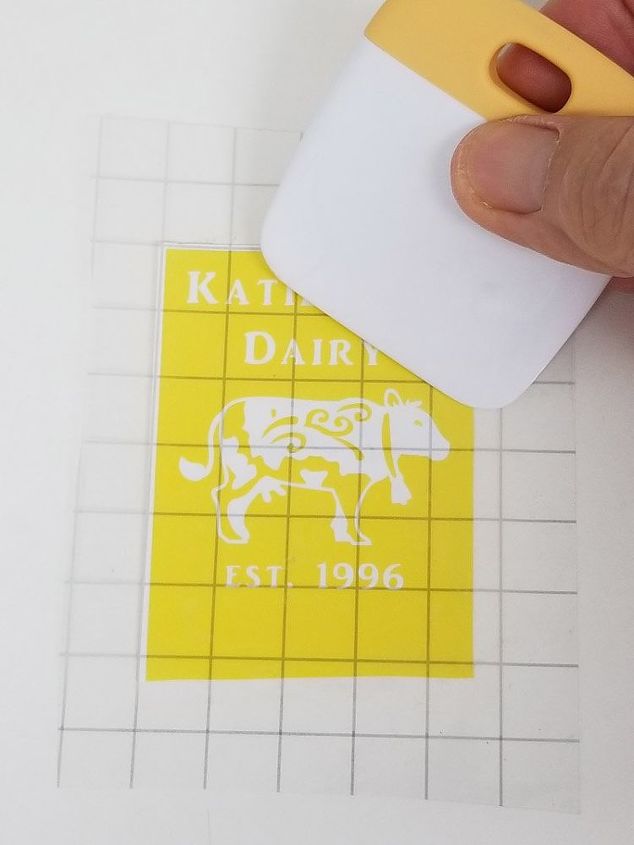
Once the I had my design, I used some scrap pieces of vinyl to make my stencil.I weeded the design and used Cricut Transfer tape to put the image on the bottle. I burnished the image real well after I put the transfer tape …
and again when I transferred the image to the bottle
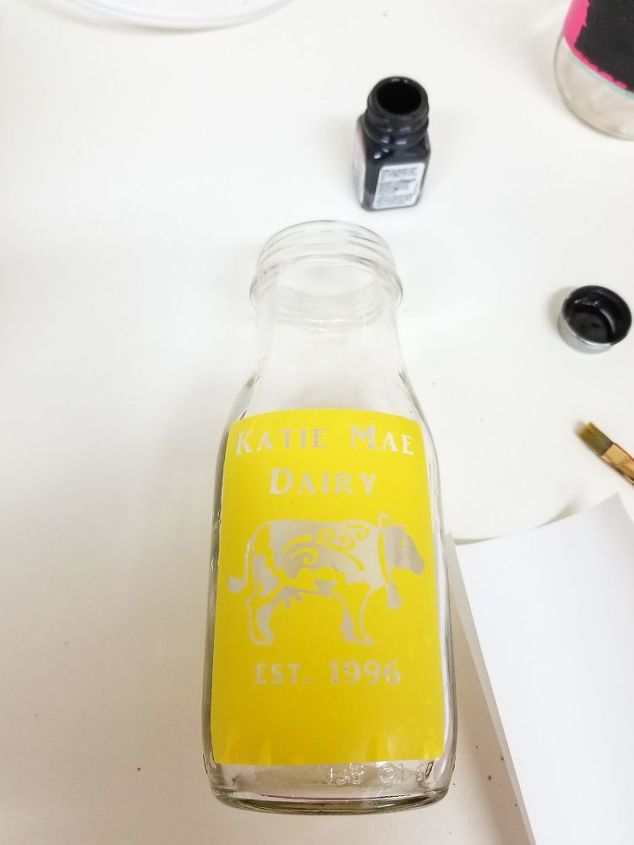
Once I was sure that there weren’t any air bubbles, especially close to the design and words, I lightly dabbed on the black paint. I applied 3 light coats which definitely helps to prevent any seepage under the stencil. The image below shows after 2 coats…you can still see through a little bit, but after the 3rd coat it’s completely opaque.

CAREFULLY pull the stencil off. You might have a couple of areas that you need to touch up with your paint…I found that a needle dipped in the black paint worked better to get the small areas then any brush would.A spray of polyurethane will help keep your stencil intact.

Want more details about this and other DIY projects? Check out my blog post!
Comments
Join the conversation
2 comments
-
I like the tips about removing the labels. Its always been a mission for me.😝


Frequently asked questions
Have a question about this project?