


How to Reupholster Mid-Century Modern Chairs
4 Materials
$250
2 Weeks
Advanced
Almost any tutorial on dining room chair reupholstering has you finished in an afternoon--"it's simple, try it," the tutorial assures! Well, I (Vicki) found reupholstering mid century dining room chairs with a seat and a back is no simple afternoon project!
There was a lot of trial and error in this project. The most difficult aspect was figuring out how to recreate the stitched design on the chair back. It was only when I deconstructed the chairs that I saw how it was done, but it was no easy feat to recreate.
I tried several different options to try to recreate it and finally settled on the technique that is shared in the video. Below is a brief overview of the project. Please visit our website for all the details.
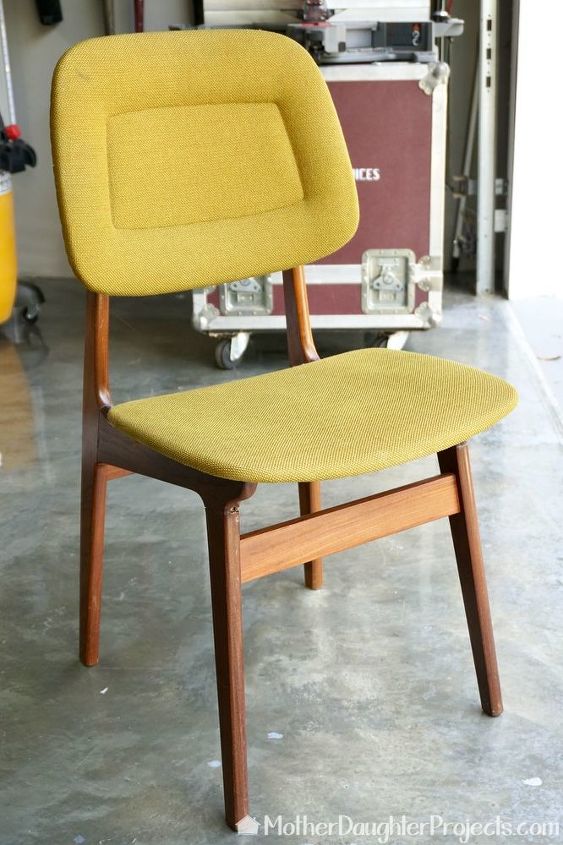
This is one of eight dining room chairs with the original upholstery. Still in good condition but oh so smelly! They were manufactured by Bahus of Norway in 1967!
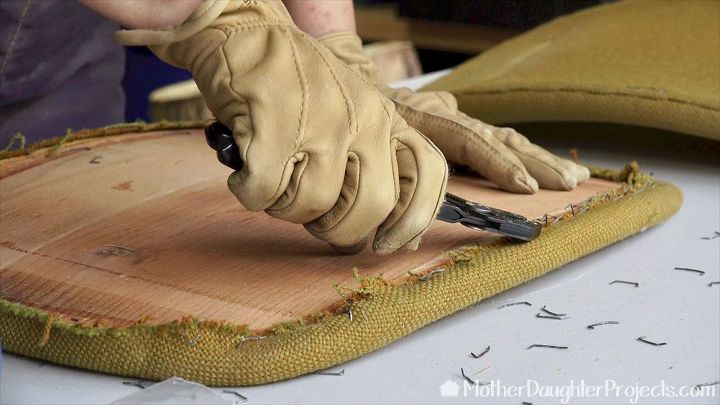
After the seats and backs were removed from the chairs all the staples were taken out and the old upholstery and foam was discarded. Be sure to protect your lungs and eyes when working with old materials as the dust can be potentially harmful.
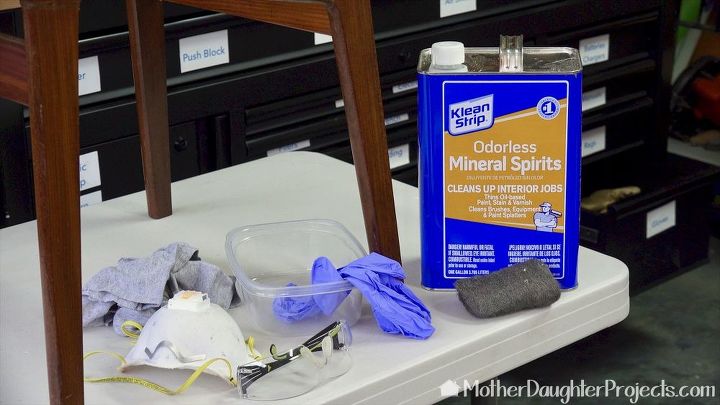
Everything was given a wipe down with mineral spirits to get rid of any lingering odors.
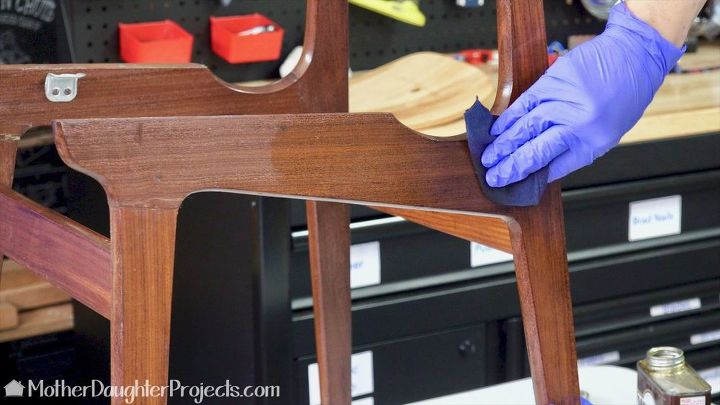
The wood frames got a new coat of Danish oil which brought back the shine.
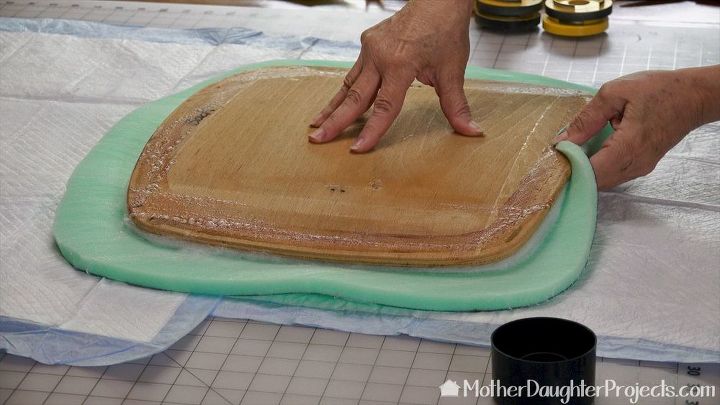
All the seat bottoms got three layers of batting and 1/2" foam all glued into place with spray foam glue.
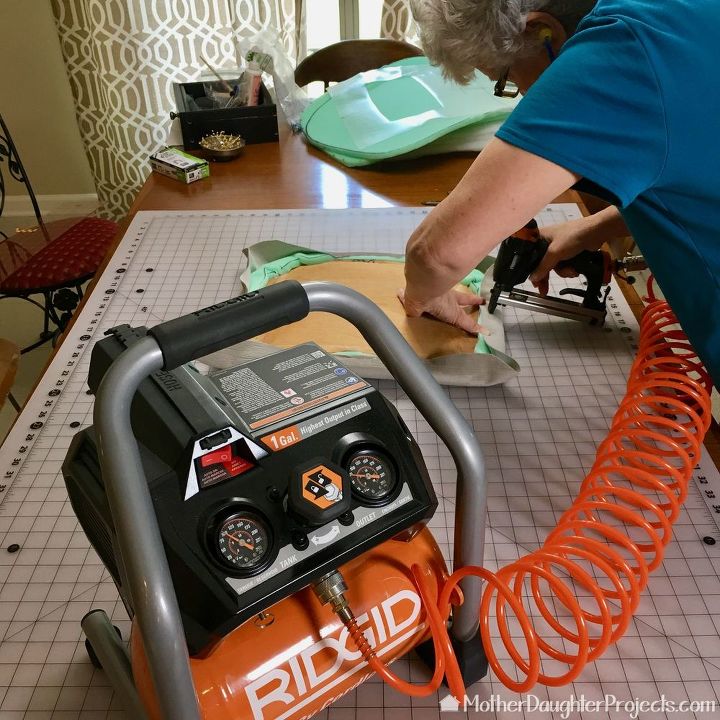
The Ridgid battery powered compressor and staple gun were used to attach the new upholstery.
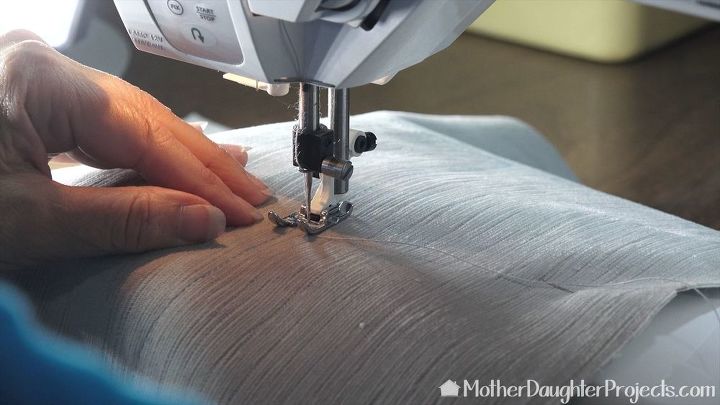
A piece of muslin fabric was put underneath the back fabric and the front detail was stitched into place.
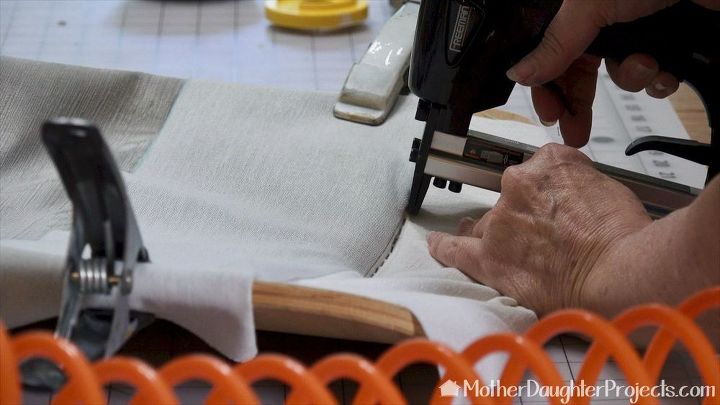
This step is best viewed in the video as it's a little tricky to explain. Basically, the muslin piece is stapled around the perimeter of the stitched detail. The upholstery fabric is kept out of the way at this point. Prior to stapling this in place a piece of foam was added to the back.
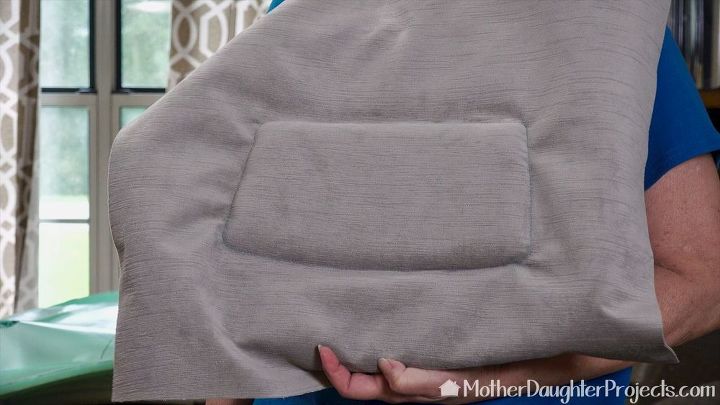
At this point the remainder of the foam is added and the upholstery is stapled to the back.
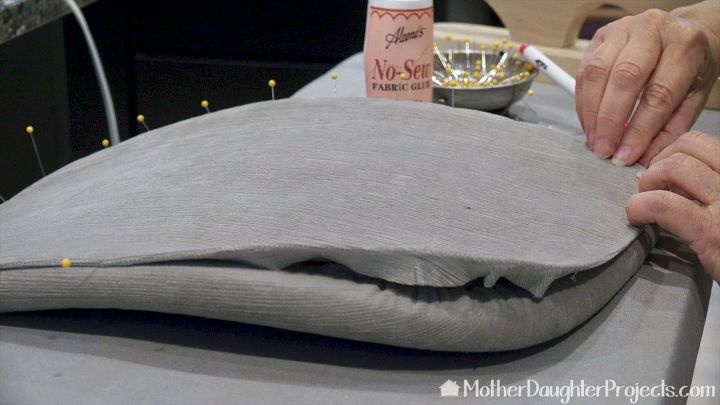
Once the upholstery is stapled into place a piece of fabric is glued to the back to cover all the raw edges. Straight pins keep the back in place as it dries.
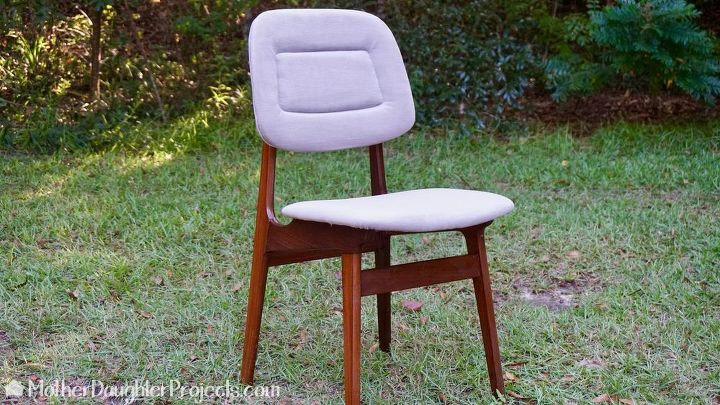
All finished--only 7 more to go!
{
"id": "4254004",
"alt": "",
"title": "",
"video_link": "https://www.youtube.com/embed/pL6SiYHFKXY",
"youtube_video_id": "pL6SiYHFKXY"
}
{
"width": 634,
"height": 357,
"showRelated": true
}
For full details please watch the video.
Sign-up for our newsletter here to see more projects from us!

Want more details about this and other DIY projects? Check out my blog post!
Comments
Join the conversation
2 comments
-
Wow - these turned out fabulous and I learned something too! I had no idea how to do those inserts with the muslin; what a great feature! Thanks so much for your clear instruction on this. Well done. If I even happen across chairs like this, I'll snap them up too :)


Frequently asked questions
Have a question about this project?