


Make Your Fridge Into a WOW!

2 Materials
$41
2 Hours
Easy
Does your slightly older white fridge have yellowed handles? Mine does and its killing me. Have you looked into the cost of replacing handles on any of your appliances? It's not pretty. You might as well buy a new fridge. So I am on a quest to give my fridge a makeover. We're going to use a gorgeous matte black called Iron Gate by Heritage Collection All In One Paint. You won't believe how easy this is going to be! And best of all you can watch me do it live on Hometalk on 9/19/17 at 8pm EST. Hope to see you there!
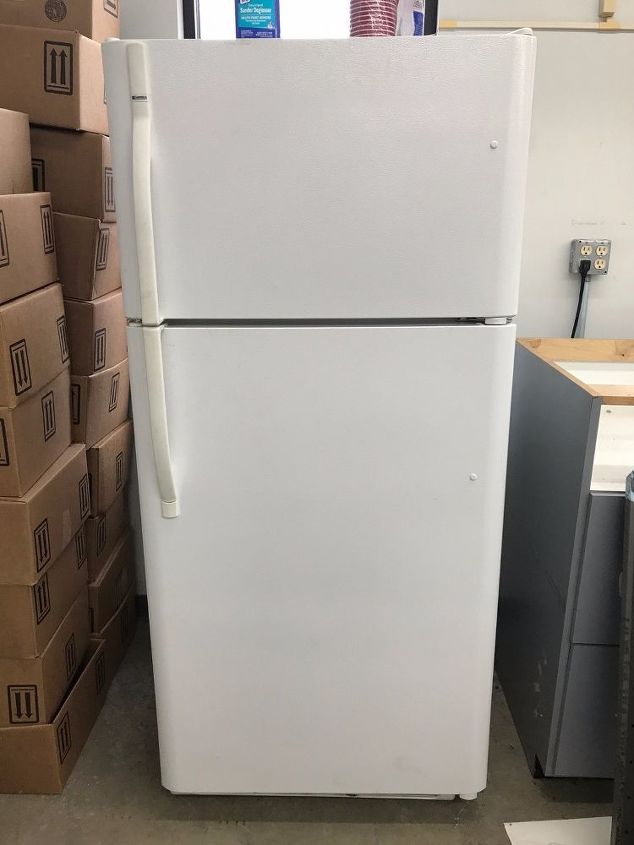
This is our shop fridge that I'll be painting live on Hometalk. The handles are just slightly yellow on this one but once they start turning, they go quick. We're going to paint everything with the Iron Gate including the handles, but you could easily paint the handles white (Cashmere) or Gray (Cobblestone).
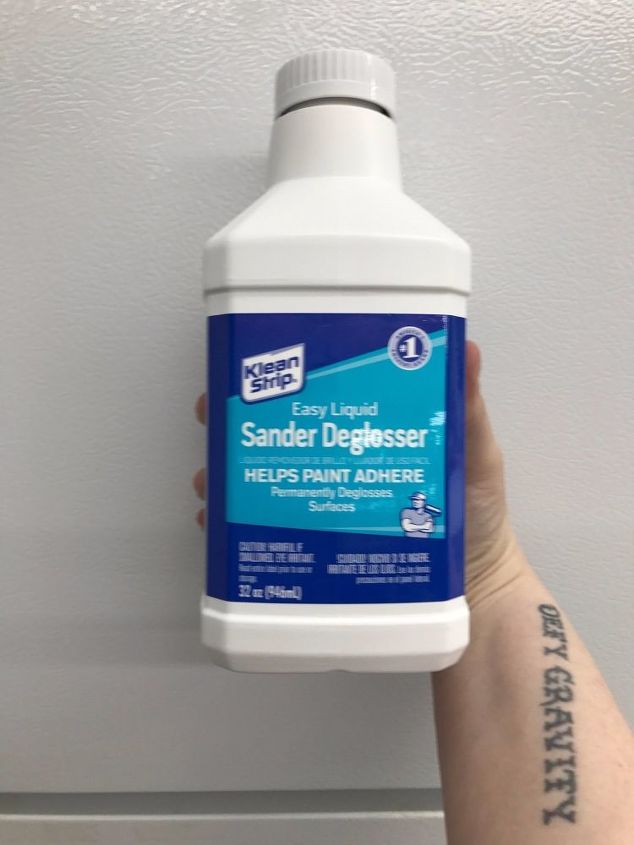
I've chosen the All In One Paint for this project for several reasons. 1. It has a built in bonding primer so it'll adhere to most surfaces.]2. It has extreme durability. I don't know about y'all but my fridge gets used a LOT! 3. It does not contain latex nor look like a latex paint. It's going to be give me a gorgeous matte finish with a low luster sheen. It looks like chalk paints that have been waxed and it dries velvety smooth. To prep my fridge, I am going to be safe & use a deglosser. I rarely do any prep with All In One other than a good degreasing, but for a fridge, I wanted an extra layer of protection. You can pickup a deglosser at your local hardware store in the paint department. I've never deglossed before and was not looking forward to this added step, but it was much easier than I anticipated. I just followed the directions on the jar. I also suggest unplugging your fridge before you start if you're able to.
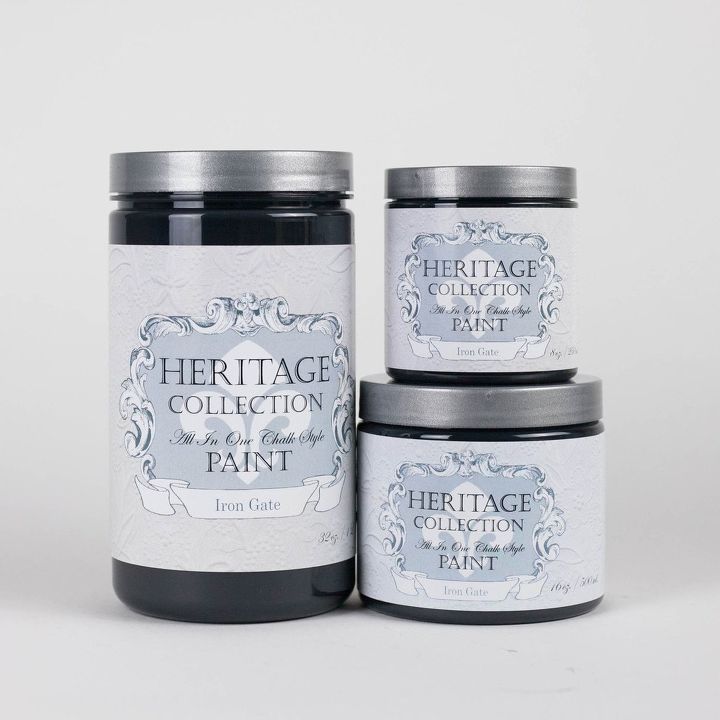
Here's the color I'm using on this fridge makeover. Isn't it gorgeous?! I'm loving black accents in my home right now. My plan in the future is to paint the cabinets in Cathedral, so black appliances will work just perfectly. I'm planning to replace my fridge down the line, but for now, paint will buy me a couple more years. It's a quick fix when your kitchen makeover budget doesn't allow for a new one. Be sure to stir your All In One Paint well whipping from the bottom until the paint thickens. Don't skip this step. You'll thank me later. Then I'm going to apply the paint to my fridge with a Syntec Chalk Brush using a liberal coat. Don't overwork the paint. The first coat won't look great and that's okay. It's establishing the bonding process. Let it dry thoroughly. You'll be tempted to overwork it because as the paint is drying it changes sheen and creates the visual illusion that you missed a spot. Leave it alone. Let it dry. Then apply coat 2 with a liberal coat and you should be good to go. I like to paint anything that has the same texture as the outside of the fridge including where it starts to roll to the inside. Stop at the rubber seals. No sealer or topcoat required! This paint dries very durable in 48 hours and fully cures in 30 days. The look of waxed chalk paints without all the steps. That's my kind of DIY!
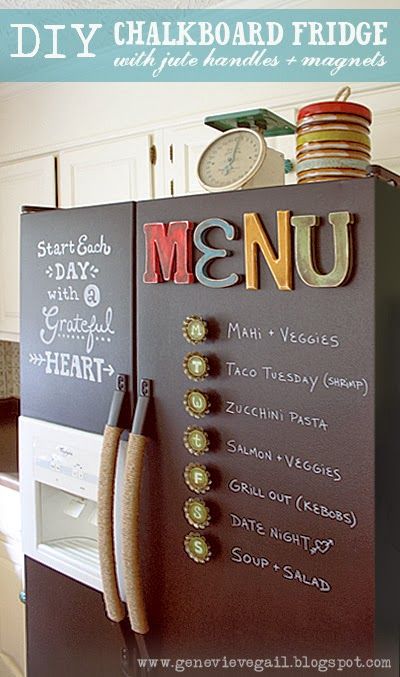
So, you'll have to wait until after my live on 9/19 for the final outcome. But Pinterest always comes to my rescue with a few inspiration photos. I love several things about this one. They left the icemaker alone. I would suggest this also. And look what they did with the handles! If you're opposed to painting them, this is a great alternative. And YES, you can totally use chalk on your All In One Painted fridge. And......it wipes totally clean unlike traditional chalk board paint. No chalky residue and no phantom writing left behind. It's the best of both worlds. What would you write on your fridge?
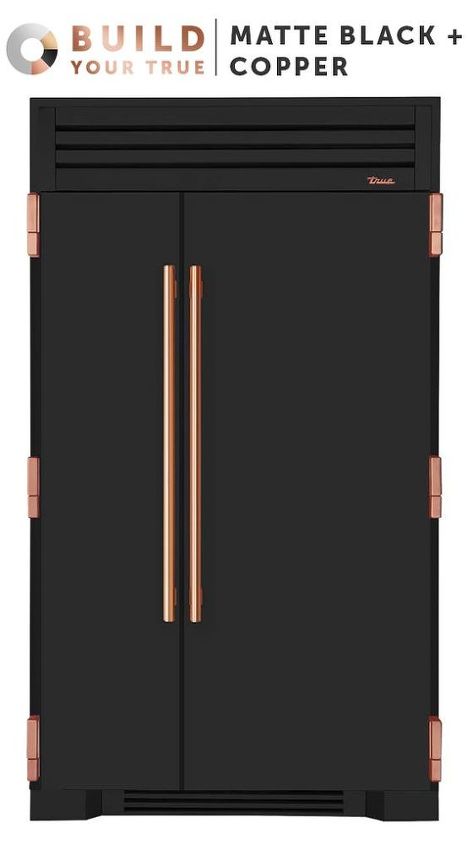
Courtesy of Pinterest, here's a modern version of a black fridge with copper accents. I'm loving copper right now.

I'm in envy of this dreamy fridge! They just added a few molded pieces to create this look. Wedgewood would work perfectly to achieve the base color of the fridge and Manor House with the Weathered Wood Antiquing Gel would give you that look on the molding.
We want to help you DIY, so some of the materials in this post are linked to sellers. Just so you know, Hometalk may collect a small share of sales from the links on this page.
Comments
Join the conversation
3 of 18 comments
-
Probably Not,
-
So, this was not “chalk” paint? How is it holding up? I really want to do this..wear do you get the paint?


Frequently asked questions
Have a question about this project?
Did it not work out, was it a mess? This is May 2018. Where is YOOR painted fridge?
that'sreally awesome you can paint your fridge. Can you use the same paint for your stove too?
May 2021, where is link to see "live" video or pic of finished product. Now 4 years later, would love to see how this turned out and how it is holding up.