664 Views
DIY Geometric Walls

by
Stephanie (Sandpaper & Glue)
(IC: blogger)
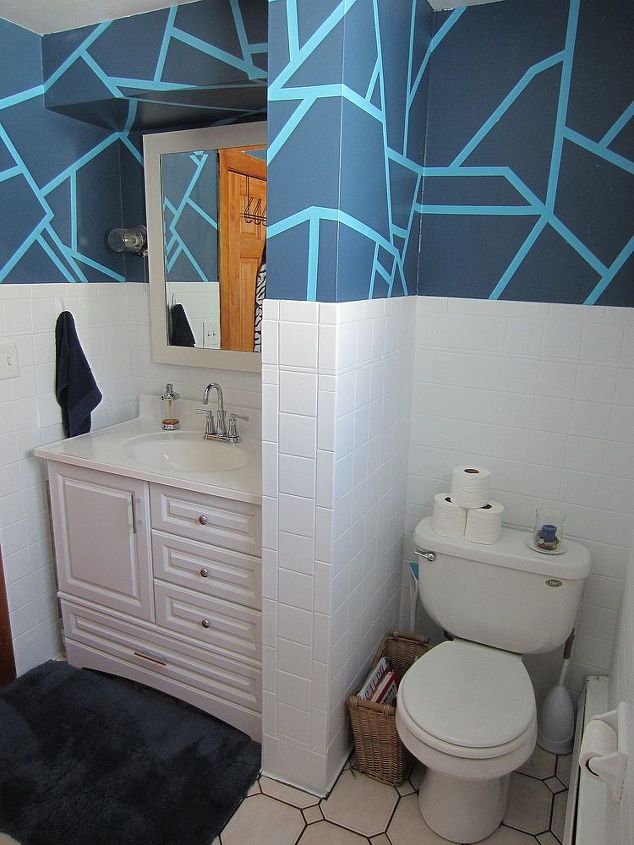
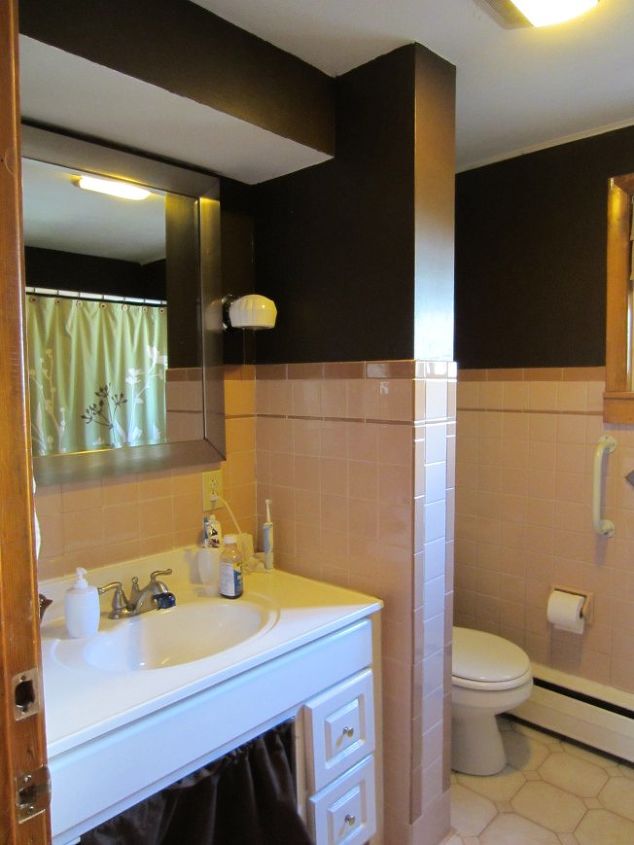
When we first moved in to our house our bathroom was a dungeon- deep, dark brown walls with beige tile and one tiny window. I took a lot of steps to lighten it up, and the geometric walls not only lightened things up but added some much needed personality too!
I created a geometric look on my bathroom walls with 2 paint colors (Fountain by Sherwin Williams and City Nights by Clark + Kenginston) and frog tape.... this paired with the pure white painted tile has made the space so much more open and light. :)
A few tips:
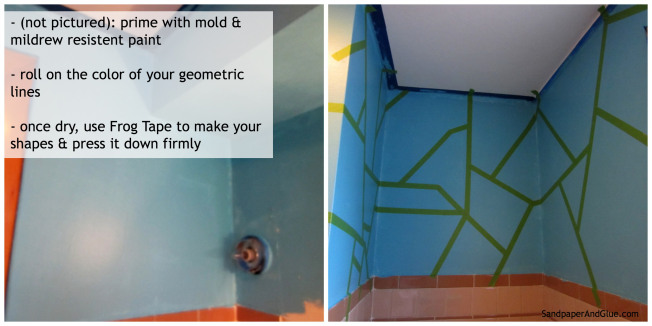
- I used mold and mildew resistant primer on the tile, walls, and ceiling because this is a full bath without a great source of ventilation.
- I only did 1 coat of the line color (aqua) because so little of it is seen, I did touch ups as needed. This helped cut costs, because only a quart was needed.
- To be sure there's no color bleeding, press a license or credit card at a 45* angle on each strip of tape
See more details (and info on how I painted the bathroom tile) on the blog!
(
The dark blue paint color (City Nights) was leftover from our basement and because of that it is eggshell. I realized after that fact that a sheen (gloss or semi gloss) would have been much better in this room to help with cleaning and moisture resistance. Live and learn! Two years later it's still holding up, I just have to clean it more carefully.
Make sure you let your first paint color dry completely before adding on the tape to help prevent peeling. Since this was a bathroom, I also made sure to keep it extra dry in there for as long as possible (shower with the door or a window open) to give the paint time to cure fully.
BEFORE: The camera flash helps make this room seem much brighter then it was. The dark walls and cracked tile really needed a budget friendly update and I took the shade off the window to take this picture. I've since frosted the windows, replaced those side lights with salsa jars (they're clear! so much brighter!), painted the tile, and geometric-d the walls.
Enjoyed the project?

Want more details about this and other DIY projects? Check out my blog post!
Published February 25th, 2014 6:49 PM









Frequently asked questions
Have a question about this project?