


DIY Dip Dyed String Curtain
4 Materials
$45
1 Day
Easy
Need to hide a closet or a creepy space? Try this fun, easy, and stylish string curtain!
Want an easy way to hide the adjoining room? A closet? A space you just don't want to see? Fill it with some clothesline and some fabric dye!
A handful of time ago, I removed a door from our super creepy utility closet that swung into our beyond-miniscule, terribly laid out, so inefficient laundry room. It was taking up extra space and as I seem to have a running thing with removing swinging doors in our flipped house, I was as usual attempting to free up valuable square footage.
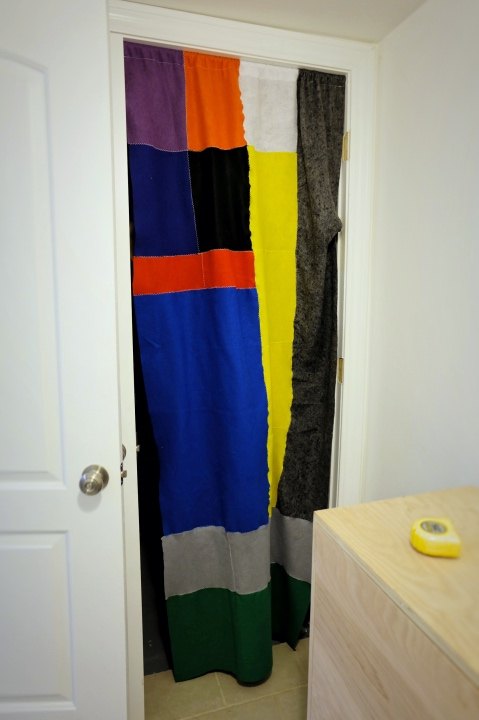
In an effort to block out the view of the spiders and the way creepy utility room, I had assembled a felt curtain, a project I shared on Hometalk.
Sadly, that curtain, though it has tremendous potential, didn't pan out for me.
So with a tear in my eye, down the felt curtain came. But I needed something to replace it as the door was not going back on nor was I planning on high-fiving it with the icky spiders.
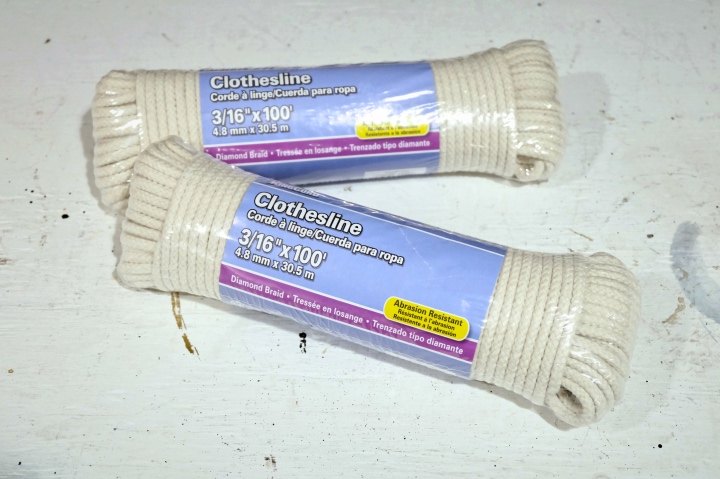
Into my head popped an idea of a string curtain, dip dyed. Off I ran to my Menards for cotton clothesline.
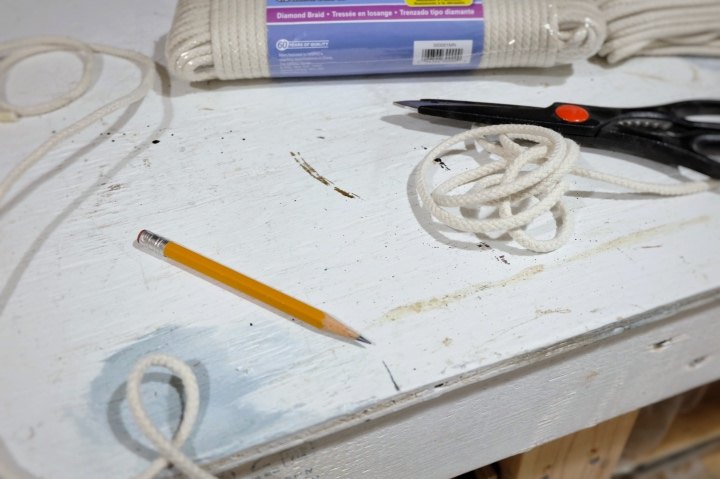
I measured the height of the door frame, about 81.5", give or take. Since my spiffy workbench is exactly five feet wide, I measured 21.5" inches in, made a mark. Now all I had to do was stretch the line all the way across then to the short mark and I had 81.5" each time. Well, double it actually, as I needed two lengths per string.
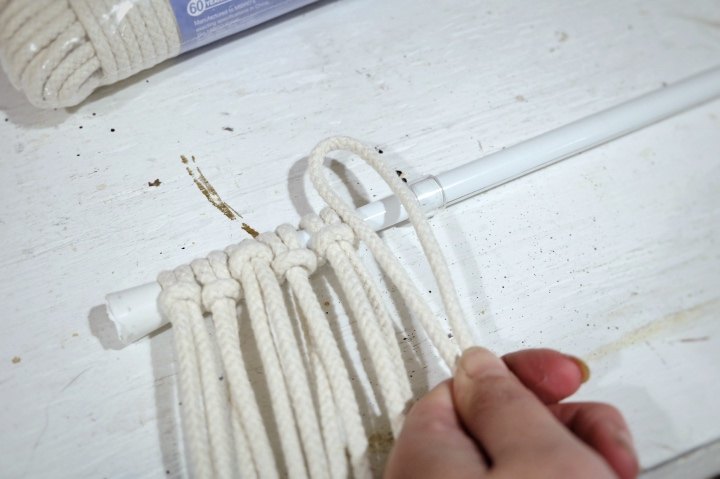
Using a larks head knot, on went the clothesline. Be sure to have the bunny ear in front if you want the knot line in front.
Come on by and visit my blog, Flipping the Flip, for more fun details about this project, about all the doors I've yanked off and replaced, and all sorts of other good stuff!
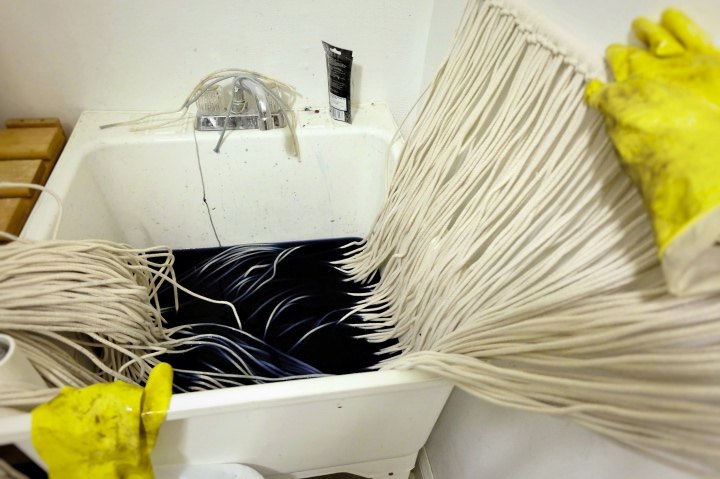
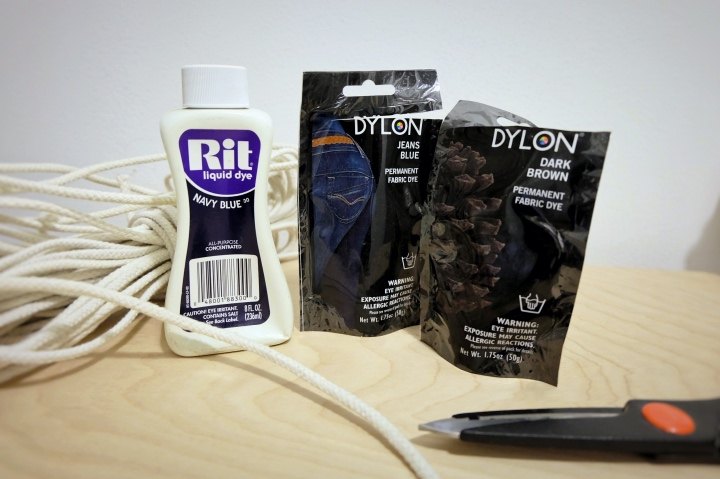
Time to dye. Now, I'm no dyeing expert but you don't have to be to do this project. Simply fill your laundry sink about 2-3 inches with hot hot hot water, or a dish tub, or a storage bin. Sprinkle in your first color and test it with leftover string -- know that it will dry several shades lighter.
Next, dunk time. I wanted gradations so I only dipped a portion near the top to start.
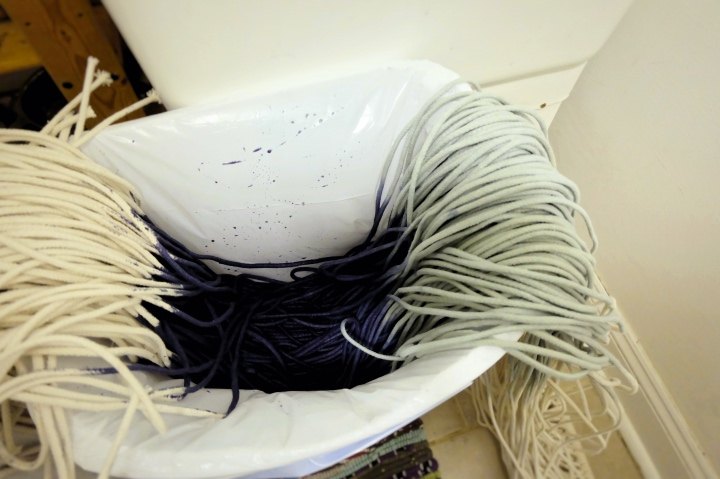
For the second dip, I darkened the existing water. Here I used a trash can with a clean bag to park my drippy clothesline collection between color changes.
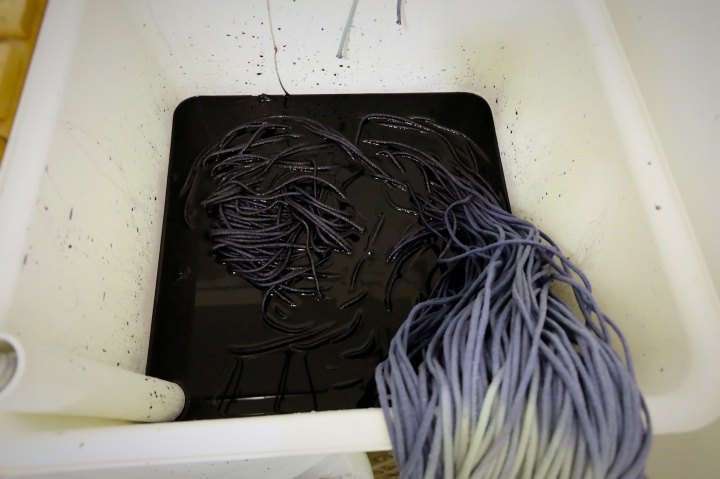
Lastly, darken again and dip the ends. It was gorgeous outside that day so I brought the whole thing outdoors to dry.
Sadly, my first go around kinda sucked and I wasn't happy with it. I ran out and purchased aquamarine and black dyes and gave the whole process a go again.
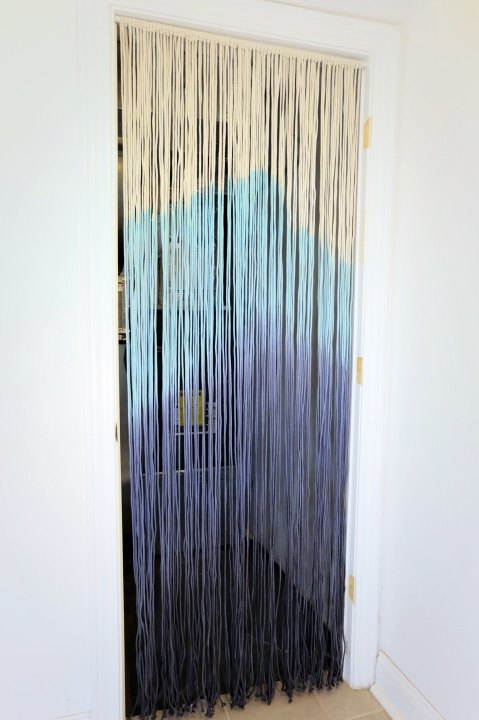
In the end, I think it came out great. It hangs straight, it looks stylish and hip as if I'm cool, and it looks much better all around! Plus it's so easy to do, and really not expensive to make yet the look is expensive. Or it will be when the rest of the sad sad room is fixed.
Now onto fixing the rest of that darn laundry room......
Be sure to click the link below for more info on this project and others!
Resources for this project:
See all materials


Any price and availability information displayed on [relevant Amazon Site(s), as applicable] at the time of purchase will apply to the purchase of this product.
Hometalk may collect a small share of sales from the links on this page.More info

Want more details about this and other DIY projects? Check out my blog post!
Comments
Join the conversation
4 of 86 comments
-
Pretty!
-
I've been planning to macrame a "fly" curtain with jute and various beads. But thus looks waaaay quicker and very stylish at the same time! Nicely done!!


![How to Make Curtains With Grommets [and Lining]](https://cdn-fastly.hometalk.com/media/2021/03/02/6965263/how-to-make-curtains-with-grommets-and-lining.jpg?size=350x220)


Frequently asked questions
Have a question about this project?
Is the upper section just plain, no dye?
i think is a great solution to "hide" something that's not so nice to see! I can think of a couple places I would like to try. Great idea!
🤷♀️ How did you get it to a point for the dying process! I absolutely LOVE what you did x
Did you just redip the ends that you previously dyed as you were changing colors and moving up?