


How I Built a Cedar Window Box for Under $20

Hey y'all! Come check out how I've elevated the exterior of our home and helped create a more inviting look with the addition of an inexpensive window box!
We moved into our home about 6 months ago and since then have been honing the decor vision for our home. I like to have a cohesive style and color scheme throughout our home and I find that being in a space for a while before I start doing a lot of projects really helps with that. One of the first projects I knew I wanted to tackle was the front exterior of our home. To be honest I'm not wild about the exterior of our home, it's basically all brown vinyl and really boring but I quickly developed a course of action for the front of our home and whipped up a (badly) photoshopped inspiration picture for reference.
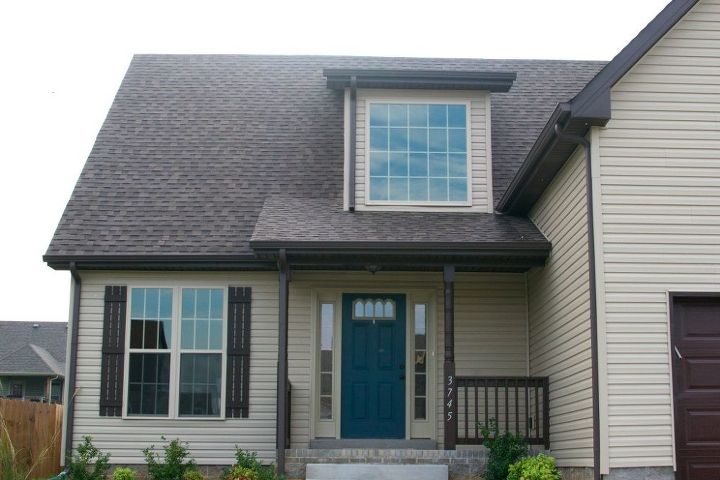
Here is a "before" picture of our home.
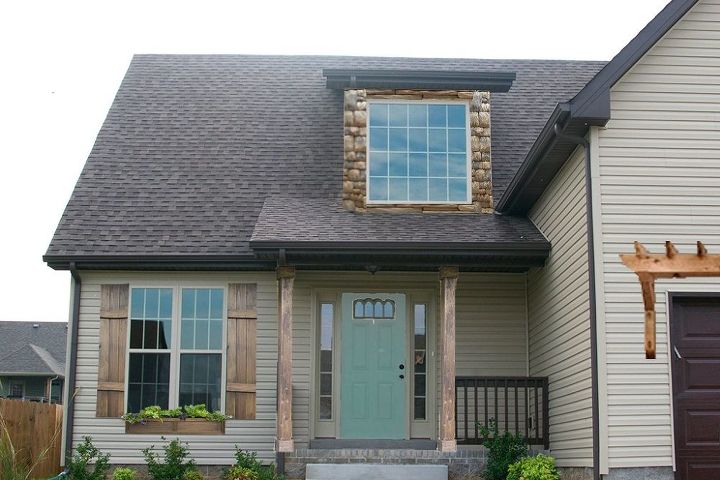
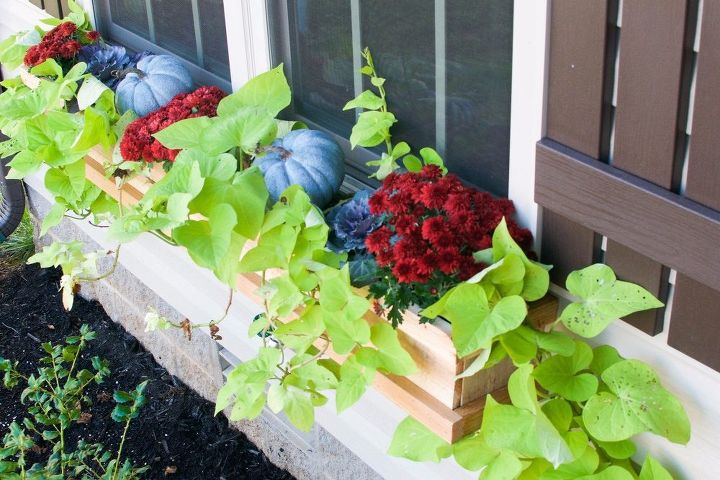
And, here is what our house could look like if we included some character giving features to the front exterior. One of the first projects I decided to tackle was the window box on the the double lower level window and it turned out so cute, I can't wait to show you how I whipped it up!
Materials:
3 cedar fence boards ( I needed 3, you’ll need to measure to see how many you would need)
cedar 1×2 trim (I needed 2 pieces, you will need to measure your window size to determine how much you will need)
Exterior screws
Optional: nail gun & nails
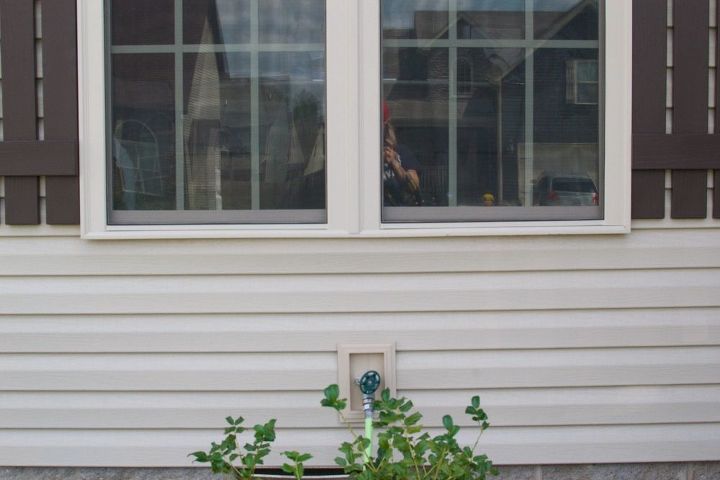
Step One: I only have one first story window on the front of our home, therefore I only needed one window box to fit right underneath this window. Step one, easy, measure your window. I measured from the outer edge of the left window trim across to the outer edge of the right window trim.
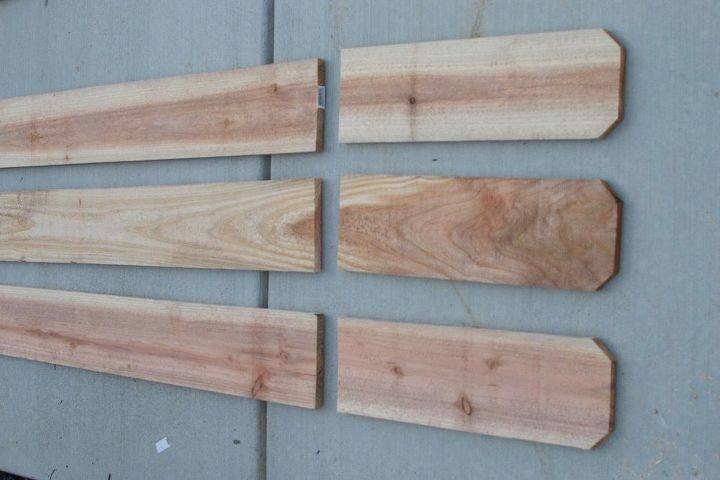
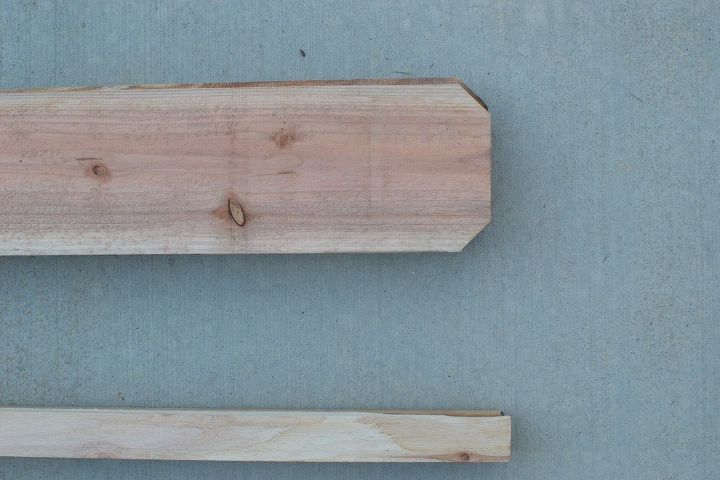
Step Two: I cut all three of my cedar fence boards to the length of the window ( which I measured in step one). Fence boards have a squared off end and a dog eared end, measure starting from the squared off end so that after you cut the board, you have two squared ends.
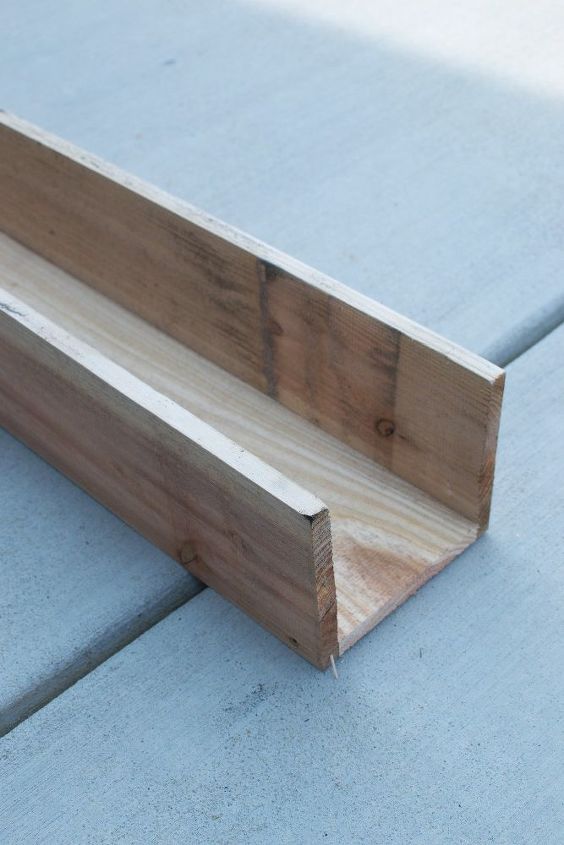
Step Three: This step is where I started assembling my window box. I took my three, freshly cut cedar planks, using one for the bottom of the box, one for the back and one for the front I had my son hold them in place while I drilled exterior screws in through the bottom of the front and back planks and into the bottom plank of the box. I put about 4 screws in across the bottom on both sides.
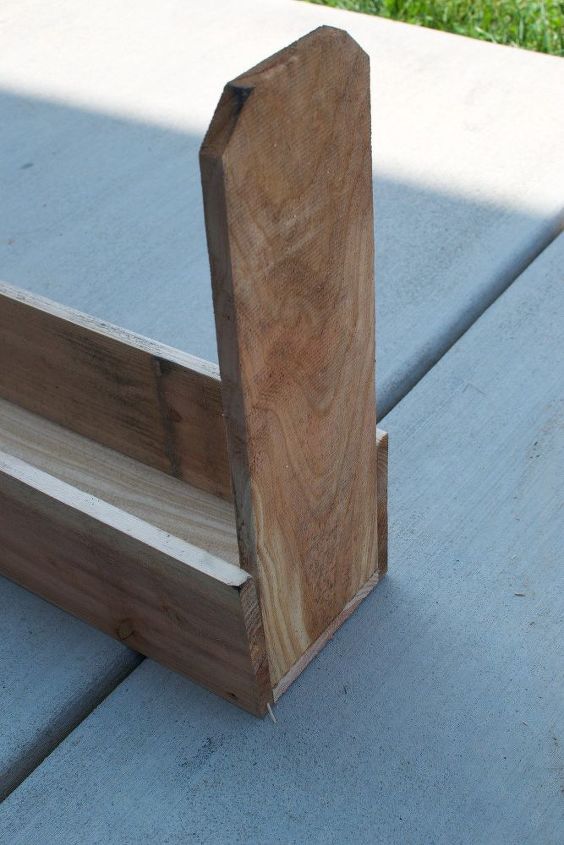
Step Four:Using the scrap from step 2 I measured for the sides of my window box. Place the squared edge down in between the front and back planks and mark the wood where the top edges of the front and back planks end. Do this for both sides.
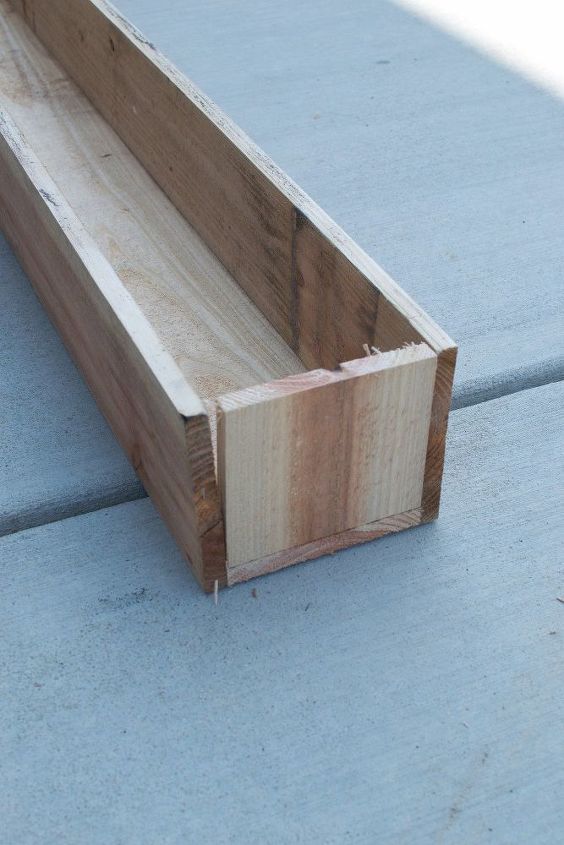
Step Five: This step is where I cut along the marks I made in step 4, placed the wood on the sides of the box and drilled my exterior screws in on each side and bottom to secure the side pieces so that I ended up with this…

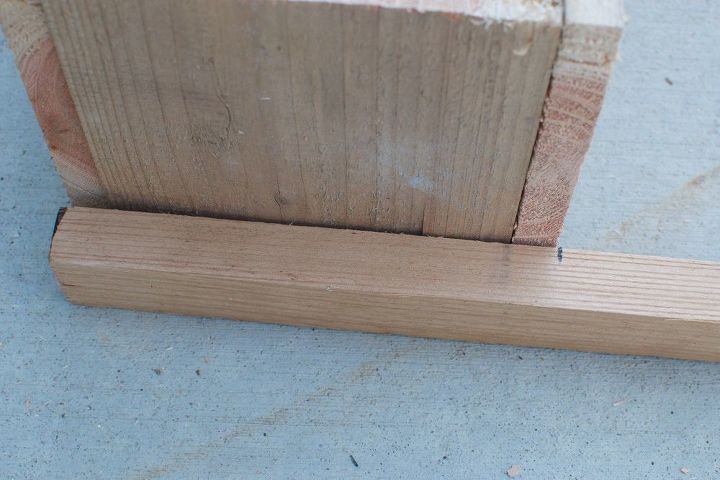
Step Six: Now that the whole box is assembled it is time to add trim the the front and sides of the window box. First I wanted to add the side trim so I measured the side trim by laying the trim piece against the side of the box and marking my trim. I did this x’s 4 and I attached the trim with my nail gun. *although you could use screws or a hammer and finishing nails if you don’t have a nail gun.
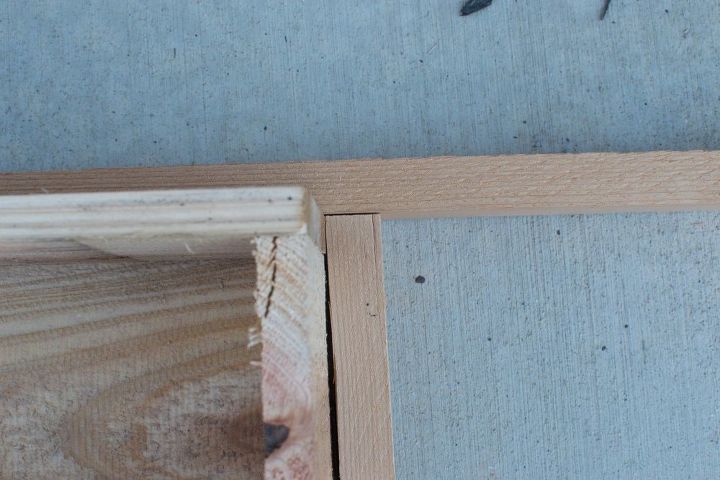
Step Seven: With the bottom trim attached I measured the front trim for the top and bottom of the window box. marked it, cut it and attached it, again using my nail gun. This was the result..

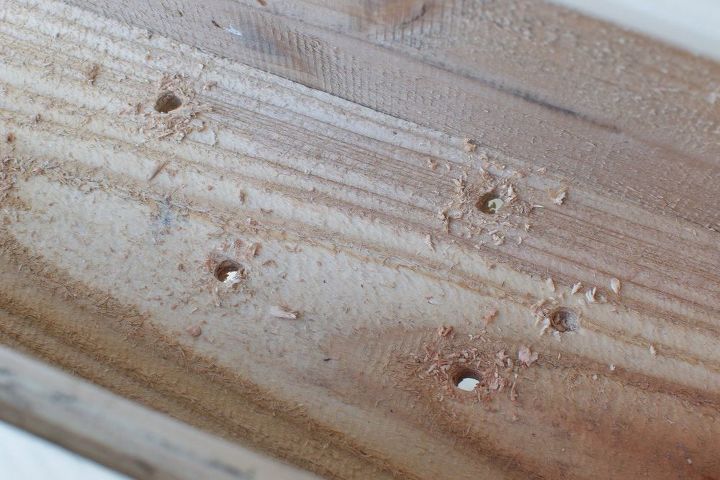
Step Eight: I drilled holes in the bottom of the box using my largest regular drill bit to allow drainage for my plants.

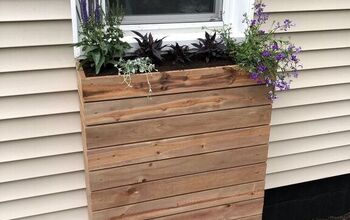
Step Nine: I watched a few youtube videos explaining how to mount the window box into studs, found the studs and hung up the box. I filled it with potting soil and plants. I opted for kale, mini mums and sweet potato vine I popped in a few faux pumpkins since fall is starting to be in the air here and I am in love with how it turned out!
Cost Break Down:
I already owned a box of exterior screws so I wont count those or the nails from my nail gun in the cost break down. I won’t count plants either
For my particular window I need 3 cedar fence boards, I purchased these at Lowes in the garden section for $2.79 each
The size of window box I made required 2 6ft long cedar 1×4 trim boards which I also purchased at Lowes for $4.99 each.
The window box alone cost me $18.37 before tax!
That is a really good deal if you ask me, and it did so much for the front of our home! To get all the details on our home exterior makeover hop over to www.lovethetompkins.com!


Frequently asked questions
Have a question about this project?