


Ceiling Fan Makeover With Black & White Chevron
1 Hour
Medium
I’m working on our office and today I gave our Ceiling Fan a makeover with fabric. It was that ugly faux wood color and was in need of a makeover for sure. This was a fun project that cost me nothing because I had the fabric already in my stash. I just love love LOVE chevron especially black & white and am so happy with the way it turned out.
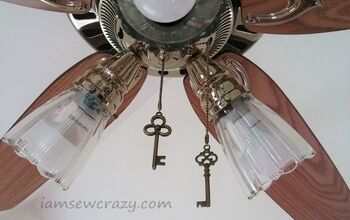
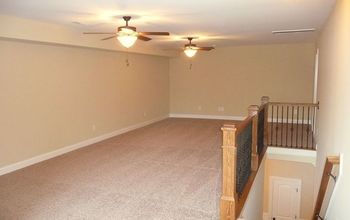
We have four ceiling fans in our house and eventually they will all get replaced but for now I loved the idea of changing the look with this cute fabric and the fact that it would cost me nothing….wooo hoooo. The office is going to be done in black and white with pops of yellow and I’ve been gathering some cute wire baskets and fun accessories too. If you’re scratching your head and thinking “Hmm I don’t remember seeing that room on the House Tour.” You aren’t wrong, it’s that catchall, spare room, dump everything in there that doesn’t have a specific place but really needs to transform into an office craft room. I’ll share with you soon. Here is the pretty before picture of the lovely ceiling fan. It’s nothing special, just that faux wood look on the blades. My inspiration came from a blog I love called Dimples & Tangles and she did this in her daughter’s room and I have loved it and knew I wanted to try it too. This was pretty easy to do and I’ll share with you how.
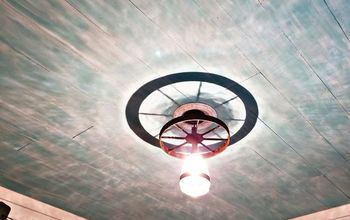
What you need: 1 yard of fabric & Mod Podge. Here's what you do: Take your blades off and clean them. Cut your fabric like the above picture and I allowed an inch around. I glued it so that the fabric was glued on the edges that wrapped over. So if someday I change my mind, or really want that faux wood look again (I really doubt it) I can remove the fabric and the glue would be on the top of the blades that you don’t see. Remove the blade holders. My hubs has an electric drill so this was all very easy and quick. For or the rounded edges, it’s important to make little snips in the fabric so when you wrap it over you can blue it really nice and tight and have pretty crisp edges. If you haven’t used Mod Podge, it’s the miracle glue like sealer and is great for fabric and paper. I LOVE it. I have an old paint brush that I use to paint on the glue so that less gets on my fingers, or so I thought…lol. When I was all done it looks like this. This is the top view that faces the ceiling. I just let them dry a few hours and went and ran some errands. When my hubs came home I had him help me put the blades back up and we just used a screw driver to punch the holes back in the fabric and then attached them back on.
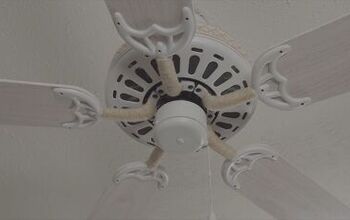
Voila!!! I love it!!!! Cute modern update to our office. Thank you for stopping by and have a great day, Lisa
We have four ceiling fans in our house and eventually they will all get replaced but for now I loved the idea of changing the look with this cute fabric and the fact that it would cost me nothing….wooo hoooo. The office is going to be done in black and white with pops of yellow and I’ve been gathering some cute wire baskets and fun accessories too. If you’re scratching your head and thinking “Hmm I don’t remember seeing that room on the House Tour.” You aren’t wrong, it’s that catchall, spare room, dump everything in there that doesn’t have a specific place but really needs to transform into an office craft room. I’ll share with you soon. Here is the pretty before picture of the lovely ceiling fan. It’s nothing special, just that faux wood look on the blades. My inspiration came from a blog I love called Dimples & Tangles and she did this in her daughter’s room and I have loved it and knew I wanted to try it too. This was pretty easy to do and I’ll share with you how.
What you need: 1 yard of fabric & Mod Podge. Here's what you do: Take your blades off and clean them. Cut your fabric like the above picture and I allowed an inch around. I glued it so that the fabric was glued on the edges that wrapped over. So if someday I change my mind, or really want that faux wood look again (I really doubt it) I can remove the fabric and the glue would be on the top of the blades that you don’t see. Remove the blade holders. My hubs has an electric drill so this was all very easy and quick. For or the rounded edges, it’s important to make little snips in the fabric so when you wrap it over you can blue it really nice and tight and have pretty crisp edges. If you haven’t used Mod Podge, it’s the miracle glue like sealer and is great for fabric and paper. I LOVE it. I have an old paint brush that I use to paint on the glue so that less gets on my fingers, or so I thought…lol. When I was all done it looks like this. This is the top view that faces the ceiling. I just let them dry a few hours and went and ran some errands. When my hubs came home I had him help me put the blades back up and we just used a screw driver to punch the holes back in the fabric and then attached them back on.
Voila!!! I love it!!!! Cute modern update to our office. Thank you for stopping by and have a great day, Lisa
Love the way it turned out
Here's the before picture
Take your blades off and remove the blade holders too
Cut out your fabric with and inch around the edges
Cut snips around the corners
Mod Podge is fabulous stuff
I use a paint brush to apply it to my area
When you are done let them dry

Want more details about this and other DIY projects? Check out my blog post!
Comments
Join the conversation
2 of 21 comments
-
This must look awesome when it’s on!
-
I used cut outs from leftover wallpaper in my bar area to upscale the blades on my cheap ceiling fan.


Frequently asked questions
Have a question about this project?