


Tween Boy's Desk Makeover With a Neon Green Stripe

2 Materials
$50
2 Hours
Medium
When my 11 year old asked to have his room painted I knew it was going to turn into more than just a simple paint job. You know how this typically plays out. You paint the room and add new bedding, only to see how dingy the carpet looks and that he really needs a quiet place to do his homework. And the list went on and on while the money in wallet became less and less. I agreed to his request for the desk with the concession that it had to be something we could up cycle.
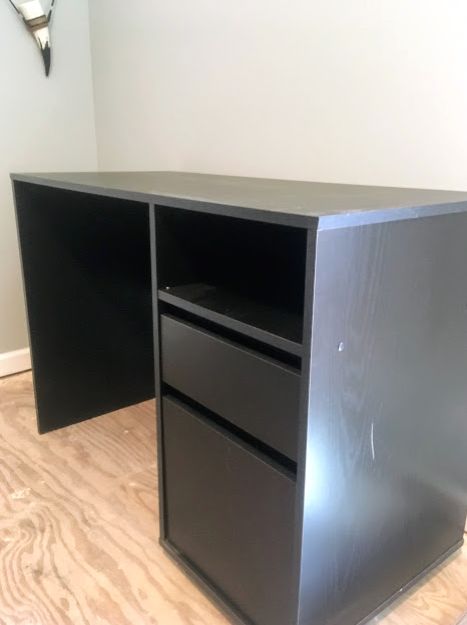
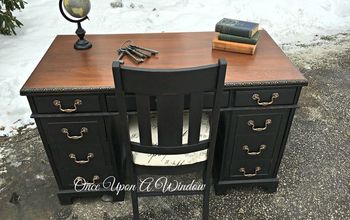
So on a very busy Saturday afternoon we took a trip to our local thrift store and he made a beeline for this black desk. It was made out of heavy particle board (not my fav) but it was sturdy and fit the dimensions of the space in his bedroom.
Tip: When buying used furniture always check for odors especially inside drawers and behind closed doors. Make sure the drawers glide with ease. Sometimes they may have been taken out while moving and then put back in the wrong slot which is an easy fix.

Since the original finish on the desk was slick I decided to prime the desk before painting in order to help the paint stick to the desk–after all, it had to hold up to the use of an 11 year old. But first I did a thorough prep job (scuff sanding, degreasing, etc.). I then applied 2 coats of primer following the manufacturer's directions for dry times between coats.

I then painted the sides and drawers of the desk with General Finishes Lamp Black Milk Paint. It took 3 coats of paint to completely cover the primer.
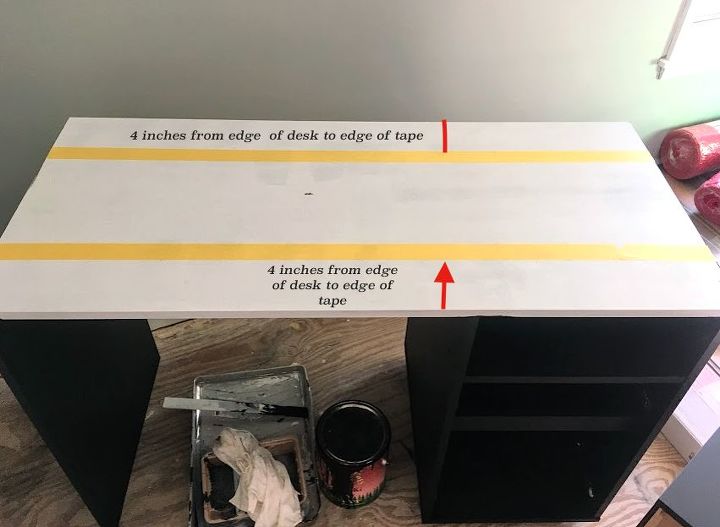
Next I taped off the the lines for the black stripes. We had decided on a very wide neon green stripe to be the eye catching center of the desk and on each side of the neon green we would paint a white stripe with a wider black stripe on the edges. Again, I painted 3 coats of black paint with proper dry times between each coat.
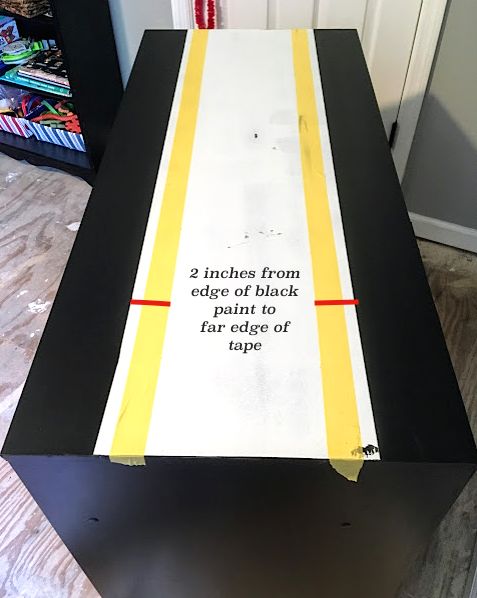
Next I taped off for the middle stripe and painted it with neon green. This was a very thin paint and it took numerous coats to fully cover the white primer underneath.
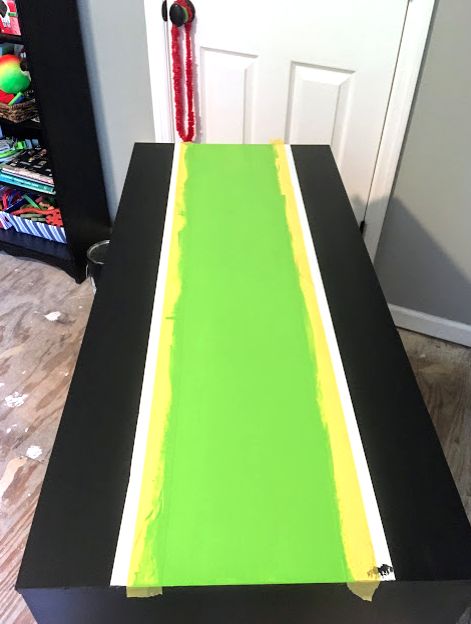
Tip: I use small craft brushes for any touch ups. As you can see above, I had a big "oops!" spot of black paint get onto the white stripe.
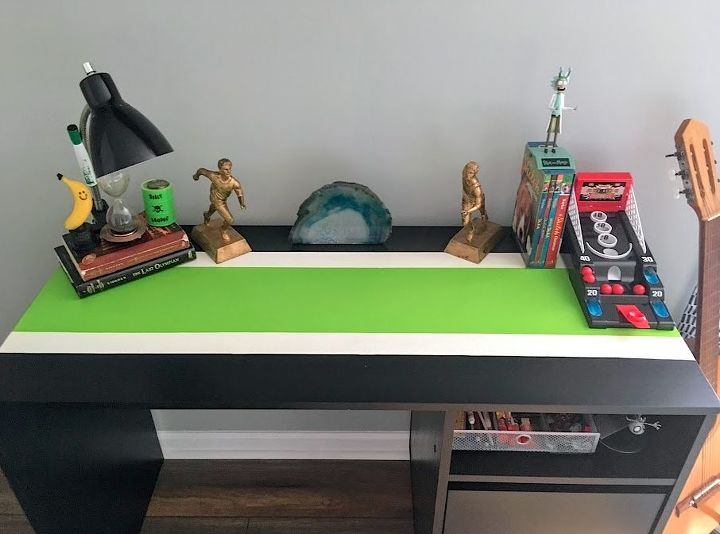
I sealed the entire desk with my favorite sealer from General Finishes. Btw, the Lamp Black paint and High Performance sealer are the same ones I used last year on my kitchen cabinets makeover.
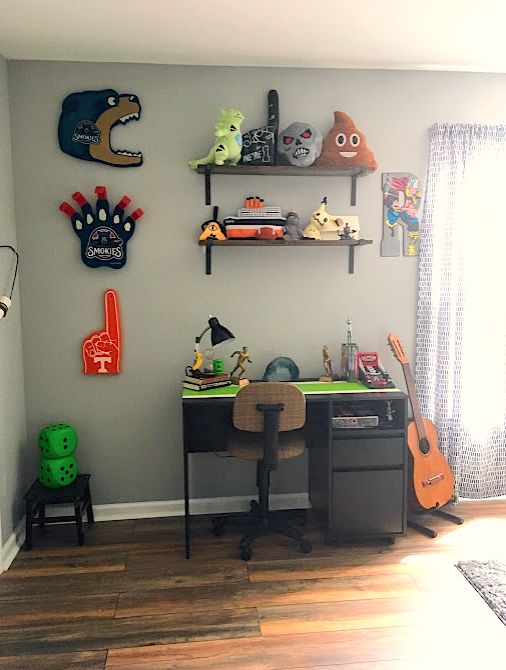
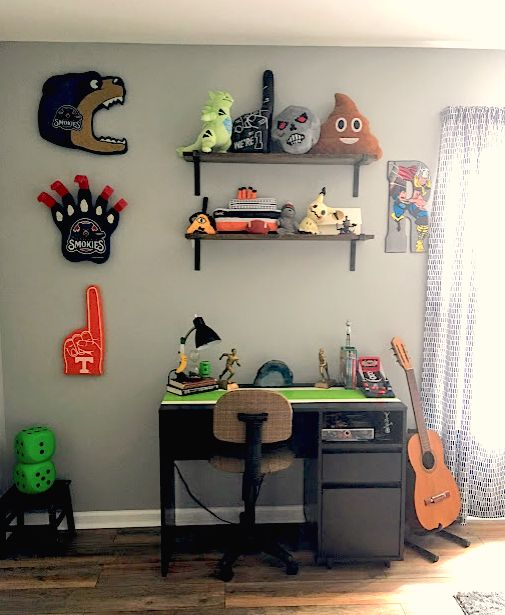
As you can see, the simple paint job went on to become new flooring, wall shelves, and a fun desk that's appropriate for a tween boy. You'll find more detailed step by step instructions on the blog.
Comments
Join the conversation
2 comments
-
Desk is amazing. The room is very cool. Great job.
-
Thanks William!


Frequently asked questions
Have a question about this project?