


Pumpkin Stack Growth Chart
2 Materials
$100
6 Hours
Easy
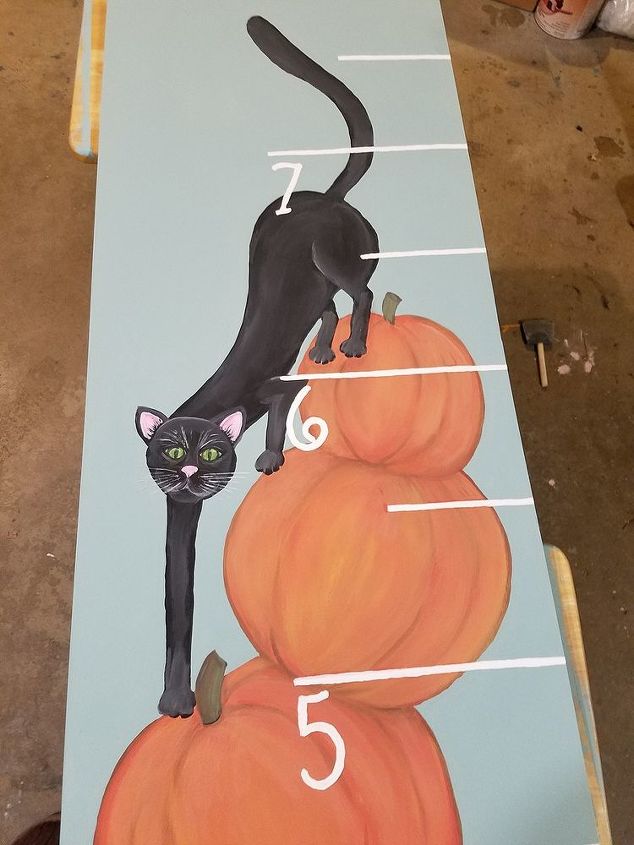
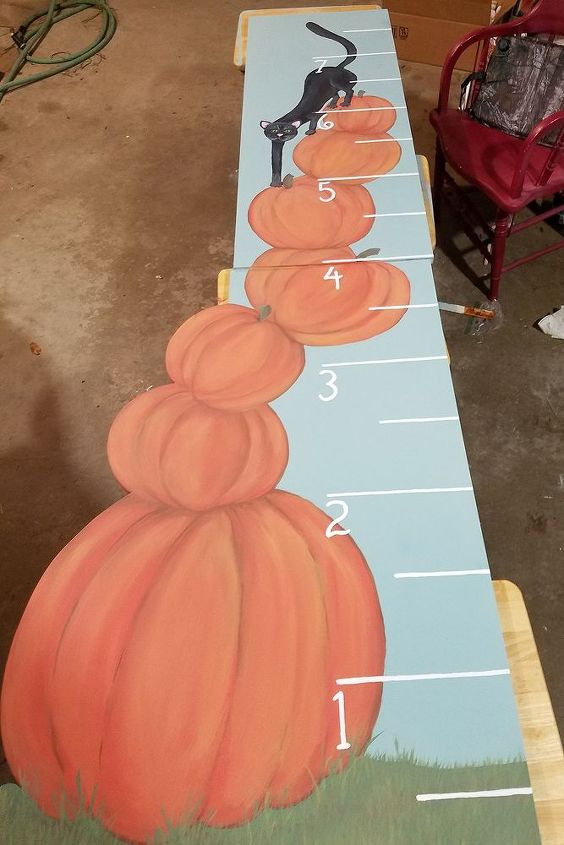
Each year, Woodcraft corporate employees bring their children and grandchildren to the office, and we have a special Halloween Trunk or Treat for them.  Tasked with painting something for a photo op for the party, I opted for a stack of nearly-toppling pumpkins and a slinky black cat with measurement markings along the side. This fun, new display will become something we use from year to year, and the little kiddies can see how much they’ve grown.
Tasked with painting something for a photo op for the party, I opted for a stack of nearly-toppling pumpkins and a slinky black cat with measurement markings along the side. This fun, new display will become something we use from year to year, and the little kiddies can see how much they’ve grown. CUT OUT
Ben Bice from our Product Development Team got two 3/4" x 48" plywood birch boards for the project. Using a jigsaw, he cut around the shape I sketched on the bottom half for the first three pumpkins and cut down the top board to 18" wide. He saved the scrap wood for later use. He sanded the edges lightly so there wouldn’t be any splinters before I began painting it.
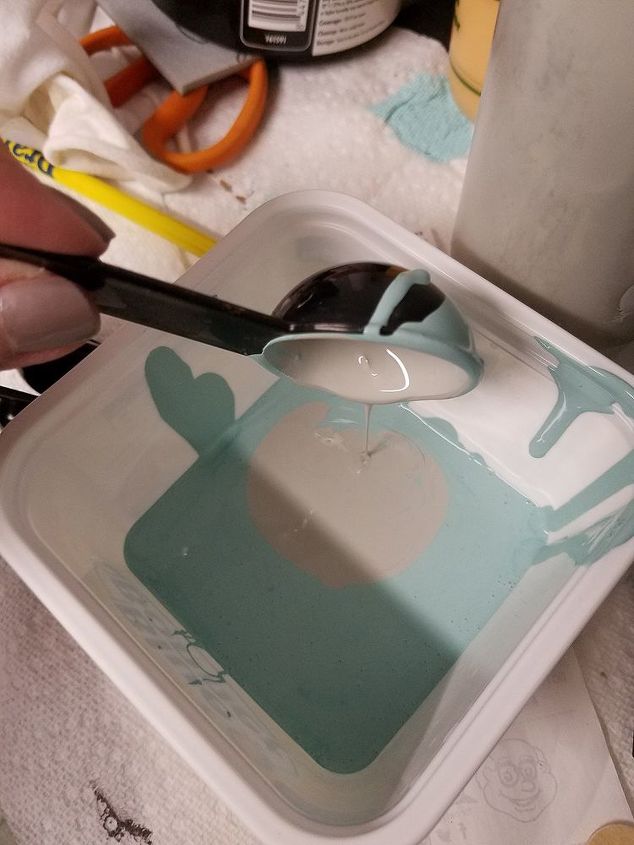
Mixing colors
COLORS - Next it was my turn. I gathered the colors I needed, including three mixed colors using Black Dog Salvage Furniture Paint recipes. You can find all the paint and recipes here. I used little lidded containers for the mixed colors in case I needed to touch up before topcoating the entire piece. Sky: Mountain Mist mix Grass: Moss mix Cat: Black Dog Black Lettering: Clean Canvas Pumpkins: NEW RECIPE Bumpity Pumpkin – 1 part I Need a Bandage + 1 part Caution: Dogs at Work
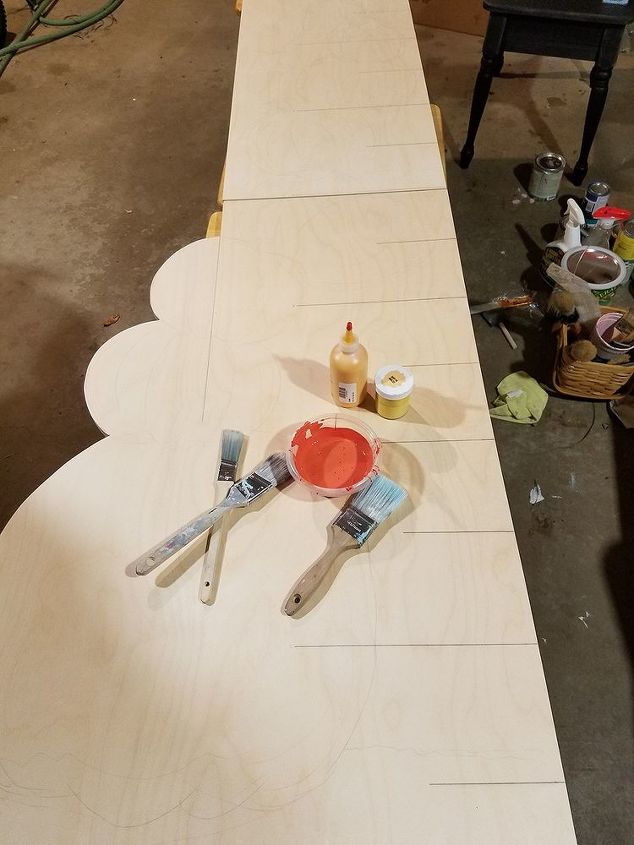
Get everything ready
Paint is all gathered and mixed. Details sketched out. Now it's time to paint!
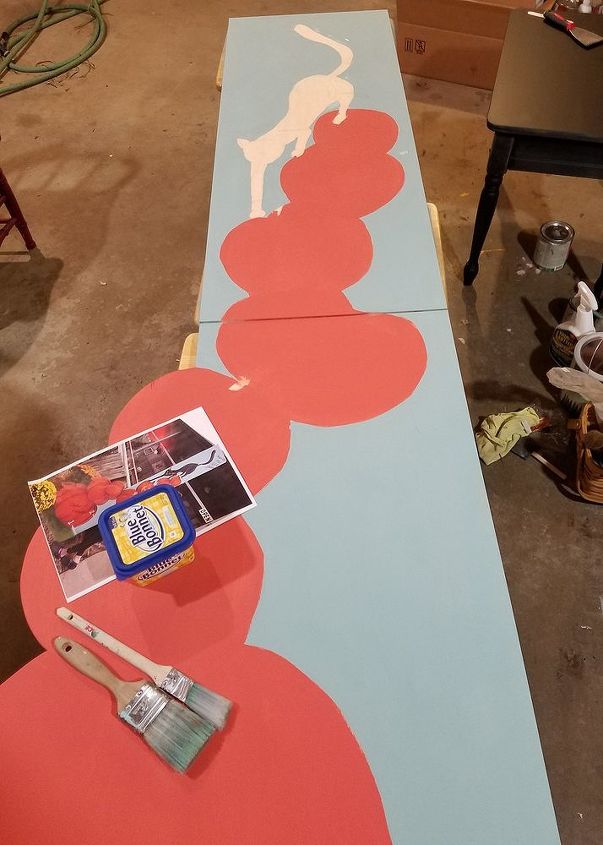
PAINT - I roughly sketched out the design on the board, so I started painting with the pumpkins since the other parts revolved around them. I basecoated the pumpkins with Bumpity Pumpkin and filled in the grass area with Moss. Next, I painted the sky with Mountain Mist, kind of leaving an outline where the cat would go. You can see my inspiration photo in the picture.
Shading and highlighting
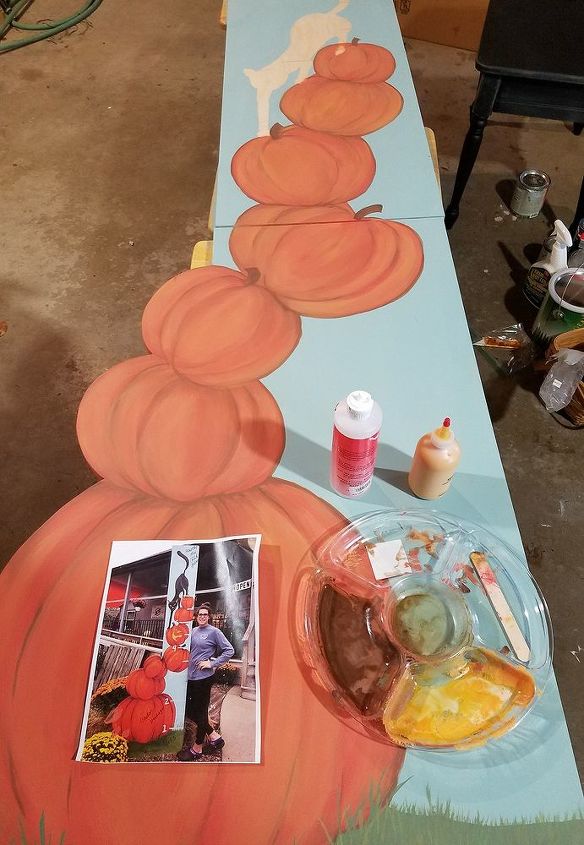
I added some dimension to the pumpkins with Dirt for the shadows and Caution: Dogs at Work for the highlights on the “ribs,” mixing with General Finishes Extender to blend the colors. I continued doing this up the stack of pumpkins and also painted in a couple of stems with blends of Dirt and Moss. For the grass, I simulated some uneven areas with Dirt over top of the Moss, and then layered blades of grass over the entire area by using a mix of Moss, Dirt and/or Caution: Dogs at Work. I carried the grass up on the bottom edge of the biggest pumpkin in a few places. (How do you like my handy mixing tray? A washable Dollar General “party tray” that I got for a buck!)
Slinky black cat
The next step was to paint the cat with Black Dog (ironic, huh?) and blend in some highlights with Galvanized so he wasn’t just a flat black blob. I painted his eyes, nose and ears with little bottles of acrylic paint that I had on hand so I didn’t have to mix up a color for such a tiny part. I used a two colors of pink for his nose and ears and two shades of bright green for his eyes. Then I added some sparkle on his eyes to make them shine a little! His whiskers were painted on with a mix of Galvanized and Clean Canvas.
Add marks for measuring
For the ruler marks, I measured off every 6", making a shorter line for the “in betweens.” I used two guide marks for each one to make sure I went straight across, and then made a pencil line for each. I painted those all with Clean Canvas, including the sketched-in numbers I drew at about 3" tall. I did a few touch-ups and my part was done!
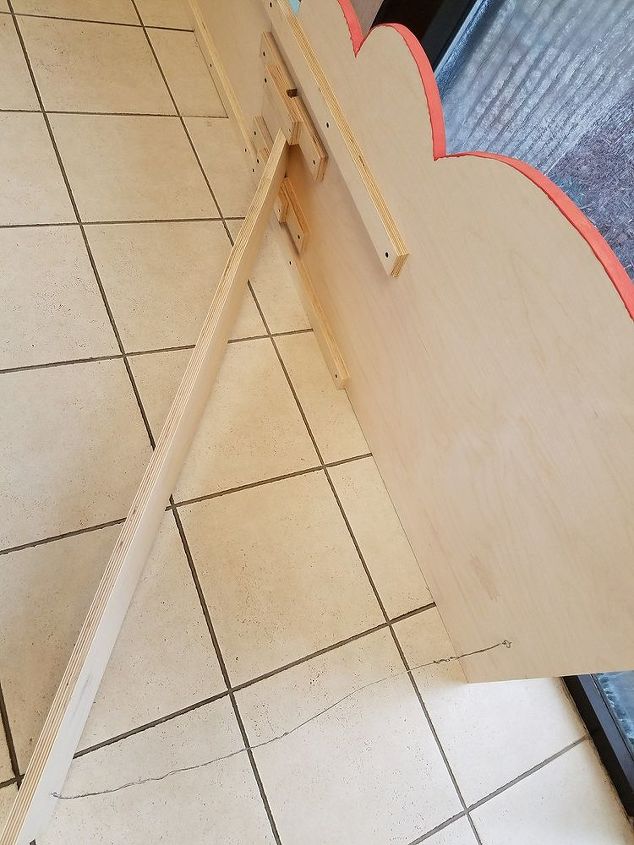
Base for standing
BASE - Ben again came to my aid when I handed over the painted project, and he created a base for the display to stand with the scrap boards. He and Product Manager Pete Collins made some supports on the back, which also allowed the project to be taken apart for storage by removing just three screws on each side of the bottom half.
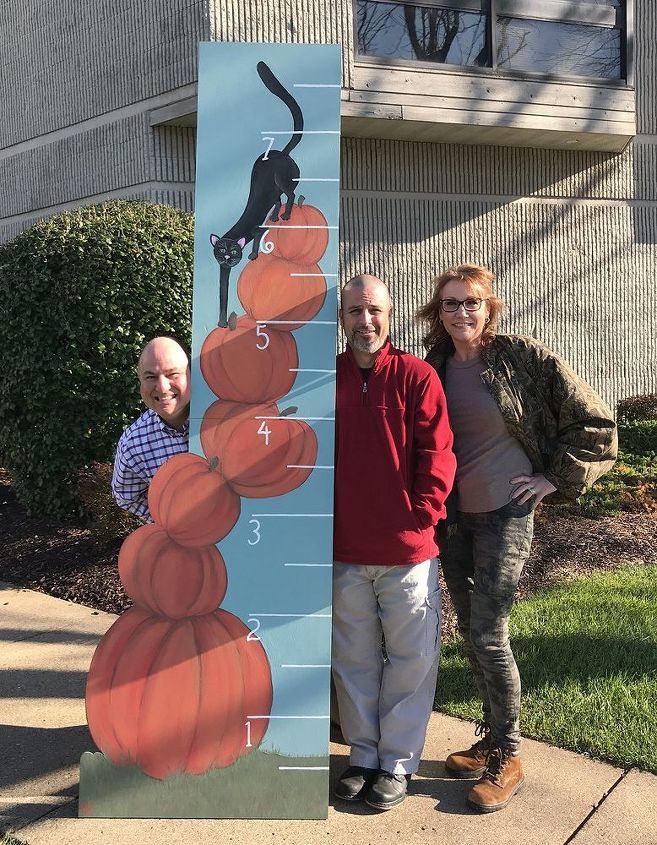
Ready for the kiddies!
Resources for this project:


Any price and availability information displayed on [relevant Amazon Site(s), as applicable] at the time of purchase will apply to the purchase of this product.
Hometalk may collect a small share of sales from the links on this page.More info

Want more details about this and other DIY projects? Check out my blog post!
Comments
Join the conversation
2 of 11 comments
-
Bet the children loved it! Very creative!!


Frequently asked questions
Have a question about this project?