


Easy DIY Vine Wreath + A Problem-Solving Thrift Store Repurpose
7 Materials
$12
2 Hours
Easy
Vine wreaths are so simple to make yourself. If you have access to fading fall vines, you've got all you need to make your own beautiful wreaths, and if you've ever picked up a dingy mirror at a thrift store...
Read on to see how I combined the two to make a beautiful indoor wreath decor piece that used spent summer vines and a sad thrift store mirror.
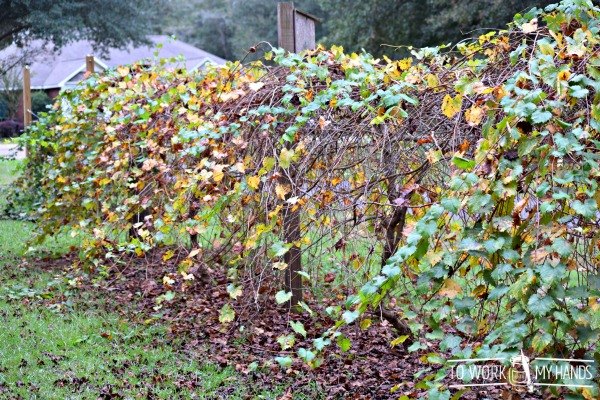
To get started, you'll need a supply of vines. We have a muscadine arbor in our yard that has almost lost all of its summer leaves, and is ready to be trimmed; perfect for some easy wreaths.
Trim enough vines to supply the size wreath you want, and remove any lingering leaves. You can also remove tendrils if you prefer. I like to leave them on.

Start by shaping a vine into the size you want your wreath to be. The finished wreath will be slightly larger because of the width of added vines, so keep that in mind if you're looking for a very specific size.
Twist the large end over a couple of times to hold it in place, then begin wrapping the shorter end around and through the loop until you reach the end. Find a loose place between two twists and secure the end.
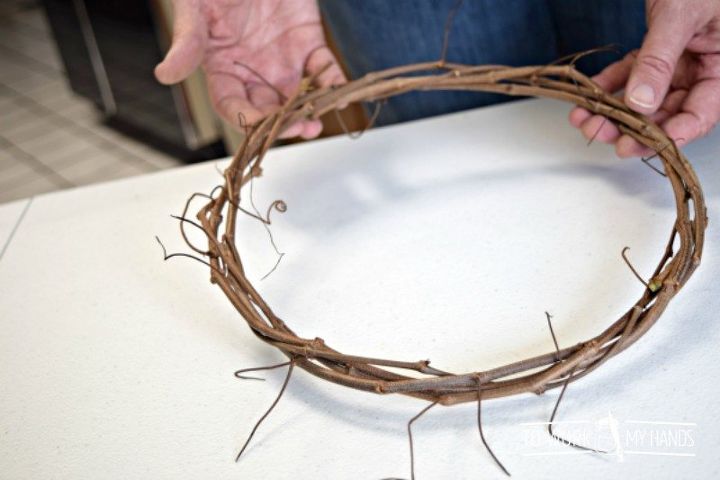
Continue adding vines until you get the size and thickness you want. Try to start a new vine in different places each time to keep it nice and even.

I finished up my wreath outdoors and my Little Maker joined me and made one of her own with my extra vines! I've got to say this was my favorite part of the entire project - sharing it with my little sweetie! (I'm sharing a pic of her finished project on my Instagram if you'd like to see it.)

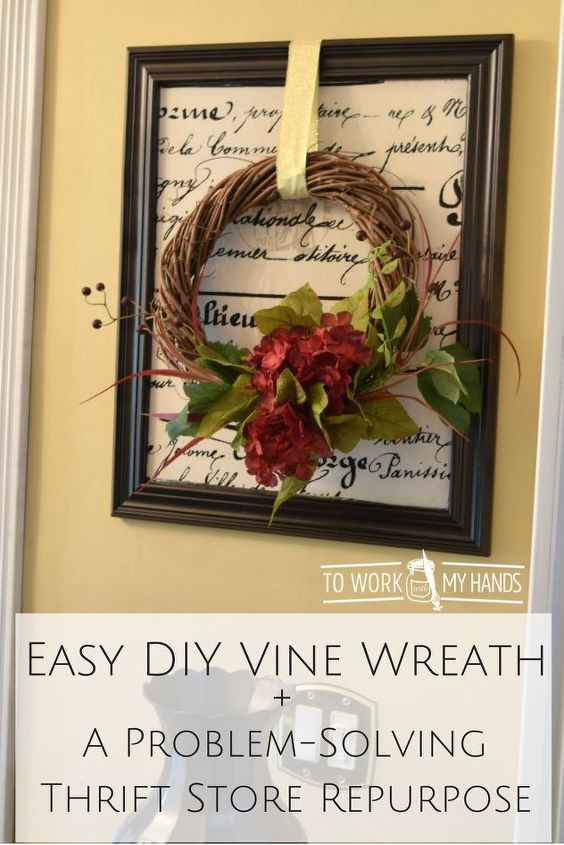
Back inside, I added some floral elements to the bottom right corner. These all came from a single spray of flowers and I simply cut them apart and poked them in individually: 3 flower groups for the focal point, and a longer sprig on each side.
During the summer I found a pair of wall mirrors at a thrift store. I upcycled one of them, and set the second aside for a later project.
After a good cleaning, I realized the second one had more of a problem that just dust. It had that dull, dingy look that was beyond a cleaning. The frame was perfect, but the mirror was useless as a pretty mirror.
So...this one, not useful as an upcycle, got a repurpose instead!
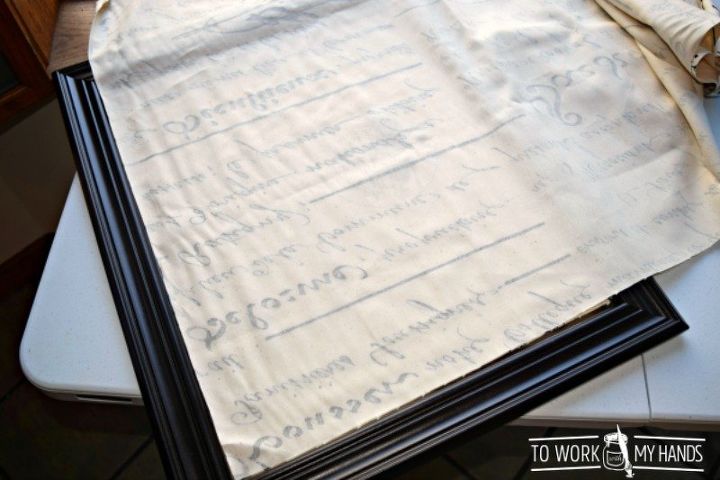
I started by giving the frame a coat of my favorite spray paint, Rust-Oleum's Oil Rubbed Bronze, then measured a piece of duck fabric to fit the mirror.
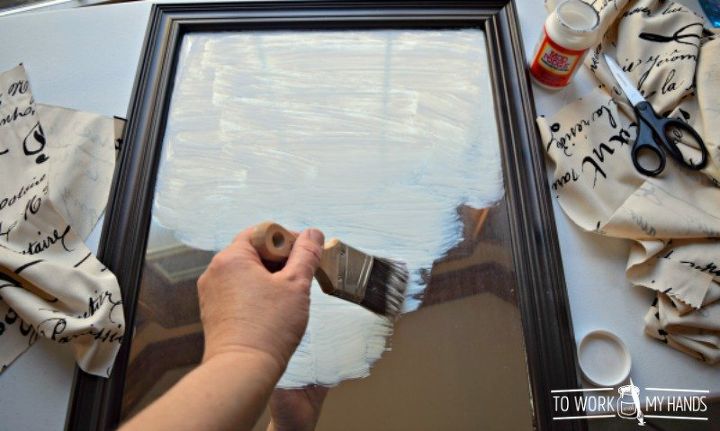
Next, I coated the sad mirror with Mod Podge, then smoothed the fabric over it.

Last, I used a length of gold ribbon to attach the wreath to the back of the frame (I used hot glue and a couple of thumb tacks into the frame to secure it) and nobody can even tell it was once a mirror!
This is another great Pocket Time project. If you love to get your hands into a creative project, but don't have a lot of free time, these are the absolute best kinds of projects because they can be worked on a little here, a little there, and before you know it, you'll have a beautiful, finished project to enjoy or share!
Resources for this project:
See all materials


Any price and availability information displayed on [relevant Amazon Site(s), as applicable] at the time of purchase will apply to the purchase of this product.
Hometalk may collect a small share of sales from the links on this page.More info

Want more details about this and other DIY projects? Check out my blog post!
Comments
Join the conversation
4 comments
-
I never realized how easy a vine wreath was to DIY! Now to get my hands on some vines.....
-
Very Nice!!


Frequently asked questions
Have a question about this project?