The Best of This Old House's Budget Upgrades & Money-Saving Ideas

ThisOldHouse
by ThisOldHouse
Every year, as part of our annual reader-remodel contest, we have This Old House magazine readers send us their most clever penny-pinching, DIY hacks. Here are some of the best! And, we hope that YOU will submit YOUR solutions using here at Hometalk for your shot at a $1000 category prize in The Search for America's Best Remodel and a chance to be featured in TOH magazine!
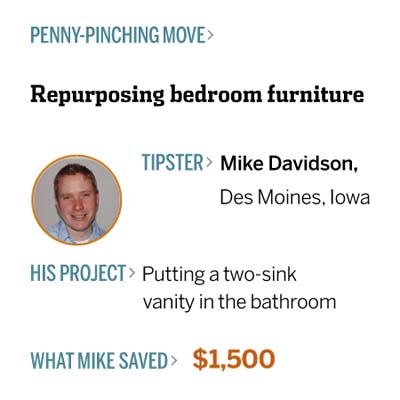
"The previous homeowners left an old dresser in the basement. I cleaned and painted it, then cut out the backs of the top drawers to accommodate water lines. Then I tiled the top of the dresser, put a couple of holes in two ceramic pasta bowls for sinks (make sure they're deep enough to avoid splashing), and found some inexpensive bar faucets to complete the vanity."


Want to build your own? Here's how to build a vintage-look dresser vanity, the TOH Step-by-Step> http://ow.ly/v8y9J
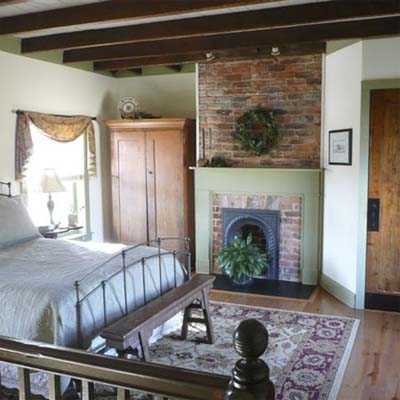
Dressing Up Ceiling Timbers


Who> Daren Rogers


Where> Montclair, NJ


What> "I found a cheap way to dress up ceiling timbers. I ripped down a hung ceiling when we remodeled, only to find it had been covering up a stained, sagging plaster-and-lath ceiling. So I ripped that down, too, and exposed the Douglas fir collar ties that help hold up the roof. They were dirty but structurally sound, and didn't need replacing. I boxed them out in oak plywood and stained them to match the refinished floors, and now the room feels airy and spacious."


SAVED> $1,000
"As we finished the final details of the gut renovation of our 1930s stone house, we coveted copper switch plates for lights and electrical outlets. But at $25 or more each, the price tag was way over our budget. So I bought cheap metal switch plates from the big-box store and copper foil sheeting from the crafts store and used spray adhesive to affix the sheeting to the plates. My husband even embossed a beautiful fern design on some of them. They are developing a patina that gets richer every day, and we still have enough foil to make 'copper' plates for the entire neighborhood."
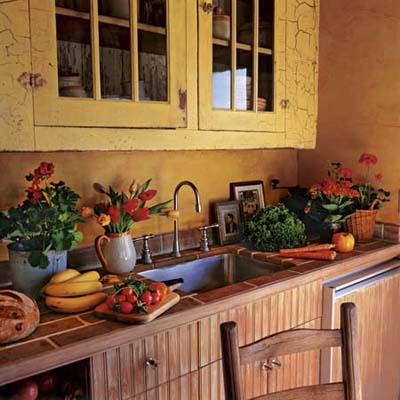
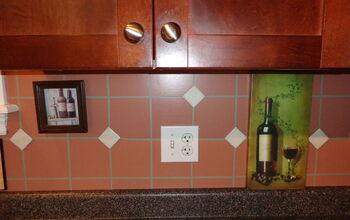
Budget Backsplash


Who> Lisa Nelsen-Woods


Where> Columbus, OH


What> "I used tough paint as a backsplash. For a long time, my husband and I were at odds about what material to use for our kitchen backsplash. We decided to make a quick fix while we weighed the options because the builder's paint job was terrible—the paint would come off with a light swipe of a damp sponge! I primed the wall with stain-blocking primer, then coated it with black chalkboard paint. Lo and behold, we found our long-term solution. It's easy to clean, durable, cheaper than tile, and much easier to change if we get tired of it!"


SAVED> $372


Another wallet-smart backsplash idea? Beadboard! Here's the how-to> http://ow.ly/v8xRK
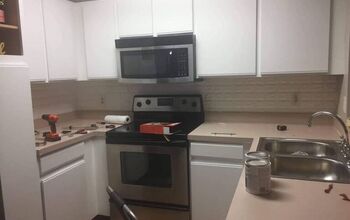
"Instead of paying a lot of money for a tile backsplash, I measured the backsplash area, went to a restaurant-supply store, and got a piece of stainless steel custom-cut for the space. I glued it on myself, and it fits perfectly and works great. For my countertops, I looked at granite but instead ended up buying butcher block from IKEA and had my contractor cut it to fit. I then stained it to match my floors. With an open kitchen plan, it really gives a finished look to the space."
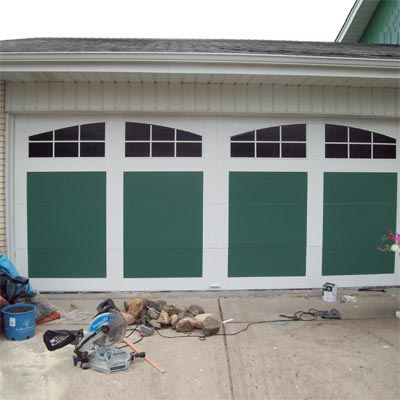
Faux Carriage-Style Garage Doors


Who: Tracy Westwater


Where: Orland Park, Ill.


"I always wanted carriage-style garage doors, but they were way beyond my budget—that is, until I decided to create a faux version of them on my own. After removing the existing trim, I sanded the door and primed it. Then I drew a carriage door design right on the door. Some black gloss paint created surprisingly authentic-looking "windows." To add dimension, I cut some plywood sheets into strips, which I attached to the door with liquid nails, giving it a raised-panel look. After tacking on some used gate hinges (just $3.90 a pair!) and handles, ta-da! I had carriage doors that cost just $65!"


What Tracy Saved: More than $2,000


Love creative paint ideas? Check these out> http://ow.ly/v8BNL
"I was renovating my fixer-upper, which was built between 1900 and 1920, and needed a countertop for a new peninsula in the kitchen. As we demolished interior walls, we found many intact 2x4s made of pine and realized these could be made into a counter easily. After removing all the lath nails, I drilled some holes through them, inserted threaded rods, and glued them together, using wood filler to make repairs where needed."
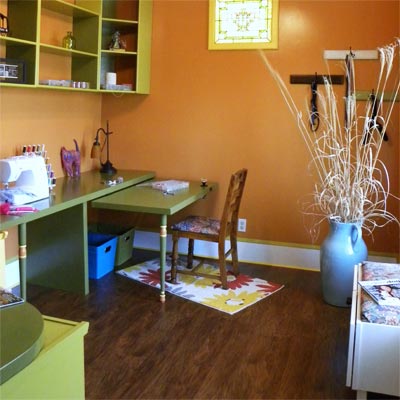
From Two Old Doors and a Throwaway Cabinet to the Ultimate Home Office


Who: Robin Martin


Where: Manchester, Mich.


"I was in desperate need of more storage and workspace in my small home office, but I didn't want to spend too much on a new desk and cabinetry or shelving. Instead, I picked up some old doors and a used upper kitchen cabinet at a local salvage shop. With some help from my neighbors, we cut down one of the doors to create a desktop, then hinged another door beneath it to conceal some storage bins. It's great because the hinged door can be flipped up for additional workspace. The kitchen cabinet provides more storage, but we also turned it into an elegant window seat by attaching legs to the bottom, painting it, and topping it off with a padded seat covered with material we found at the Salvation Army store."


What Robin Saved: At least $328 What Tracy Saved: More than $2,000
"Instead of buying trim to frame doorways and windows, my husband and I use 3-inch-by-8-foot furring strips. They're inexpensive and come in bundles of six at the home center. The strips can be left as is for a simple, clean look, or you can use a router to create more decorative profiles. So far we've used them for a window, doorways, and baseboards in our foyer and living room. They give us a look that's a little different and unexpected."
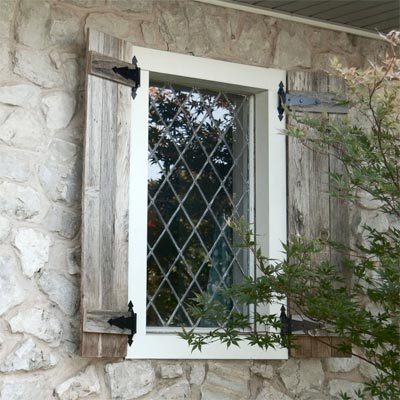
From Old Fence to Shutters


Who: Jaime Shackford


Where: Edmond, Okla.


"I was never a big fan of the vinyl shutters the previous owners installed on the front of our house. So, after tearing down an old fence panel that was hiding some pool equipment in our backyard, I decided to create my own authentic board-and-batten shutters. First, I measured each window and cut the reclaimed boards accordingly. Then, I glued and nailed each panel together, added strap hinges, and applied a wood stain/sealer. The whole project cost me just $75."


What Jaime Saved: Around $2,100


Here's the official TOH Step-by-Step on installing exterior shutters>http://ow.ly/v8BtA It's easier than you think!
"My husband and I split a large full bathroom into a guest half bath and a master bath. After getting several bids from reliable contractors, the price was still more than we had planned. Most contractors supply materials at retail prices, so I asked what the charge for the work would be if we bought materials ourselves. By having our contractor do installation only, and buying materials online or from discount sources ourselves, we were able to afford the renovation."
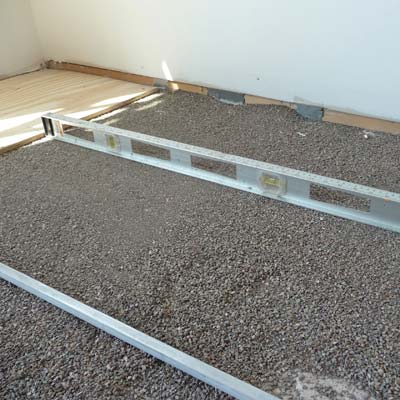
Leveling Floors With Kitty Litter


Who: Robert Lattin


Where: Minneapolis


"There are lots of commercial leveling compounds on the market, but they can be expensive and difficult to mix and pour—especially if you have a large surface area and are working by yourself. When I found out my floors were sloped, my solution was to use plain old kitty litter instead. After I checked to make sure the poured litter was level, I screwed half-inch plywood over it to make a flat surface. The litter levels the floors and also acts as a sound dampener."


What Robert Saved: About $3,060


For more money-saving tips, see this popular TOH gallery, 21 Ways to Save on Your Remodel> http://ow.ly/v8CpL
Frequently asked questions
Have a question about this project?
Comments
Join the conversation
 1 comment
  • Catherine Catherine on Feb 24, 2015
    I could never decide on a kitchen backspash, although I knew I wanted one but couldn't afford to both buy the tiles and pay for installation so I did a faux backsplash using oil based paint, 1/4 inch painters tape and one sheet of small tiles from Habitat for Humanity - 10 years later it's still holding its own and has withstood a lot of scrubbing.
Next