


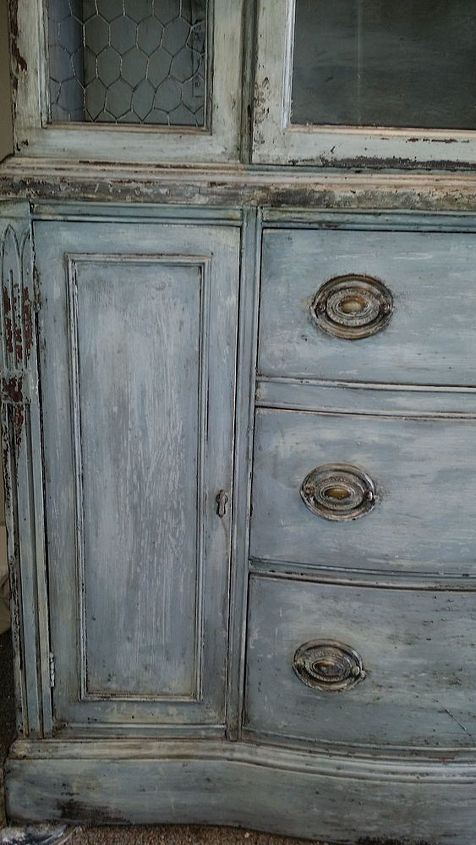
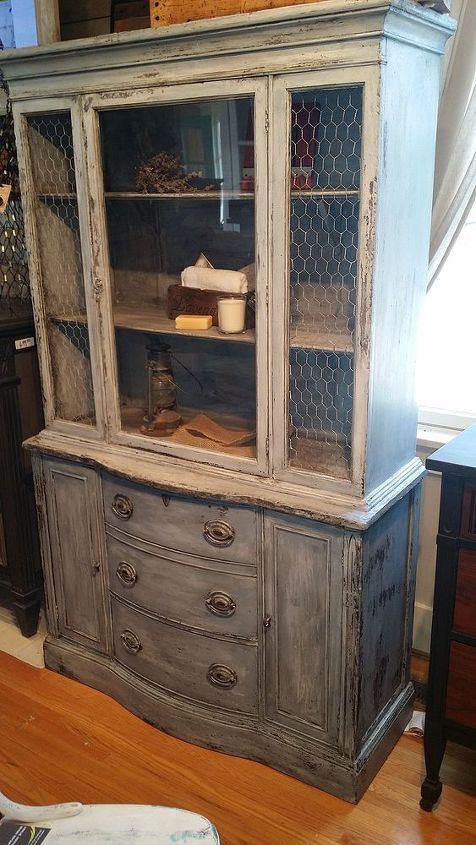
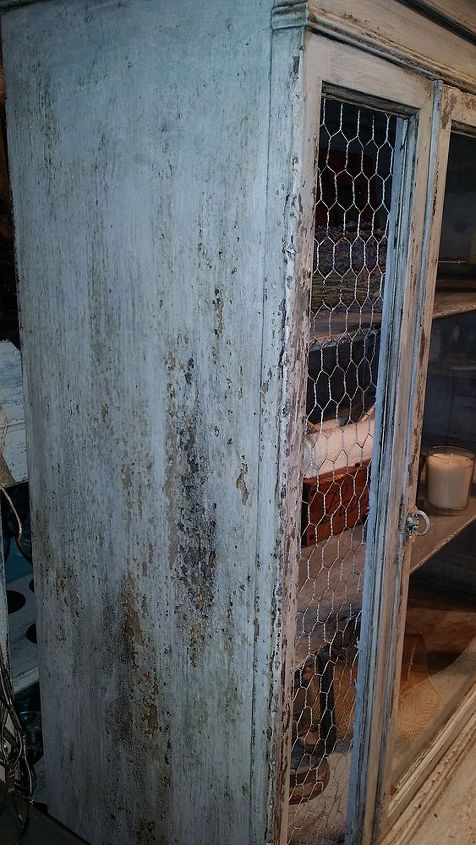
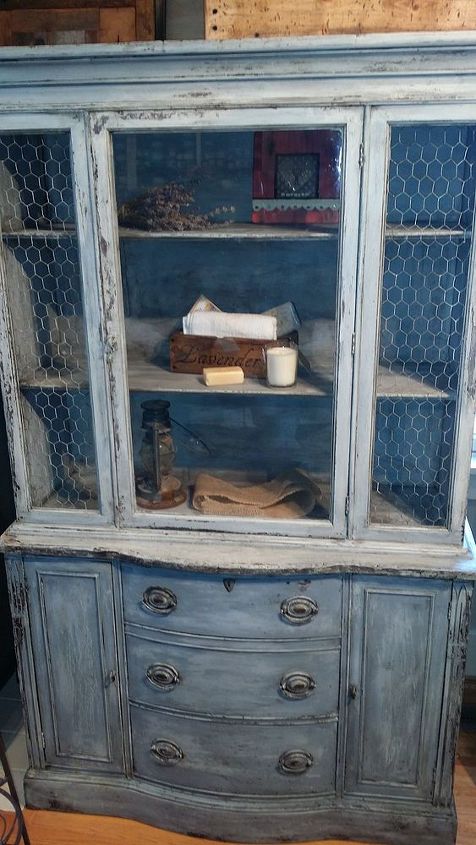
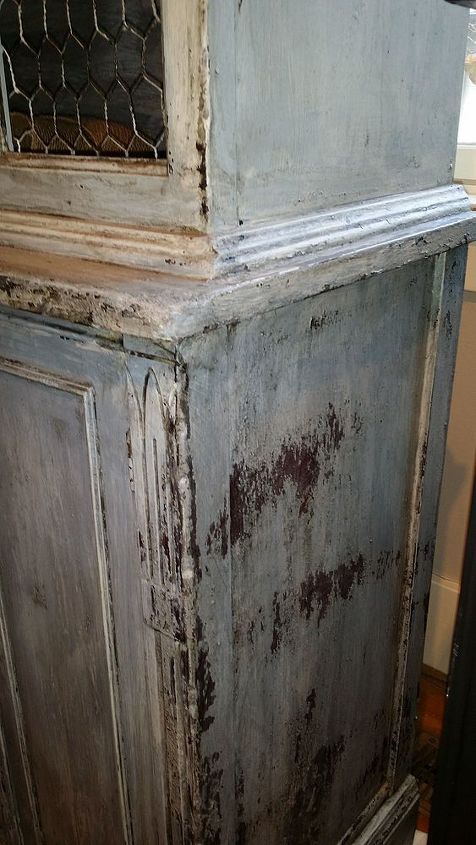
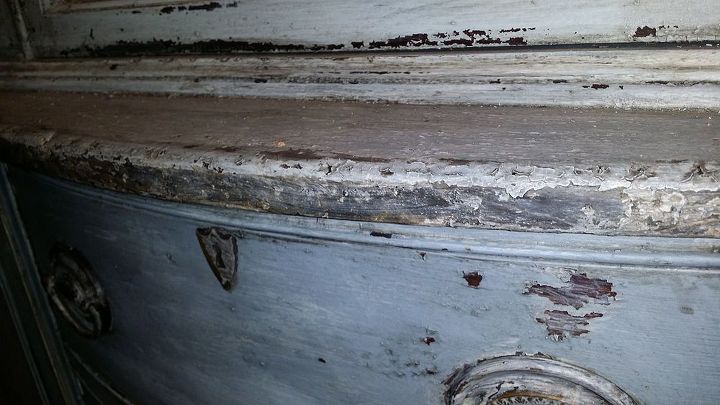
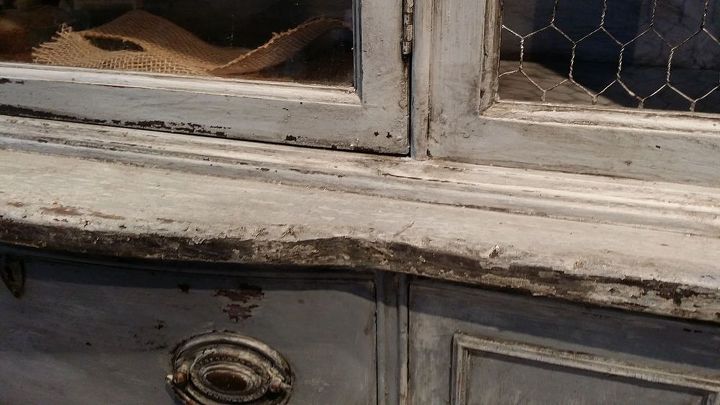
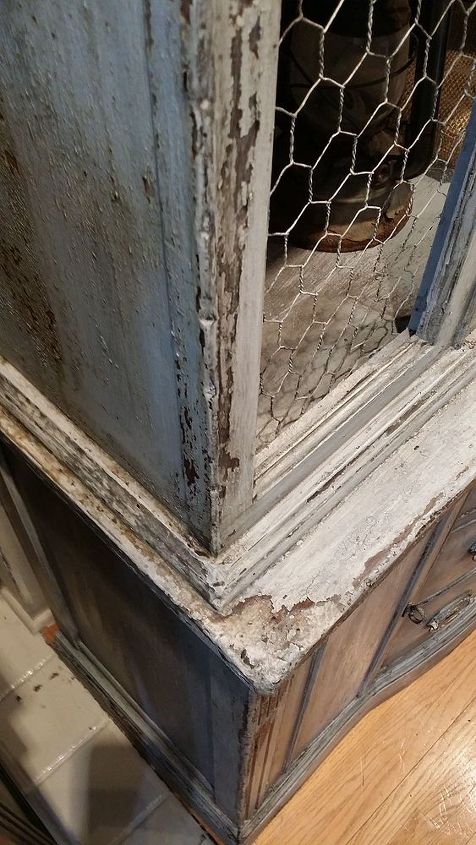
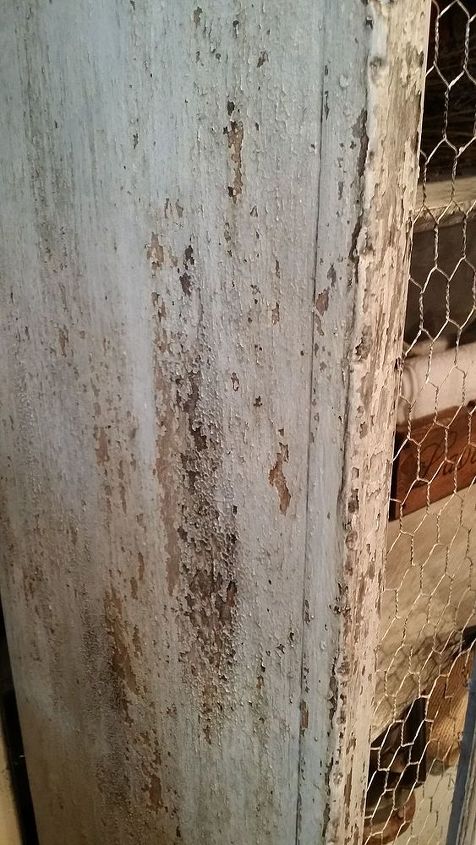
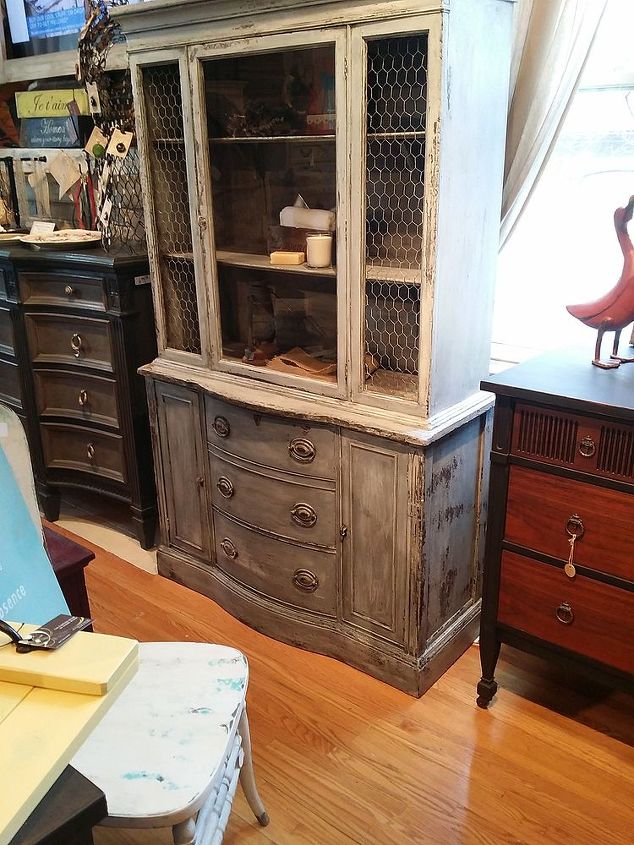
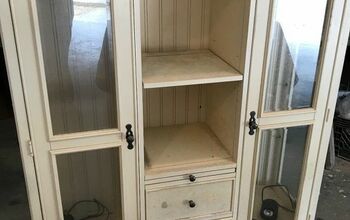
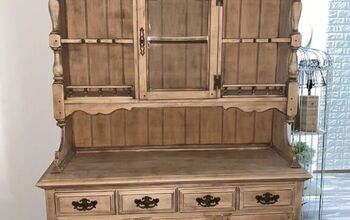
Forgotten Low Country Style Hutch
Looking old and like a relic, this was a fun project. ReLux Vintage is in Geneva IL
We ship CeCe Caldwell natural paints and finishes nationwide! See link for more info.
CeCe Caldwell’s Natural Chalk and Clay PaintClean and dry object to be painted. Vigorously shake can for a full 1-2 minutes. You should pour the paint into a separate container to paint out of — painting straight out of the can can lead to contamination issues. With a good quality brush or roller, apply one coat. Allow paint to dry very well — overnight is best and longer may be necessary in high humidity areas. As the paint dries it is going to become much lighter than it is when it is wet. Apply second coat, if needed, and allow to dry again. You can burnish with piece of brown Kraft paper or very fine grit sanding block over your piece before or after you apply your finish coat.General Waxing TipsApply all wax products sparingly. Use a ‘less is more’ approach. An easy way to learn the proper amount of wax that should be on your brush is to remove a small portion of wax from the can and spread onto a piece of cardboard or a paper plate. Pick up the wax with your brush or cloth, from the cardboard, wipe your brush/cloth off on another area of the cardboard/paper plate to ensure it is evenly coated and not overloaded in a single spot on the brush/cloth. Apply to project, returning to the cardboard/paper place to pick up additional wax. Often you can pick up from the area on the cardboard/paper plate that you wiped off your brush/cloth on prior. Endurance or Satin Finish should not be put over any type of wax (Clear Wax, Waxing Cream, Light/Dark Aging Cream).If you find the wax is moving or removing the paint, it could be one of a couple things: paint is not completely dried, too much wax, or applying too much pressure.Waxing Cream Instructions for UseApply Waxing Cream with a flat (not pointed) bottom brush or with a piece of lint-free cheese cloth. Apply a VERY thin coat of Waxing Cream; similar to the amount that you would have on a paint brush if you were dry brushing with paint. SPARINGLY is the key word. Rub/buff in with a cloth/rag. Most find this thin, first coat is ALL that is needed. It shines up quickly with a light buffing. You can immediately add a second coat if needed/desired. Waxing cream takes approximately 30 days to fully cure.This is the same way I apply the Clear Wax, only I make sure I have even less on my brush than with the Clear Wax. The number one mistake made with any wax is over applying it. With all waxes, you will achieve best results if you do 2 light coats versus one heavy coat. If you are getting splotching – you have applied too much. For continued shine and protection, re-apply the clear wax every 6-12 months under normal conditions.ADVANTAGES OF WAXING CREAM: Uses less wax to achieve better results (more economical) Less effort (buffing) needed to get higher shine. Deeper penetration of wax into the paint.Clear Wax Instructions for UseClear Wax should be applied in a thin, even coat with a flat bottom brush or lint-free cloth. Apply sparingly. Always use less wax than you think is needed. It is best to apply several thin layers than one heavy layer. Wipe away excess. The surface should then be thoroughly buffed with a dry cloth, piece of brown kraft paper or finishing pad after 2-4 hours. For an even hard finish, the wax can be rebuffed 2-4 days after the initial buffing. This product requires several weeks to fully cure. Freshly waxed surfaces should be kept free of moisture and heavy use for about a week or so. For continued shine and protection, re-apply the clear wax every 6-12 months under normal conditions.Dark Aging Cream Instructions for UseBefore first use stir well, mixing wax from bottom into upper layers of wax, as the pigment has a tendency to settle to the bottom of container. Apply sparingly with a soft brush to surface that has been treated with Clear Wax or Satin Finish. It becomes thin (like an oil) as you work with it. Feather into areas that you to appear aged. Remove any extreme excess. Leave more cream in the areas that you want the deeper pigmentation. Remove all cream from areas that you do not want an aged appearance. Allow to rest several minutes, before wiping away all excess. Apply a second coat if needed for deeper color. The cream takes longer to dry than wax. Do not over saturate your wood with the wax. Build color slowly. Use only a soft cloth to buff. Aging Cream goes on much lighter, straight from the container, than most dark waxes. For a harder finish, apply a coat of the Clear Wax several days after the application of the Aging Cream.Aging Cream and all pigmented waxes take practice. Always work on a sample board prior to first use. Different personal techniques can achieve similar results. Practice on a sample boards helps you develop your personal application method that works best for your desired results.Endurance Instructions for UseApply Endurance over thoroughly dried paint or stain. Endurance should not be put over any type of wax (Clear Wax, Waxing Cream, Light/Dark Aging Cream). Twenty four hours of drying is recommended before you apply to ensure no moisture is trapped between the paint and the finish coat. Up to six layers can be used for the ultimate protection of a surface. To apply, always work in the direction of the grain, using a foam brush, staining pad or high quality synthetic brush. Apply thin, even layers. Allow each layer to dry completely prior to application of the next layer. After every second layer, lightly sand with a very fine sandpaper or piece of brown kraft paper. Burnish your final coat with a piece of brown kraft paper (a grocery bag is great, low cost source of kraft paper, but use unprinted side). Use 4-6 layers on surfaces such as a the tops of a family dining table, coffee table or end table.Endurance is the finish recommended for cabinetry and table tops. It is a satin finish for indoor use. Endurance is non-yellowing. If you desired an aged appearance, we suggest you use our Clear Glaze tinted under the Endurance to achieve the desired effect. Endurance needs one week to fully cure.Satin Finish Instructions for UseSatin Finish is a durable topcoat. Satin Finish should not be put over any type of wax (Clear Wax, Waxing Cream, Light/Dark Aging Cream). Stir well before use. It should be applied over painted surfaces in a thin, even coat with a fine brush, foam brush. For ease of application, it can be applied diluted with approximately 25% water, using several light coats to achieve a durable finish. For a hand-waxed feel, after final coat of Satin Finish has dried completely, you may apply Clear Wax Or Waxing Cream on top of the Satin Finish. Give you piece a light sanding with kraft paper or very high grit sand paper, then wax. This product requires several weeks to fully cure. Freshly finished surfaces should be kept free of moisture and heavy objects. Heavy use should be avoided for a week or so.A single coat Satin Finish may be diluted 50/50 with water for use on projects not receiving daily use (for example, a picture frame).Clear Glaze Instructions for UseGlaze is generally used as a enhancing technique rather than a final finish. Clear Glaze can be tinted with dry pigments, universal tints, or CeCe Caldwell’s Paints to achieve the desired color or it can be used clear to give a light sheen to décor items that will not be handled regularly (i.e. picture frames). A prep layer of uncolored Clear Glaze is recommended for novice users as it allows more open time to work with the colored Glaze.Tea-Colored Glaze: Add small amount of Virginia Chestnut to into Clear GlazeTobacco-Colored Glaze: Virginia Chestnut and a touch of Vermont SlateBlack/Gray Glaze: Beckley Coal, depending on amount usedMix well. Apply with brush, sponge or rag to furniture. Work in small sections and keep a wet edge. Glaze can be moved around on surface to create the desired look. Generally, the color is more concentrated around decorative details and outer edges and becomes more subtle toward the center of a flat surface. However, it can be used for an overall aged effect. A coat of Endurance or Satin Finish is recommended to give your piece a long lasting finish.Aging Dust Instructions for UseApply a thin coat of Clear Wax to project piece. While wax is still tacky, sprinkle a small amount of Aging Dust onto crevices, carved details, corners and other areas that would have naturally collected dust over the decades. Work the Aging Dust into these areas with a soft brush. Spread excess toward flat surfaces. Let sit for 20-30 minutes while wax dries. Remove any excess with a soft cloth. Buff item well after wax has dried completely.Metallic Wax Instructions for UseApply a very thin coat of metallic wax to dry surface to highlight details or give shine. Additional wax can be applied to deepen the color. Allow wax to fully dry before use.

Want more details about this and other DIY projects? Check out my blog post!
Comments
Join the conversation
2 comments
-
JUST BEAUTIFUL!!
-
What does burnish mean?


Frequently asked questions
Have a question about this project?