


Extremely Inexpensive Laundry Sorter, Inspired by Fellow Hometalker
$4.85
45 Minutes
Easy
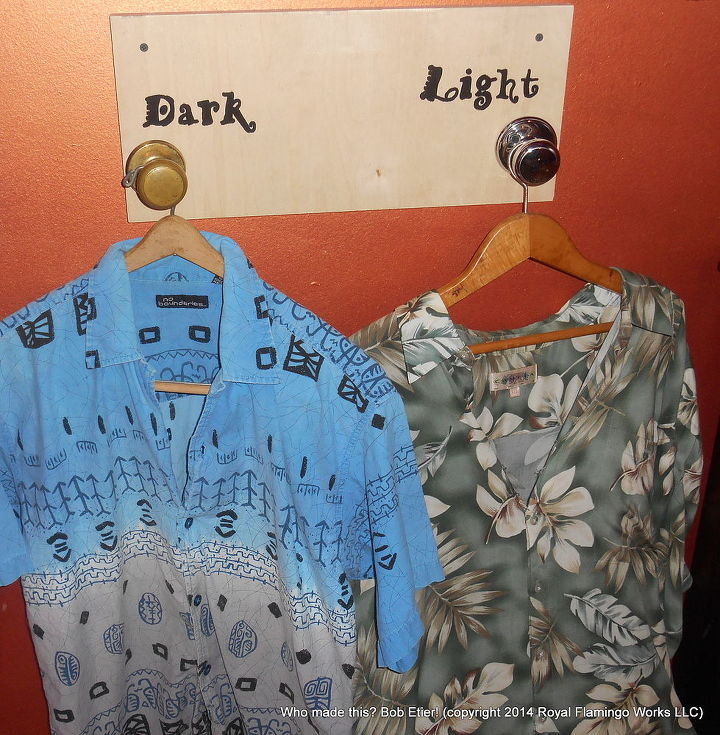
I was so inspired by @Thrify & Chic 's (Sandy, UT) DIY laundry room organization (http://www.hometalk.com/diy/laundry-room/organization/diy-laundry-room-organization-3355660), I wanted one of my own and was going to order the hanging laundry bags from Amazon when I thought, "I wonder if I can do this a whole lot cheaper." The idea hit me to use two shirts on hangers as the laundry bags and hang them from hooks on the wall.
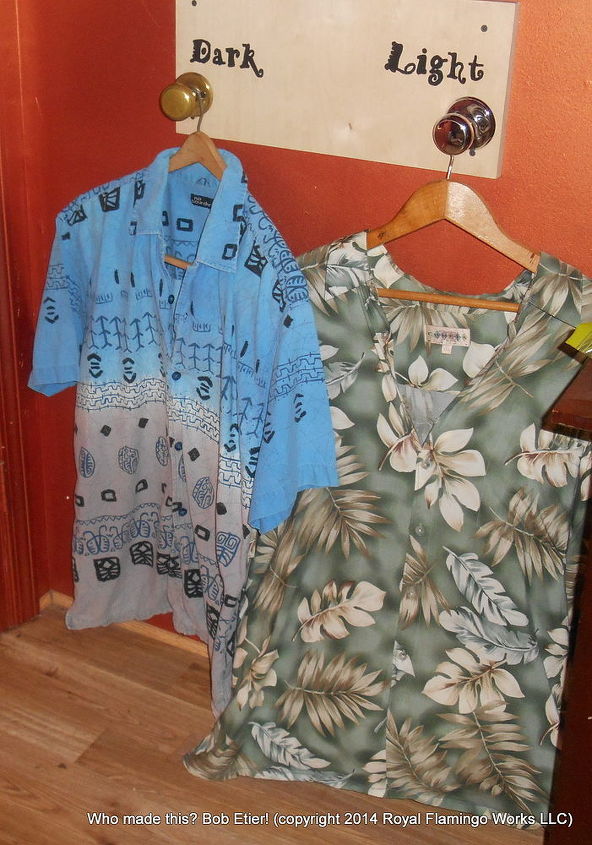
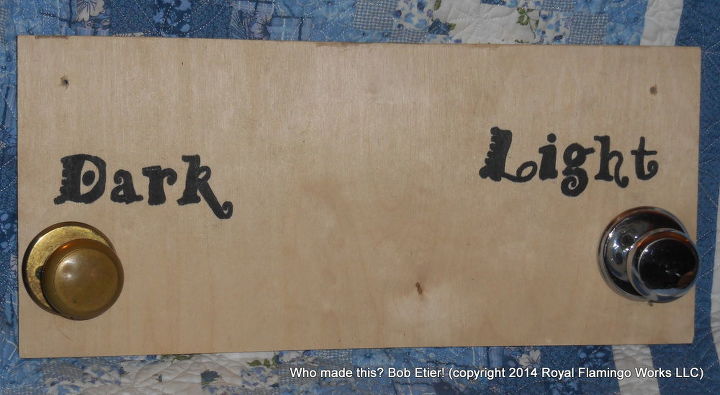
The cost breakdown was: shirt, 50-cents; Hawaiian shirt, 35-cents; two wooden hangers, 50-cents each; two birch drawer fronts, 25-cents each; and two knobs for $3. Lucky for me, a fave thrift shop was getting rid of a rack of clothes at 3/$1.00 and another fave had wooden hangers for 50-cents each; I picked up the second shirt at a church yard sale. The birch drawer fronts came from our Habitat ReStore which had just gotten a ton of them in, and that's where I got the knobs, too. The knobs are essential because ordinary hooks cannot support the bags when they are full.
Here is how I did it. I
5. used graphite tracing paper to trace words I printed out on my inkjet printer ("Light", "Dark") then painted them with a Sharpie Oil Paint Pen.

Want more details about this and other DIY projects? Check out my blog post!
Comments
Join the conversation
2 comments
-
This is so cute and fun. I love the beachy feel I'm getting from your choice of upcycled shirts!


Frequently asked questions
Have a question about this project?