


Change the Look and Feel of a Room With Conduit Curtain Rods

by
Megan Aubrey
Our living room décor and design has been in a state of flux since the moment we moved in it seems. We moved in with the red wall which my husband promptly fell in love with. For me it has been a harder sell. Red is not usually my thing (I'm an earth tone blue and green girl) but since I love him and he loves the red wall - it stays for now.
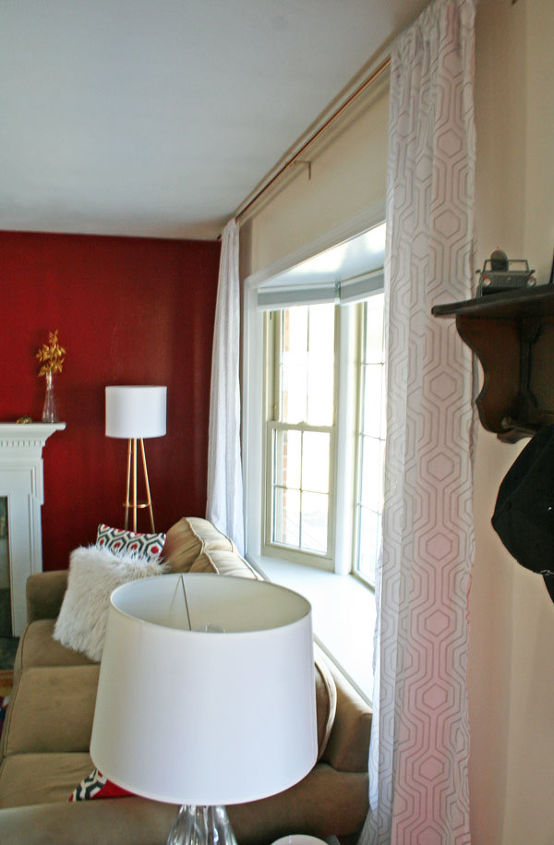
Since the red wall hasn't been natural to my decorating style I have really tried a lot of looks in this room. Thankfully, I have hit upon one that really dresses up the room, makes it feel bigger, happier, and more luxurious. For some reason making a curtain change with a conduit curtain rod painted gold has made me like the red wall and room so much more. Keep reading to see how it changes the room and learn how I made the curtain rod.
Since the red wall hasn't been natural to my decorating style I have really tried a lot of looks in this room. Thankfully, I have hit upon one that really dresses up the room, makes it feel bigger, happier, and more luxurious. For some reason making a curtain change with a conduit curtain rod painted gold has made me like the red wall and room so much more. Keep reading to see how it changes the room and learn how I made the curtain rod.
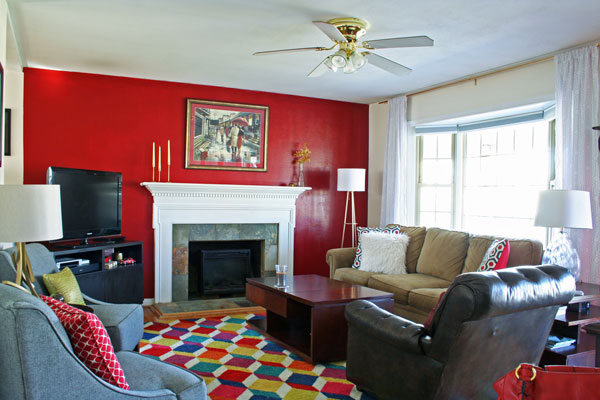
This room is such a lighter, brighter, and happier room thanks to these new curtains and their conduit turned gold curtain rod.
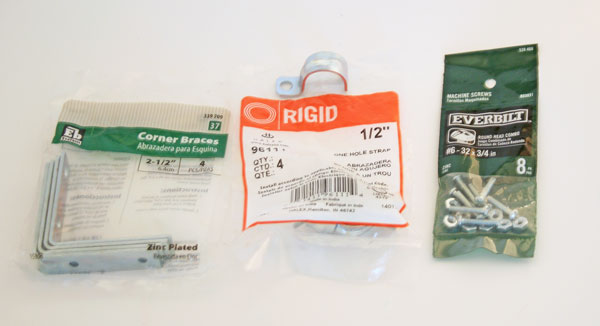
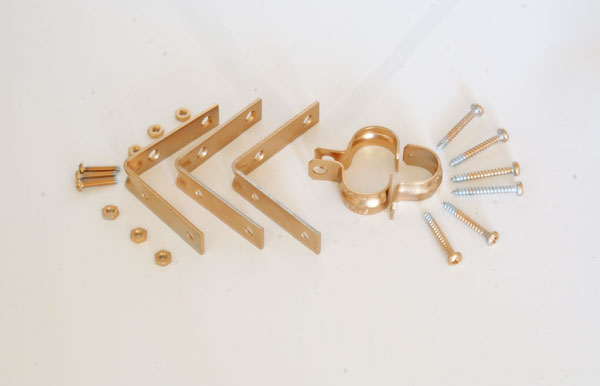
These are the materials you need:
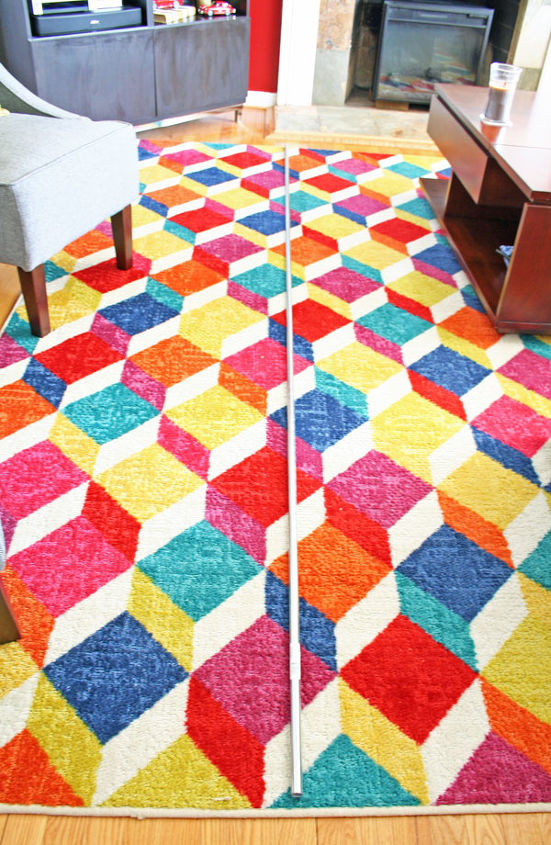
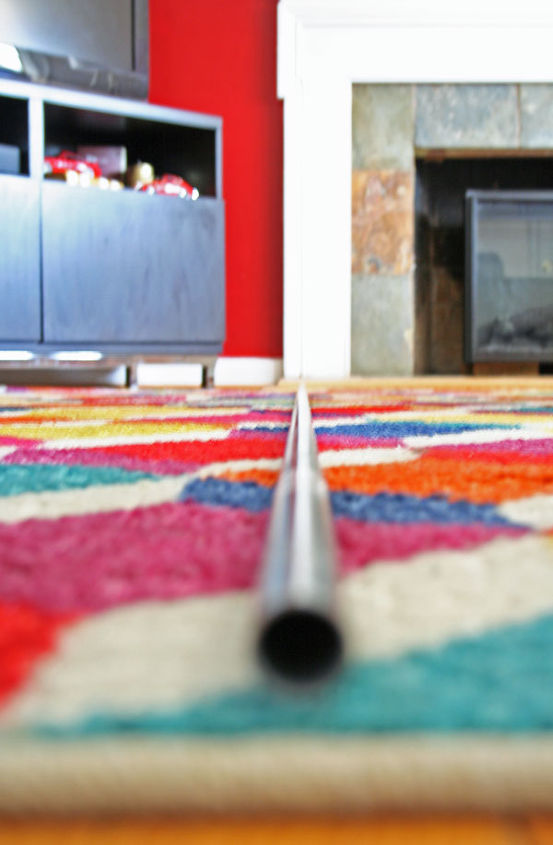
Determine the size of the curtain rod that you want. I personally did not cut it because my window was so big. All you have to do is use a hack saw to cut the pipe easily.
Clean the pipe to prep for painting. I used isopropyl alcohol.
Spray paint the pipes and all the other pieces, even the screws.

When dry, secure the braces to the wall. This is what your bracket should look like on the wall (except all one color!).
Just pop in the rod and you're done!
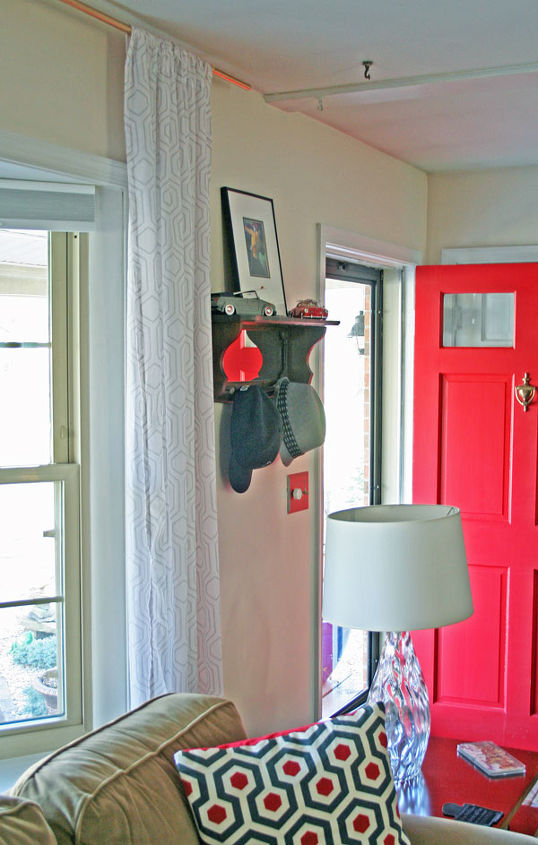
Hanging curtains higher than the window makes a room feel much bigger. This project was proof! It changed the whole look and feel of the room!
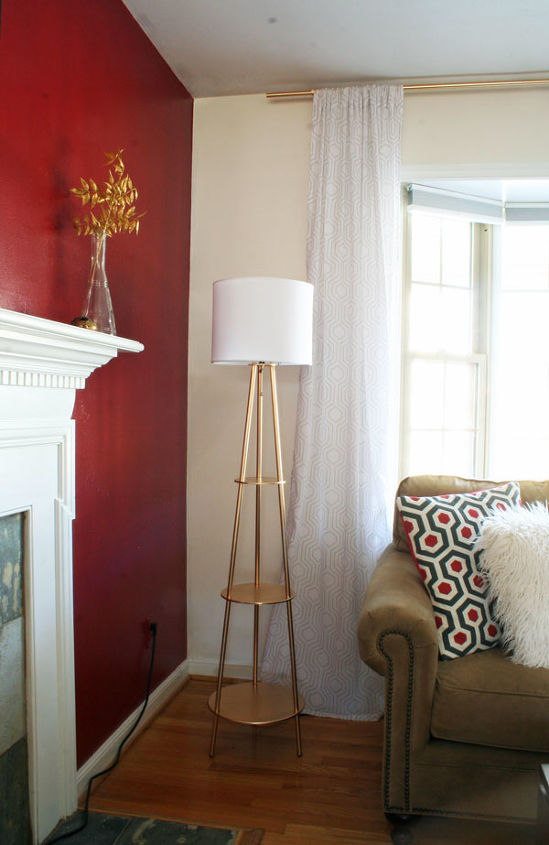
I also matched the gold I painted the lamp to the gold I painted the conduit.
Want more details about this and other DIY projects? Check out my blog post!
Comments
Join the conversation
4 of 13 comments
-
I did my bedroom windows with conduit also. I am tired of rehanging drapery rods because of kitty kats climbing (they finally stopped) and having holes to patch..... I sort of ran out of room in the sheet rock to put more holes. So I put a 1 x 4 piece of lumber across the top of the wall (instead of crown molding) and used screw eyes into the wood to hang mine. Then I used some cheap tennis balls from Walmart and covered them in white fabric (tried painting the balls, did not work well enough) and poked a hole in the tennis balls and just poked the fabric inside and then stuck them on ends of the conuit rods. Took me forever to find the screw eyes the correct size... found them at Home Depot. I wanted to ask you if you drilled a screw into the ceiling as well as the walls? I could not tell for sure. I wish I had thought of your way long before though.
-
Megan, yes, it was hard for me to put the boards up by myself (puny). lol But I sort of ran out of options as to where to put the rod.... not a new house and the sheet rock is pretty full of patched holes and the studs just were not in the right places.... so I got this bright idea to use the boards. I also have the top part of my windows open, with center only cafe curtains with long ties from the bottoms of the top cafe curtain down to the other piece of curtain....just short, cafe curtains, flanked on each side by ceiling to floor drapes.... does that even make any sense?


Frequently asked questions
Have a question about this project?