


How to End Crown Molding When There's No Transition
4 Materials
$20
10 Minutes
Medium
We had two areas in our living room that were “dead ends” and didn’t butt up to another wall. I’m not a fan of decorative moldings, so my dad showed me how to make the molding end “pretty” and I thought it might help some of you too!

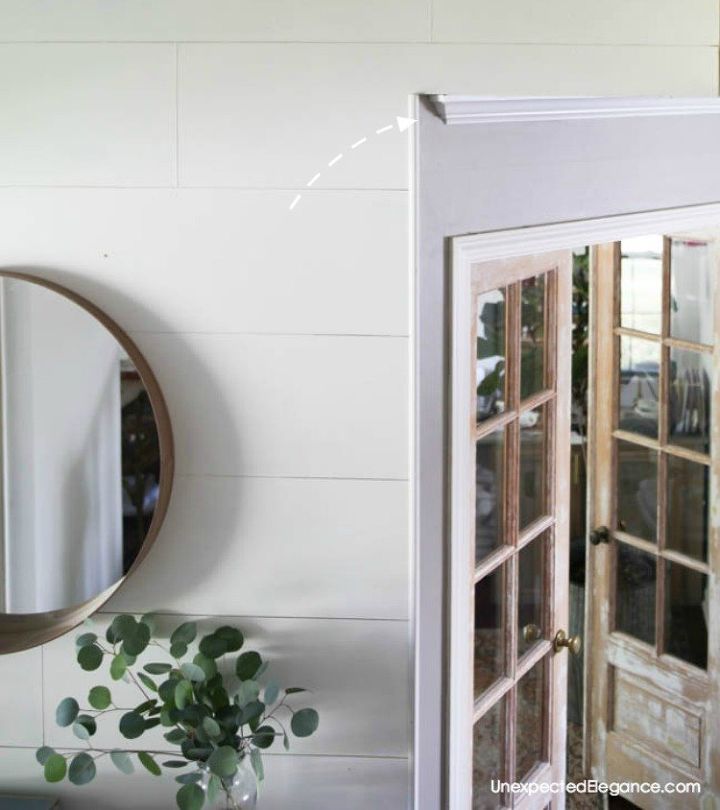
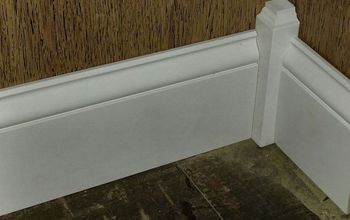
Here's how the molding will look when finished. This is the wall that stops before our staircase.
If you want an in-depth post about how to hang crown molding you can check that out here.
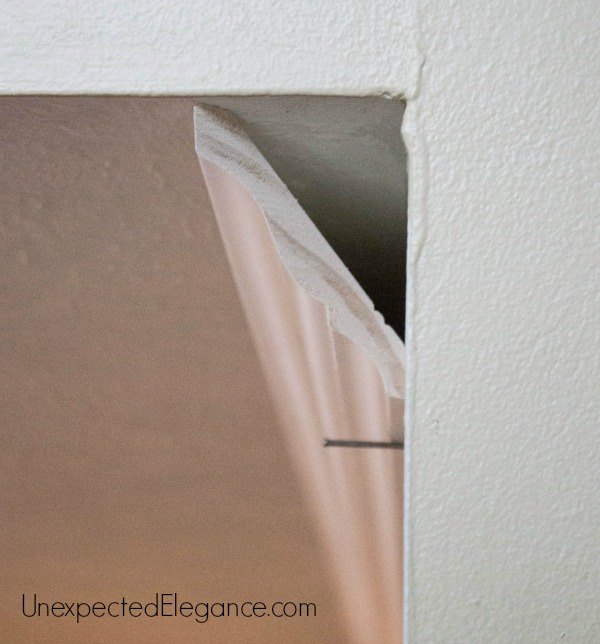
For the dead end, you want an imaginary outside corner. Use the above picture as an example. If we are looking at where the molding ends, it would be a RIGHT OUTSIDE corner. (Refer to the post I linked to above if you need some clarification about the corners.)
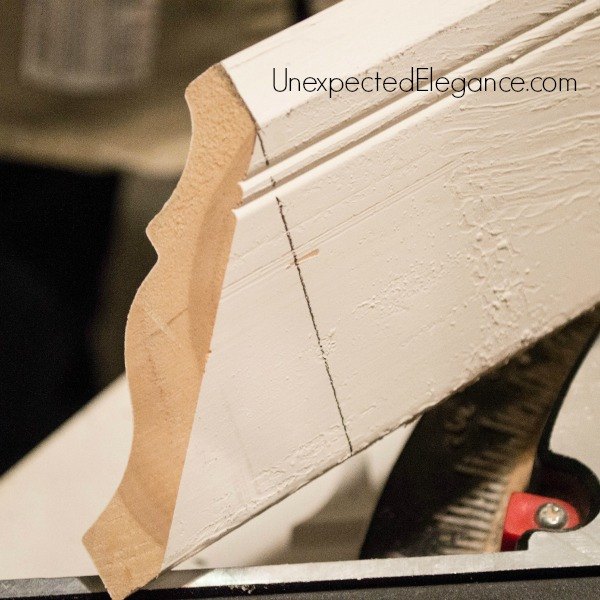
To create the piece that covers the hole, use a piece of scrap molding and make the opposite cut to form an outside corner.
For the example that we were talking about, it would be a LEFT OUTSIDE cut because you have a right outside cut already hung.
Then use the bottom of the cut as a guide, and use a straight edge to continue the line onto the front of the molding. (Refer to the picture above.)
Next, lay the molding flat on the saw and make a straight cut on the line.
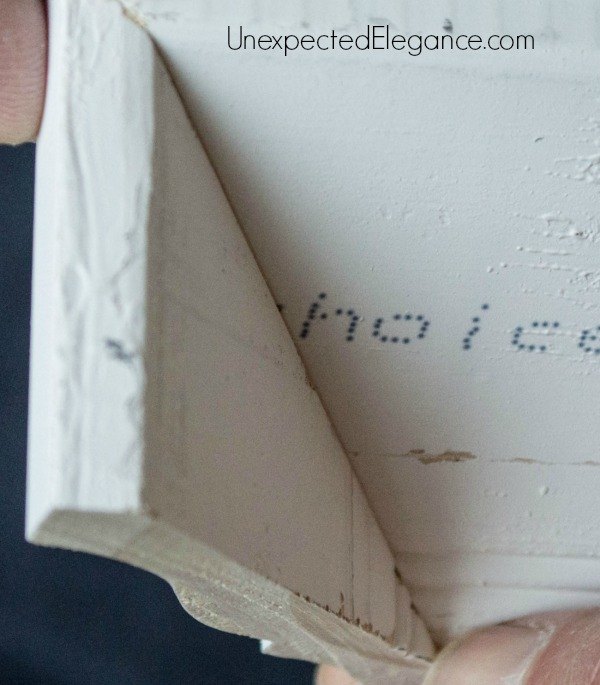
The piece should fit together with the molding on the wall like the picture above.
For more detailed directions and if you have any questions, please refer to this post!

Want more details about this and other DIY projects? Check out my blog post!
Comments
Join the conversation
4 comments
-
Super tip. That is the way it's done. It's called a "return". Guess we old timers still have it in us

-
Great info and looks great - but I love moldings - always makes a room look finished and elegant, classy, and timeless...but that's just my "old timer" tastes. Kudos to your dad for sharing his "old timer" knowledge! WTG Dad!!!


Frequently asked questions
Have a question about this project?