


The Secret Behind And How To Make A Fabulous Wreath!
This fabulous wreath may look challenging to make but it actually is quite easy. When you are making a wreath like this you are making a larger wreath and a smaller wreath and attaching the two together. That’s the secret! I love making projects where the final product looks amazing but the process for making it was super easy!
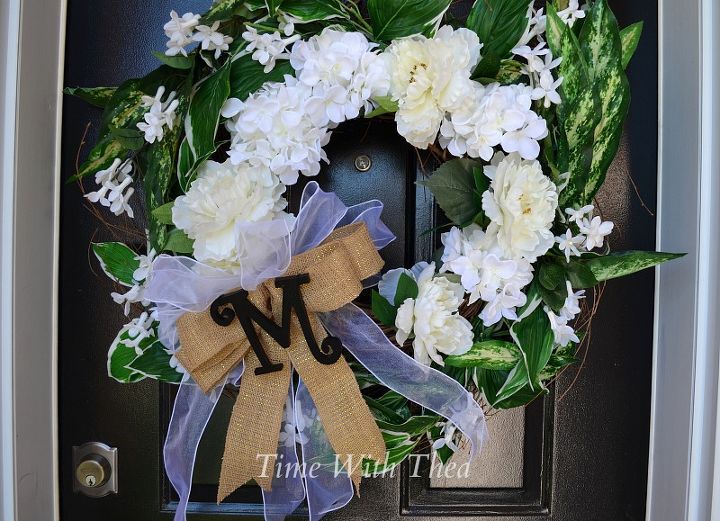
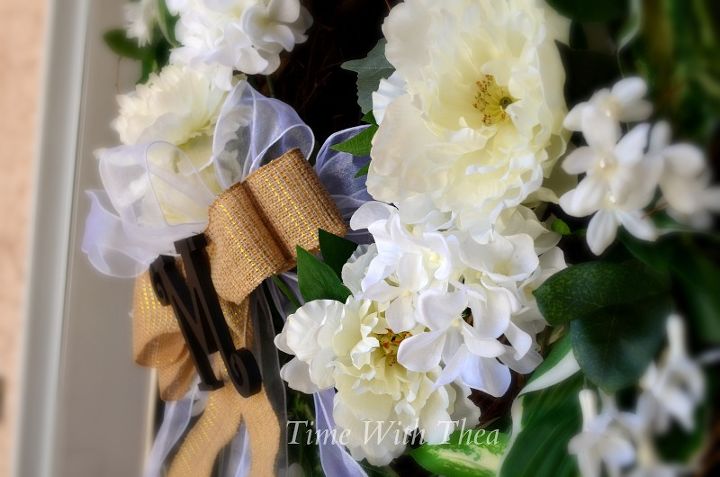
I decided to make my wreath just using the colours white and green because I thought it would look fabulous hanging on my black front door. I also added a white sheer wired bow and a burlap material bow. The letter ‘M’ attached to the burlap bow finishes the wreath off quite nicely!
When making a wreath using this technique you can design your own using different colours, silk leaves and flowers and ribbon to make the bows.
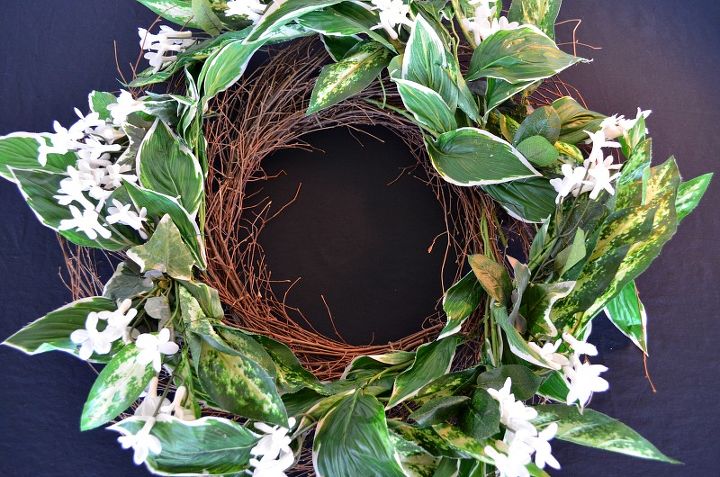
Step 1: Arrange two different kinds of green leaves and flowers that are multiple blooms on a stem on the larger willow wreath. Secure these with floral wire.
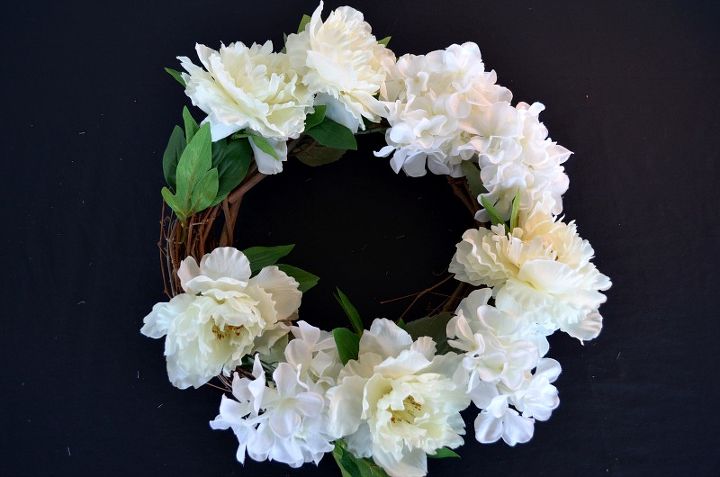
Step 2: Arrange two different kinds of larger flowers around the smaller grapevine wreath. Leave a space for the bow and initial letter. Secure these with floral wire.
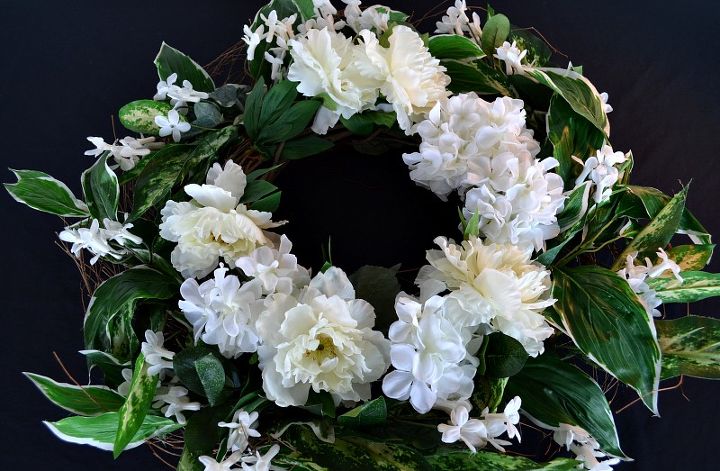
Step 3: Place the smaller wreath in the centre on top of the larger wreath. Secure the two wreaths with floral wire.
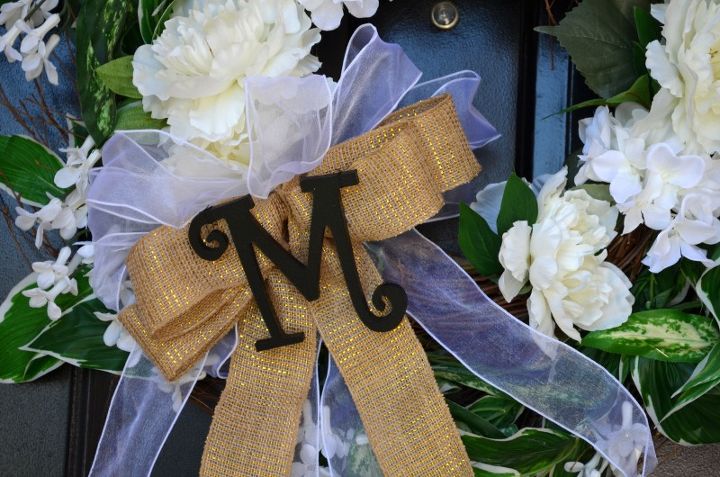
Step 4: Attach a big bow to the top wreath with floral wire. Attach the monogram letter with a few stitches looped around different places of the letter using needle and thread of the same colour.

Enjoy your wreath! These instructions are the condensed version to show you how easy making a fabulous wreath like this actually is.

Want more details about this and other DIY projects? Check out my blog post!
Comments
Join the conversation
3 of 11 comments
-
Very pretty! Thanks for the hints & tips!
-
so smart and easy! thank you!


Frequently asked questions
Have a question about this project?