


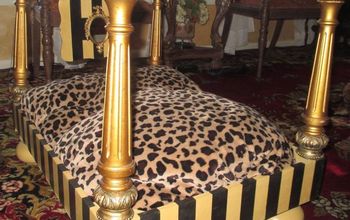
DIY Dog Bed Made From an Old Kitchen Drawer
I wanted to make a bed for my very special dog Maggie. My animals are a big part of my life and I love to spoil them just as much as I do the rest of my family. I was getting tired of the ugly dog bed that was creating an eye soar in my living room. I have been looking around for a long time for a bed that would fit in with my space and still keep in my budget.
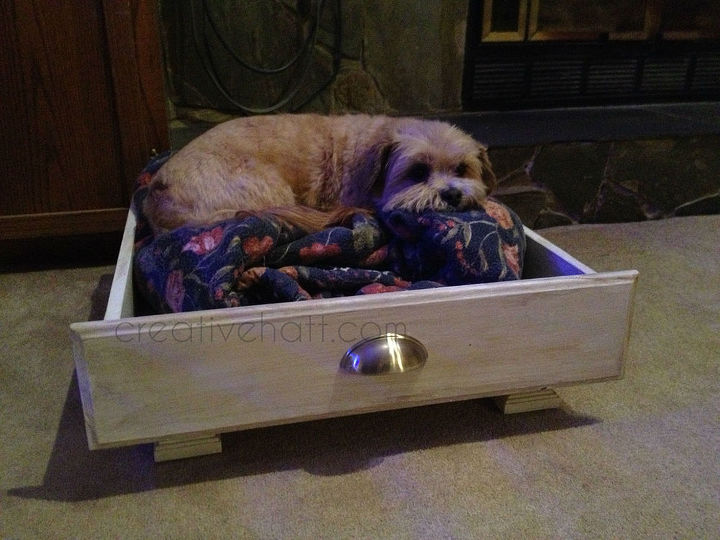
Every bed I found was either too much money or was really cheaply made. I found a few ideas on Pinterest and some of the ideas I found seem easy enough. So I started my shopping for the material I needed. The bed that I wanted to make were made from an old kitchen drawer and furniture legs.
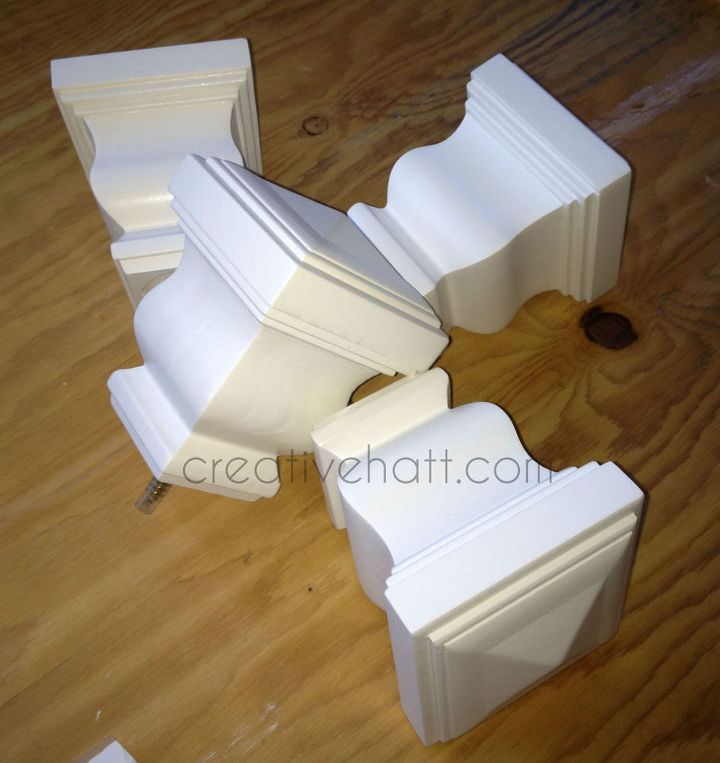
I went to Home depot to find furniture legs, but they wanted $10 per leg. That would make the dog bed over $40 and I really did not want to spend that much for the bed, and that cost would be before I even make the cushion.
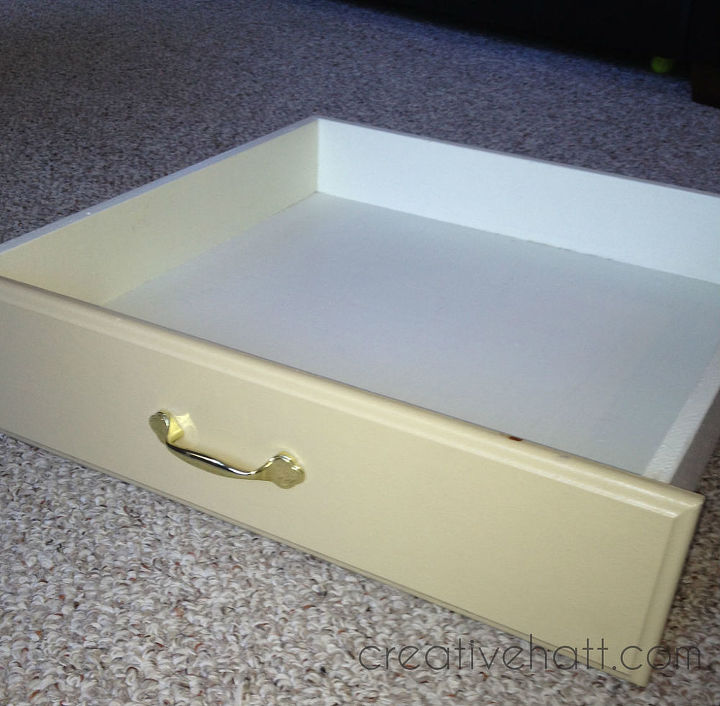
I decided that I would recruit my 14 year old son to help with this project. He is always wanting to help me and he is also very handy with power tools, plus he has more tools than I do so it was a win for me. I started by cleaning the drawer really well with a general household cleaner. This drawer that I found was a really well build drawer and already had a solid wood bottom, most newer drawers do not have this so you may have to add a step and add a wooden base before you start. I did not have to worry so I just moved on to the next step.
I measured to see where I wanted to have the legs on the bottom of the bed. I then created a template so I could make sure that each leg was in the same spot. I then had my son pre-drill the holes for the legs. He started out by just making a mark with the drill bit, then he removed the template and completed the hole.

Want more details about this and other DIY projects? Check out my blog post!
Comments
Join the conversation
2 of 18 comments
-
THIS IS A GREAT IDEA. RECYCLE EVERYTHING.
-
Don't think I have or can find a drawer big enough for my 150 lb. dog. it's a ggreat idea though


Frequently asked questions
Have a question about this project?