


Custom Print Designer Look Pillows
So lately, I am all about home decor. I think we should have a serious discussion about pillows. Can you pull up a chair and here ya go, here’s a coaster for your cuppa.
Pillows? You say. Really? I mean, they just kind of sit there. Men have a serious dislike of them. Have you ever seen a man in his own home, sit down and pull a pillow up to cuddle with, or make himself comfy? OK, maybe you have, but in our little kingdom, it doesn’t happen. Even the girly minions usually toss them on the floor. Until…. they need them for propping up while laying on the floor, or as a holder for the laptop, or snuggles. Yeah. Then they are all about those cuddly things. Myself. ADORE. Yes, I adore pillows!
I mean, they are so comfy. I like to have several around when I sleep at night, helps my back. And as I sit and chill on the couch, well, I love to be surrounded by cushy softness. Maybe one behind my lower back, a couple on the sides for that soft cuddle and even maybe tucked behind my neck. Also they are great for putting under my feet if I prop them on the coffee table. Those are all great uses for the pillows. BUT…. we haven’t even talked yet about the color impact, the decor pop, the wow factor that they have in adding to your room- colors, pattern, theme….
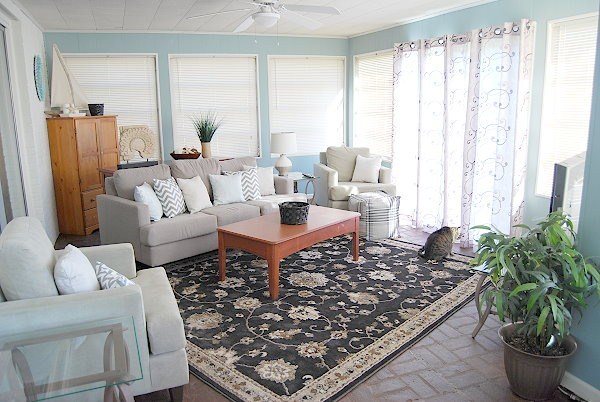
Here in our crazy world, I have been redecorating. We changed some rooms around in our house, and I moved my office to a smaller part of our office space. I took the furniture and moved it into our den, then bought new in neutral colors, a blocky sofa and two chairs, in oatmeal and softest sage colors. I bought a new rug, stained the floor and created that beautiful jute/paper twist lamp that I shared with you last week. Hubby and I painted last week, and we’re getting it slowly finished with decor. So you know, it’s time to talk about pillows. There see, we got around to it.
Here is what I want to share with you today. You can make pillows. There is no need to buy them if you have a sewing machine, can sew a straight line and can do a minimum of hand stitching.
Pillows? You say. Really? I mean, they just kind of sit there. Men have a serious dislike of them. Have you ever seen a man in his own home, sit down and pull a pillow up to cuddle with, or make himself comfy? OK, maybe you have, but in our little kingdom, it doesn’t happen. Even the girly minions usually toss them on the floor. Until…. they need them for propping up while laying on the floor, or as a holder for the laptop, or snuggles. Yeah. Then they are all about those cuddly things. Myself. ADORE. Yes, I adore pillows!
I mean, they are so comfy. I like to have several around when I sleep at night, helps my back. And as I sit and chill on the couch, well, I love to be surrounded by cushy softness. Maybe one behind my lower back, a couple on the sides for that soft cuddle and even maybe tucked behind my neck. Also they are great for putting under my feet if I prop them on the coffee table. Those are all great uses for the pillows. BUT…. we haven’t even talked yet about the color impact, the decor pop, the wow factor that they have in adding to your room- colors, pattern, theme….
Here in our crazy world, I have been redecorating. We changed some rooms around in our house, and I moved my office to a smaller part of our office space. I took the furniture and moved it into our den, then bought new in neutral colors, a blocky sofa and two chairs, in oatmeal and softest sage colors. I bought a new rug, stained the floor and created that beautiful jute/paper twist lamp that I shared with you last week. Hubby and I painted last week, and we’re getting it slowly finished with decor. So you know, it’s time to talk about pillows. There see, we got around to it.
Here is what I want to share with you today. You can make pillows. There is no need to buy them if you have a sewing machine, can sew a straight line and can do a minimum of hand stitching.
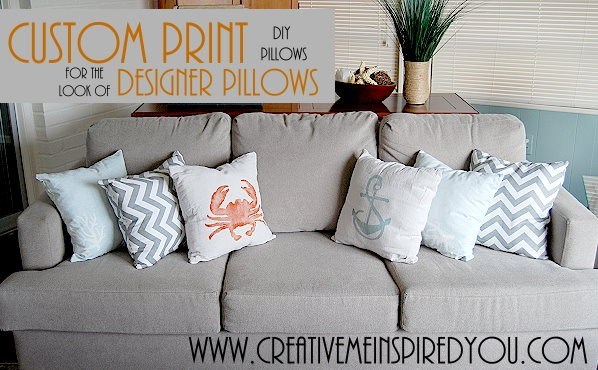
Let me tell you something. Pillows do not HAVE to cost as much as they do at stores. You can make your own for SO MUCH less. I mean, $20 plus for a pillow? TOO MUCH! Each of the pillows on this couch was less then $5!!

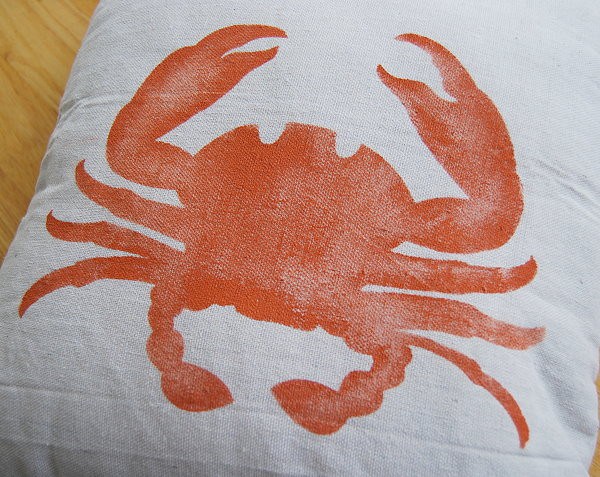
Since we are in the middle of creating a beachy feeling room, without being over the top all seashells and driftwood, I am adding in touches to create that feeling. I decided that I wanted a crab and went with an anchor and rope for my other pillow. Our colors in the room are a lot of brown, tan, black, dark grey and neutrals. Adding in a teal blue and a deep terra cotta were the perfect color accents to me.
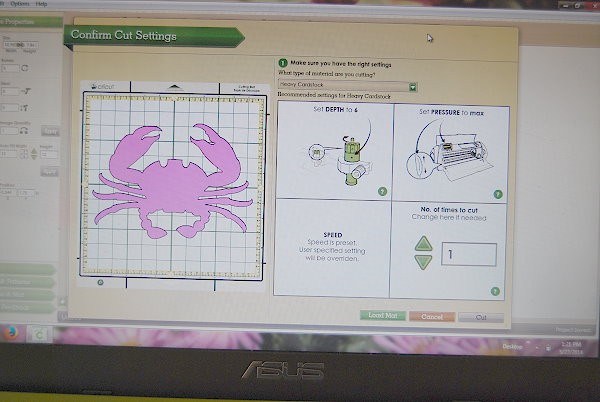
To create a shaped piece like the crab and anchor, I took the shortcut and used my Cricut machine, vinyl and acrylic paint.

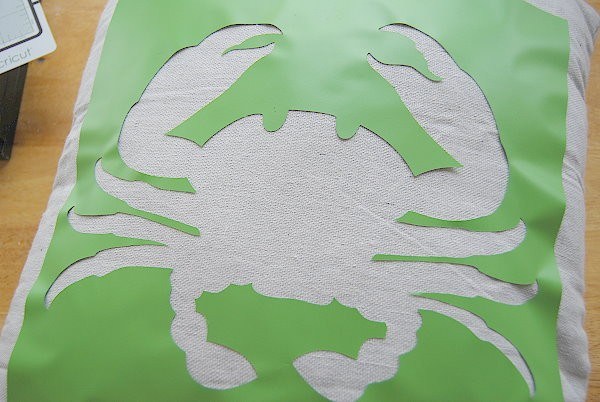
I used Cricut Craft Room- the San Fransisco Cart, to bring up my crab image, then I sized it to fill the 12×12 size.
Once it is cut out of your vinyl sheet, pull the crab shape off and this is the vinyl you will use.
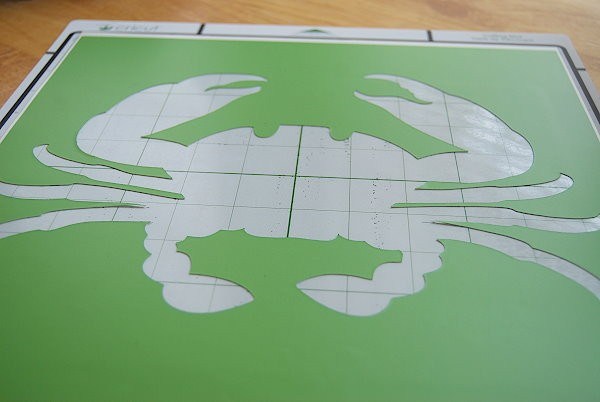
When I apply the vinyl to the pillow, I pull the backing off the top, and place the vinyl onto the cushion and roll the backing off the vinyl so that it doesn’t stick to itself.
Yes, you can see this is not super sticky, but we’ll deal with that.
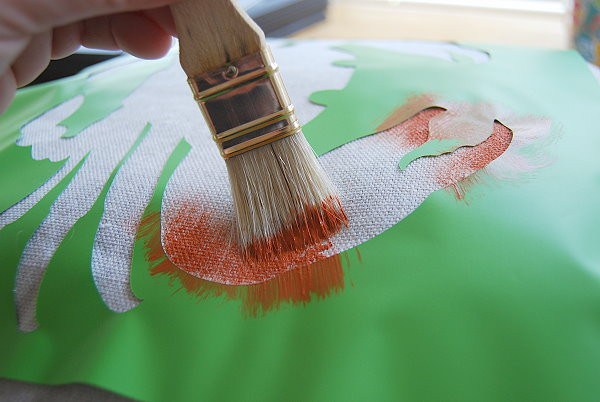
I cannot stress enough to make sure you dab off excess paint, better to have to do a little more work then get too much paint.
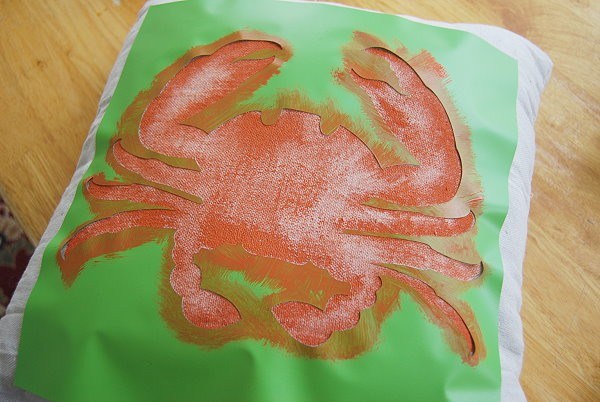
You can immediately remove the stencil if you want, or let it dry and remove. I am always anxious to see my work.
and we’ll do much the same for the anchor. Use Wild Card 2 for the anchor cut.Any color of vinyl will do. This time, since there are inside cuts- little pieces, use the cut image to help you place them correctly.

Want more details about this and other DIY projects? Check out my blog post!
Comments
Join the conversation
2 comments
-
Love! That crab decal is too cute.
-
Too Cute! Sharing n My Facebook Page ~ Some Where In Time Linens ~ Thanks Cindy


Frequently asked questions
Have a question about this project?