


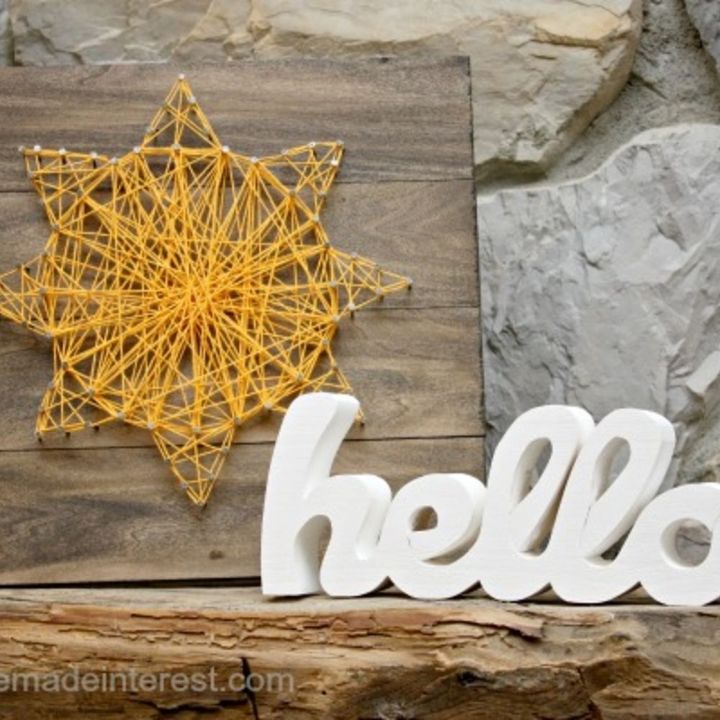
Hello Sunshine String Art
A tutorial on how to make your own Hello Sunshine string art.
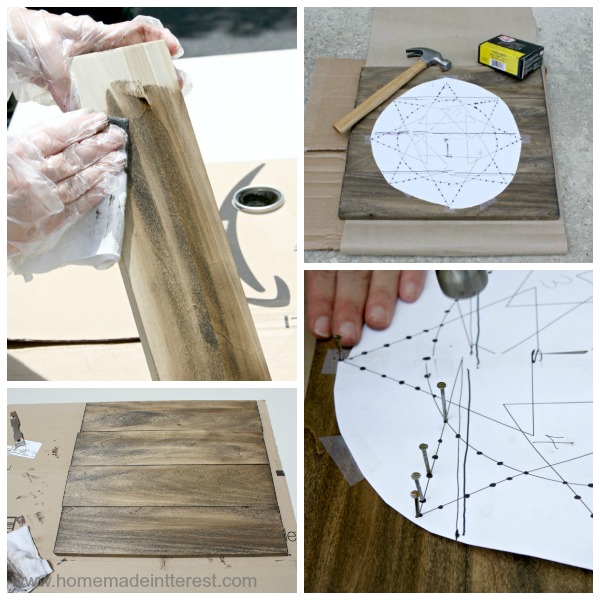
I started the project off with a trip to Home Depot where I bought a 1x4" poplar board and had them cut it into 16" pieces. I stained the boards with an "Ash" stain to give them a nice dark color. I used Silhouette Studio to create a sunshine design and I used a sharpie to plot out where I was going to put the nails. Since I was just gluing the boards together I didn't want to glue them until after I was finished putting the nails in so I laid the boards out and taped my sunshine outline in place and began hammering. Once I got going I didn't exactly follow my pre-planned dots I just kind of eyeballed the spacing. When I had all of the nails in I glued the boards together and added a little extra stability by putting 3 paint sticks on the back and gluing the boards to them.
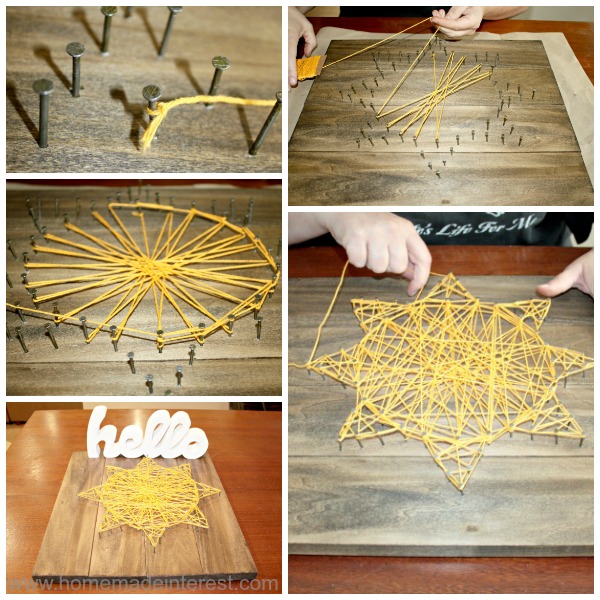
Now the fun part, wrapping the string! I started with the circle and just tied the string to one nail and started wrapping it in different patterns around the circle. then I went around each of the sun's "rays" .

Want more details about this and other DIY projects? Check out my blog post!


Frequently asked questions
Have a question about this project?