


MDF Side table makeover- I did a metal finish and new wood top

by
Becca B
If the Restoration Hardware {Baker's Rack Open Shelving} and this piece {Zinc Open Nightstand} fell crazy in love and had a little furniture baby, then it could look something like my side table makeover!
Remember my before pic- this side table in need of TLC. I almost tossed'em or yard saled the pair- since they were only 60 bucks brand spankin new and aren't even made of real wood! BUT the size and shape could work, and I needed the little drawers for living room storage- so I stayed with it.
I painted the tables black- using a DIY chalk paint formula. I used chalk paint so I could skip the prime step and skip right to the paint. And for the record chalk paint does have great adhesion to MDF, I was very pleased with it.
I took off the top of the table, to be replaced with some real wood!
To create a metallic look I started off using Jamie's {Freckled Laundry} tutorial-it's about the best tutorial I've ever seen. Jamie is so super duper talented.
I happen to have the right paint on hand to follow through her directions. I probably shouldn't have taken a pic with the freezer paper- it's really just a trick I use to keep the paint from soaking into the paper plate. So you can disregard it when/if you buy supplies.
Following the tutorial, you use a rag to blend three shades of silver, creating a slightly varied finish in color. Buuuut, I followed all 14 steps and wasn't that happy with my version-{*super sad face.} Though this was at no fault of the tute. More like I'm still working on my glazing skills. So I backtracked to step 5.
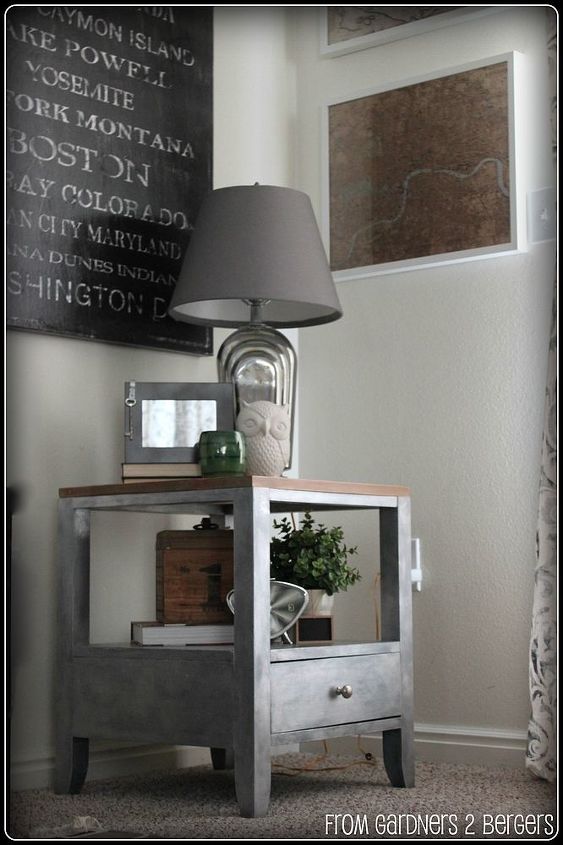
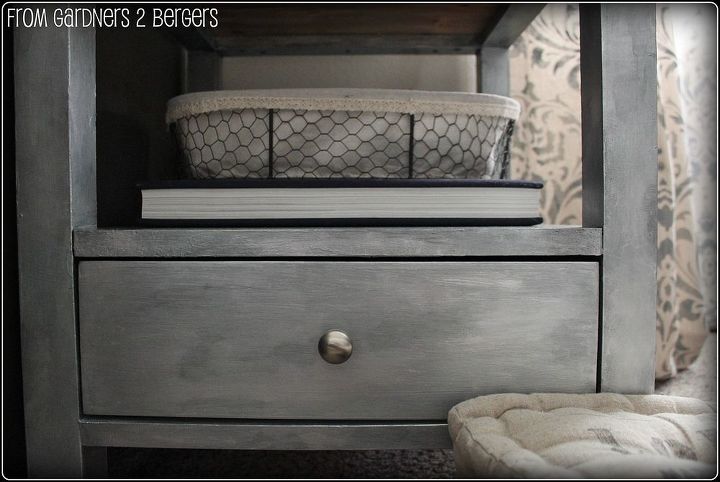
I wanted a more reflective surface. So I used my old friend, Rub n Buff, to apply another level of sheen. I also used this to create imperfections in the finish and create depth. Look at how the furniture reflects light. I took this pic n an overcast day with the curtains closed, and still you can see the shine!
Here's a few close up shots so you can see the finish. I applied the Rub n Buff with a toothbrush, like I explain here. I used it in spots, making it thicker and thinner in areas to help recreate the look of metal.
I used cheap-ish preassembled pine wood and had it cut it to size. I decided to cut them the same size as the base, trying to modernize the traditional tables a bit. The wood cost me 20 bucks and would have been cheaper if I had decided to make my own with planks- probably costing $12-13. This time easy won, though!
Then I used a homemade stain made from vinegar and steel wool to age and stain the wood. {I describe it in depth at the bottom of this post.} The wood is warm with gray tones in it. It is a little more yellow than I'd like- but that's due to the polyurethane, not the stain.
I can say I'm at peace with how the tables turned out. For about 25 bucks I don't have to stare at that red-toned "wood" ever again! Not bad for a 60 dollar Target table, huh?
Remember my before pic- this side table in need of TLC. I almost tossed'em or yard saled the pair- since they were only 60 bucks brand spankin new and aren't even made of real wood! BUT the size and shape could work, and I needed the little drawers for living room storage- so I stayed with it.
I painted the tables black- using a DIY chalk paint formula. I used chalk paint so I could skip the prime step and skip right to the paint. And for the record chalk paint does have great adhesion to MDF, I was very pleased with it.
I took off the top of the table, to be replaced with some real wood!
To create a metallic look I started off using Jamie's {Freckled Laundry} tutorial-it's about the best tutorial I've ever seen. Jamie is so super duper talented.
I happen to have the right paint on hand to follow through her directions. I probably shouldn't have taken a pic with the freezer paper- it's really just a trick I use to keep the paint from soaking into the paper plate. So you can disregard it when/if you buy supplies.
Following the tutorial, you use a rag to blend three shades of silver, creating a slightly varied finish in color. Buuuut, I followed all 14 steps and wasn't that happy with my version-{*super sad face.} Though this was at no fault of the tute. More like I'm still working on my glazing skills. So I backtracked to step 5.
I wanted a more reflective surface. So I used my old friend, Rub n Buff, to apply another level of sheen. I also used this to create imperfections in the finish and create depth. Look at how the furniture reflects light. I took this pic n an overcast day with the curtains closed, and still you can see the shine!
Here's a few close up shots so you can see the finish. I applied the Rub n Buff with a toothbrush, like I explain here. I used it in spots, making it thicker and thinner in areas to help recreate the look of metal.
I used cheap-ish preassembled pine wood and had it cut it to size. I decided to cut them the same size as the base, trying to modernize the traditional tables a bit. The wood cost me 20 bucks and would have been cheaper if I had decided to make my own with planks- probably costing $12-13. This time easy won, though!
Then I used a homemade stain made from vinegar and steel wool to age and stain the wood. {I describe it in depth at the bottom of this post.} The wood is warm with gray tones in it. It is a little more yellow than I'd like- but that's due to the polyurethane, not the stain.
I can say I'm at peace with how the tables turned out. For about 25 bucks I don't have to stare at that red-toned "wood" ever again! Not bad for a 60 dollar Target table, huh?
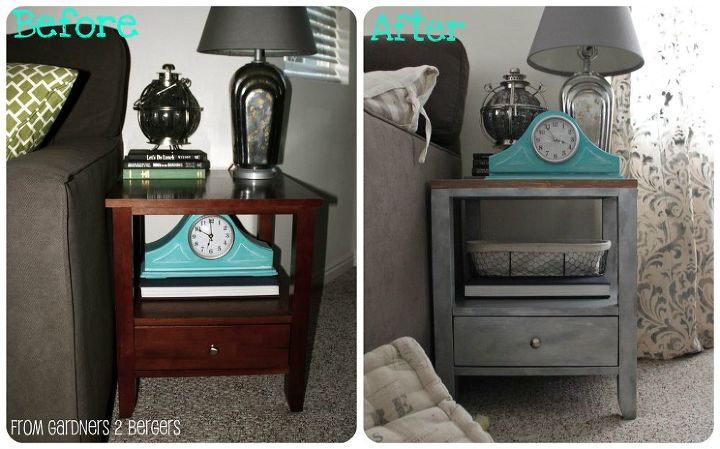
Before and After
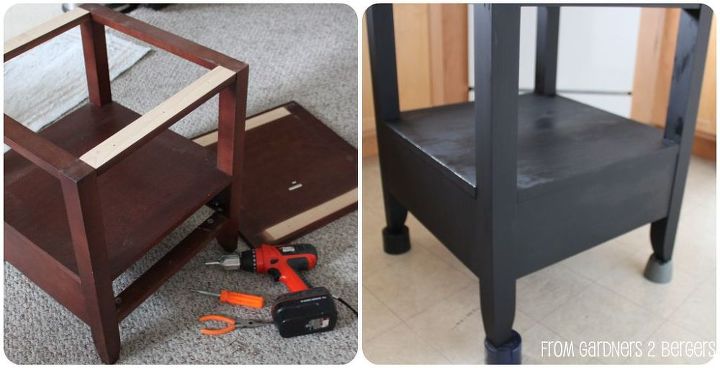
Coat of Chalk Paint
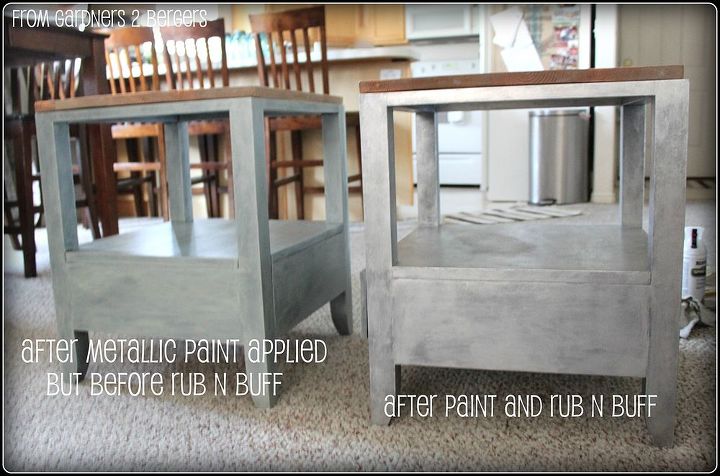
How to create the metal look

Want more details about this and other DIY projects? Check out my blog post!
Comments
Join the conversation
2 of 3 comments
-
Becca, You know I am your biggest fan! I am so glad you sharing this over here! Have you shared the Eye Chart? I know everyone would LOVE it! karianne PS I shared this on the Hometalk pinterest page!
-
You have the best projects Becca - so glad there's one more place where everyone can be inspired by you. And this dresser looks like a fabulous zinc antique!


Frequently asked questions
Have a question about this project?