DIY Braided Rope Tutorial

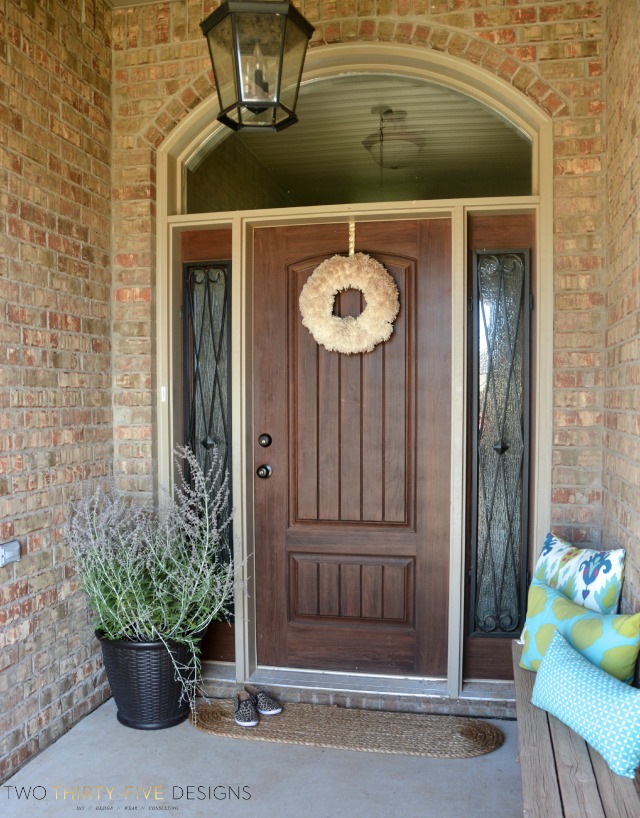
I needed to grab a new rug for our front porch with fall approaching, but I didn't want to spend a fortune!
Materials:


Manila Rope (I purchased 80ft of 1 1/2 in diameter)


Two rolls of all weather duct tape


Scissors


Utility Knife (for trimming excess tape)
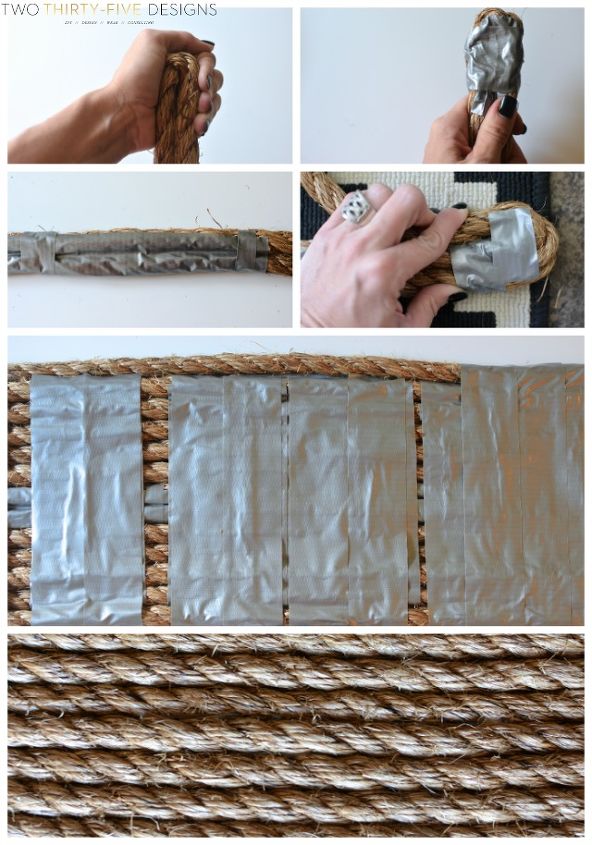
1. Measure out how long you want your center piece to be (I used the width of the door), then fold and pinch at the end.


2. Tightly place tape on one side to secure.


3. Run rope side by side against the middle piece, securing with tape as you go. You can see that I ran tape lengthwise on the center piece, then secured the two by running small strips in the other direction.


4. When you get to the end, loop rope around the edge and secure with tape.


5. Go back and forth, forth and back, over and over, again and again. The rope twists as you go, so right before I hit each curve, I would stand up and untwist the rest of the rope. It’s a little bit tedious in the beginning because of the length, but is so helpful to have it straight and not twist up and tear the tape while you are working on it.


After I got into a grove, I would just run pieces up and down, securing at the top, pulling tight, and layering each piece of tape on top of each other. When I finished wrapping the rope around, I ran a solid layer of duct tape along the bottom to fully secure it all.


6. After you are finished, flip over and trim excess tape.
For more detailed instructions and images, head on over to the blog!
Two Thirty~Five Designs
Want more details about this and other DIY projects? Check out my blog post!
Go
Frequently asked questions
Have a question about this project?
Comments
Join the conversation
Next