


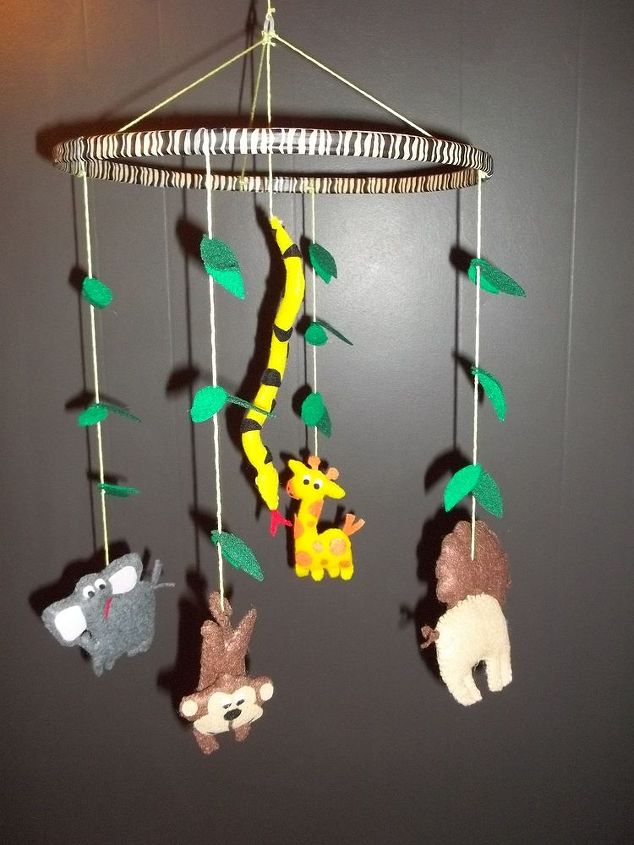
DIY Safari-Themed Nursery Mobile
$5
6 Hours
Easy
Last month, I made my nephew a safari-themed mobile. My brother had looked at a few on Etsy that he liked, but they were quite costly. He asked if I would be able to make one. It was super easy, it turned out pretty cute, and most importantly, my nephew loves it! The entire mobile costs less than $5 to make! Each animal costs less than $1 to make!
I can't put all the details out here or this post would go on forever, so be sure to visit my blog for more details, as well as the templates for the felt animals.
I can't put all the details out here or this post would go on forever, so be sure to visit my blog for more details, as well as the templates for the felt animals.

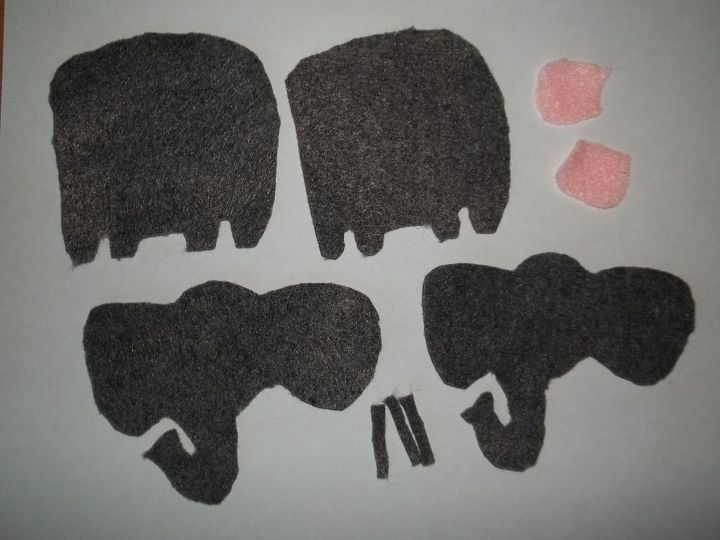
Needed Materials:
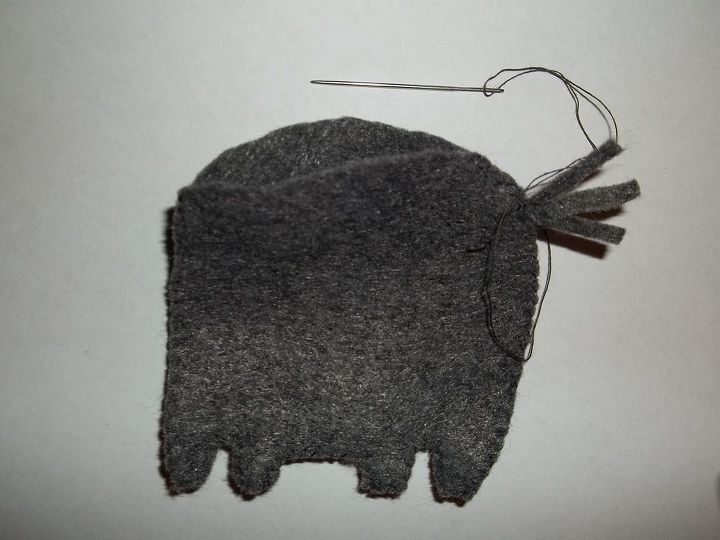
Step 3: Staying close to the edges, sew around the body. Put the tail pieces in place as you sew around the body. Be sure to leave an open space to put in the stuffing.
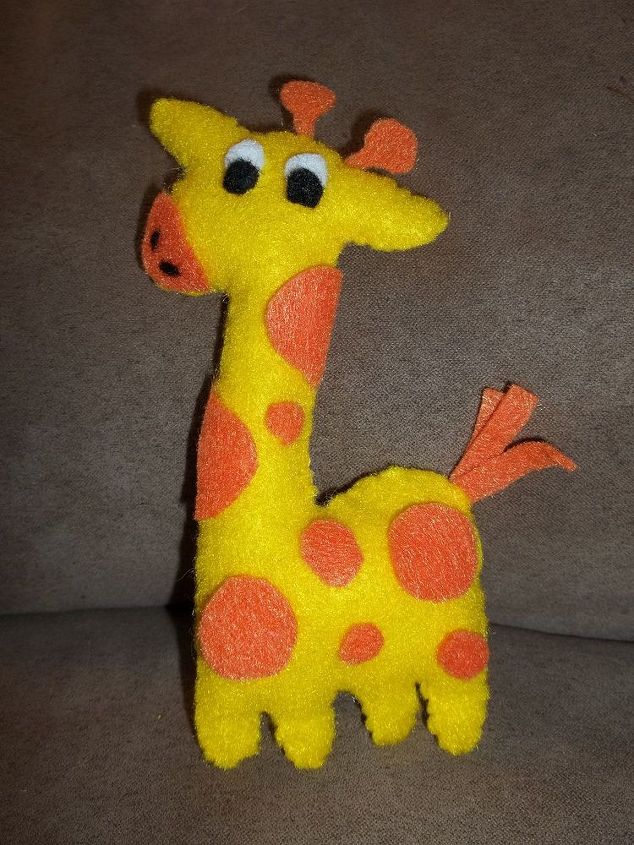
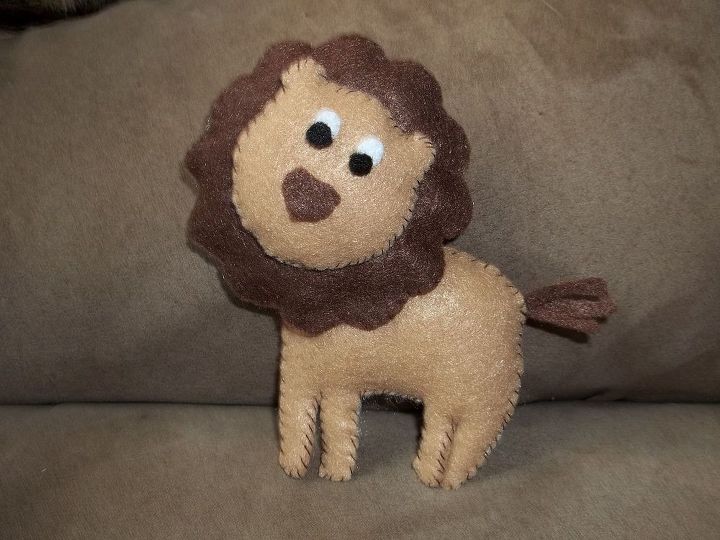
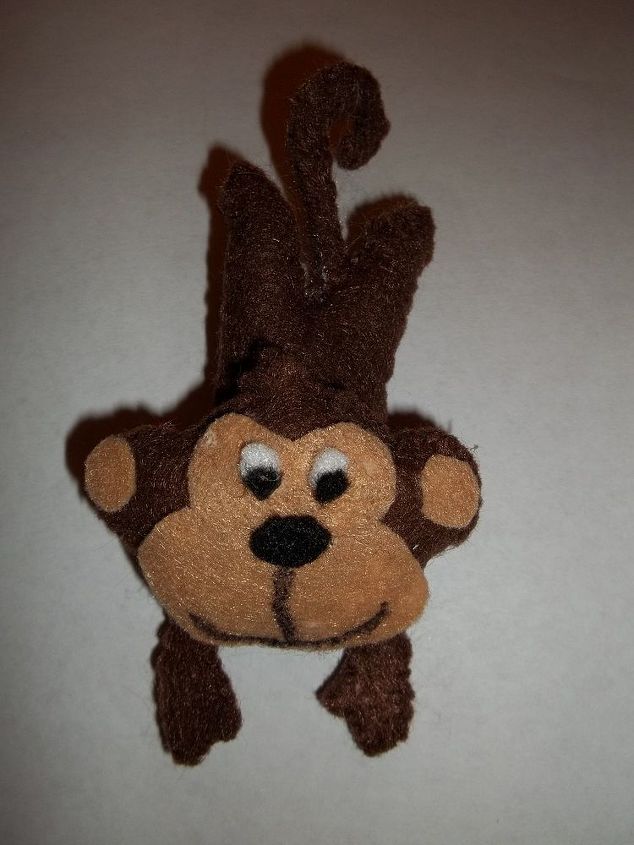
Step 4: Lightly stuff the elephant's body.
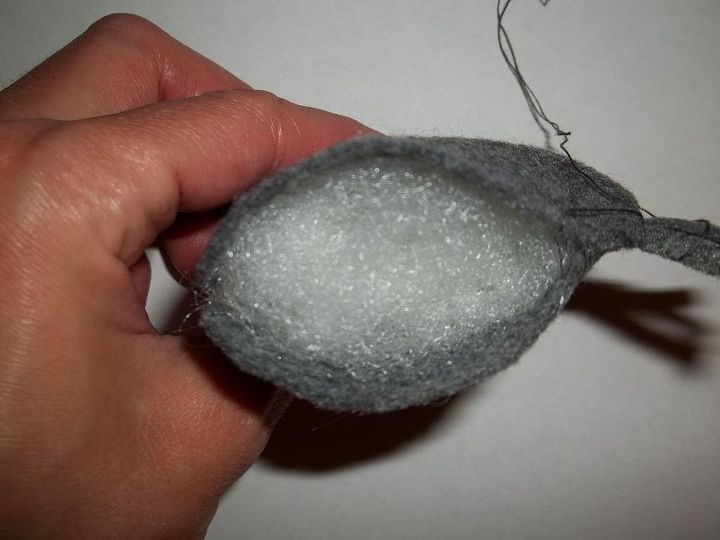
Step 5: Once you are happy with the amount of stuffing, sew the hole shut.
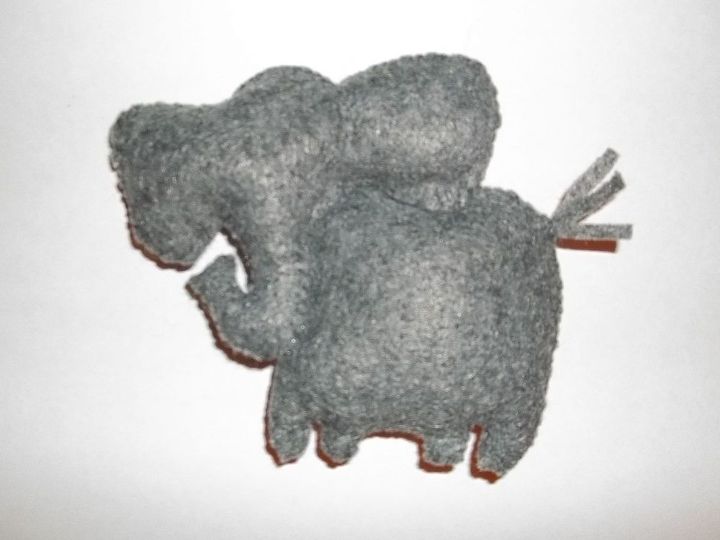
Step 8: Glue or sew on a face and the inner ears.
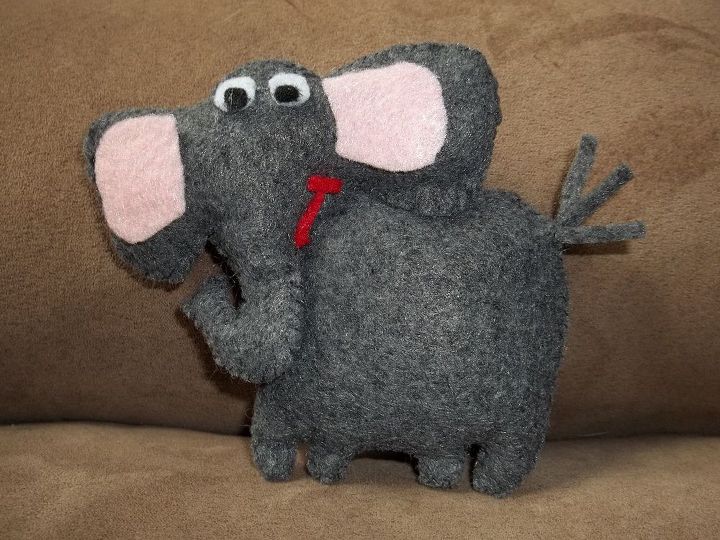
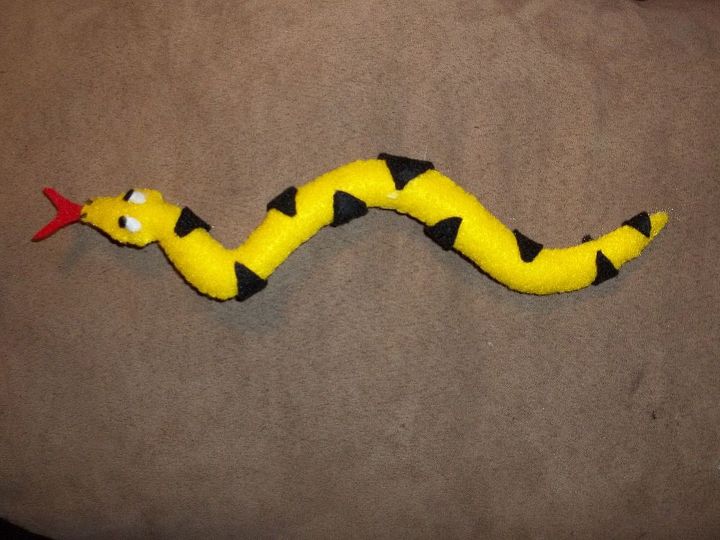
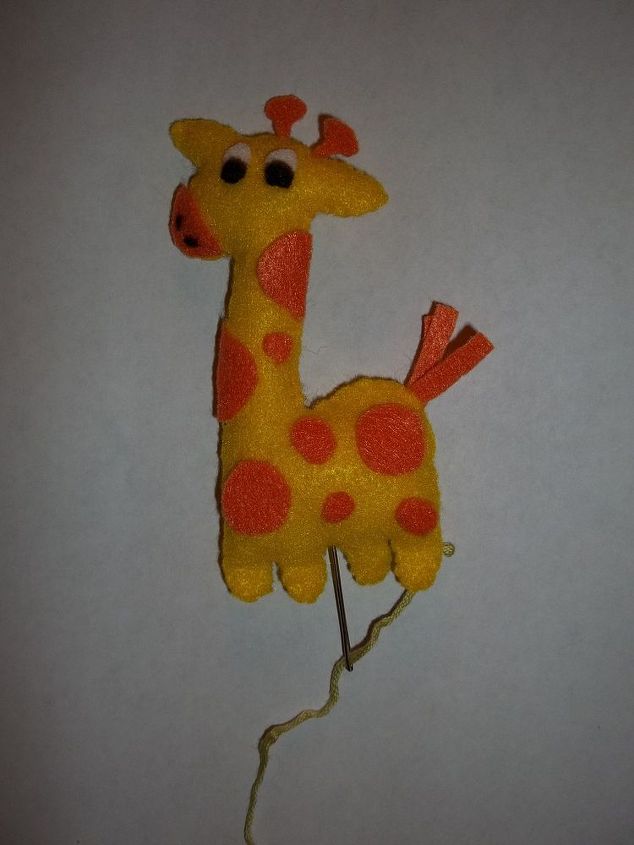
Follow these same steps for each animal.
Part 2: Make the mobile
Step 3. Cut a length of yarn about 2 feet long. Starting from the bottom of the felt animal, pull the yarn though the animal. Put a knot at the very end of the yarn. Pull the yarn through the animal until you get to the knot. The knot at the bottom of the animal will hold it. You may want to put a small dab of glue on the knot just to ensure it stays.
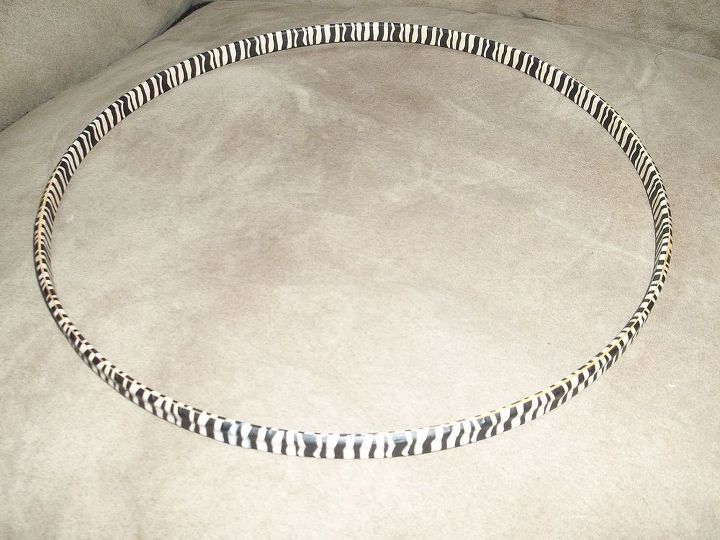
Step 4. Attach the main hanging string. Cut 3 lengths of yarn or string at about 8 inches. Tie these three strings to the washer and then to the hoop. Try to evenly space them around the hoop. Cut a long length of yarn and tie it to the washer. The length of this piece depends on what you are hanging it from and at what height.
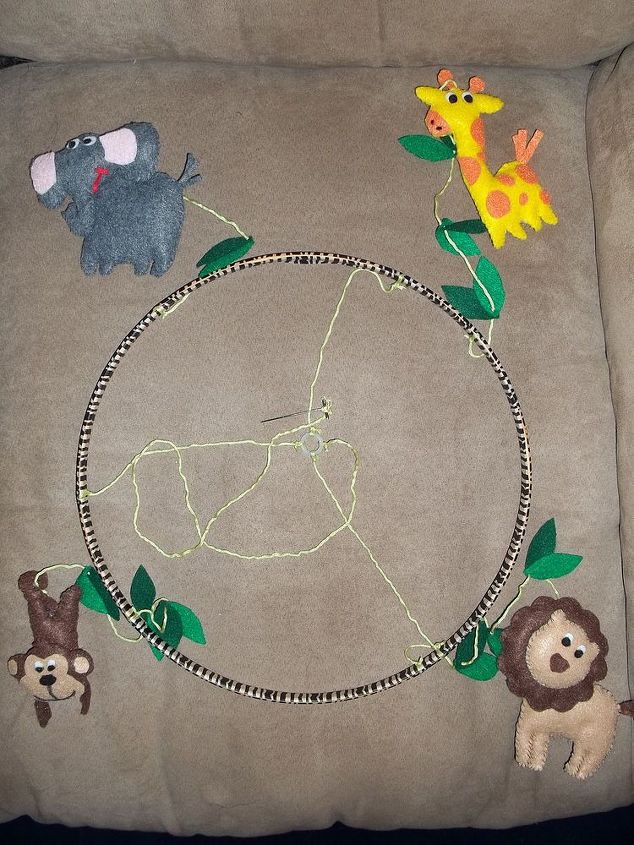
Step 12. Hang the mobile and enjoy!

Want more details about this and other DIY projects? Check out my blog post!
Comments
Join the conversation
4 comments
-
Oh my gosh you are insanely talented! This is SUCH an adorable mobile!
-
ADORABLE! Objects like this ARE usually very pricey. It is good to have a talented Aunt!


Frequently asked questions
Have a question about this project?