How to Make a Live-Edge Hairpin Coffee Table for Under $150

Anna @Annabode
by Anna @Annabode
$150
1 Day
Medium
These days such tables are between $400-1200…not fun. When I discovered this, I said screw it–I’ll make my own, and I’ll show you how to do it too!
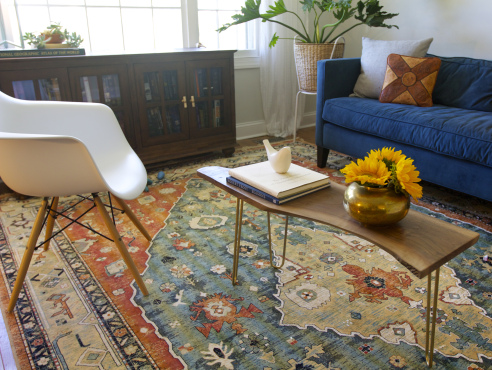
Follow the steps below, and you’ll have yourself a GORGEOUS mid-century modern hairpin coffee table, for less than $150:


Supplies:


-1 live-edge slab, at least 12″ wide, ($40-$80)


-Half pint Minwax Polycrylic in Satin, ($9)


-1 high-quality synthetic brush (such as Purdy), ($12)


-Sandpaper in 60 or 80, 150, & 220, ($3-10)


-3 16-inch Hairpin legs, ($49) Note: these legs come with the appropriate screws (1/2-inch wood screws), latex gloves, sealing wax, steel wool, and a sponge


-Rags


-A sharpie


-Large piece of cardboard


Optional:


-Metallic gold spray paint, $3.76


-Clear enamel spray paint, $3.76


-9 washers for the wood screws


Equipment:


-Electric sander


-Drill


-A bandana/mask and goggles


-A can-do attitude!
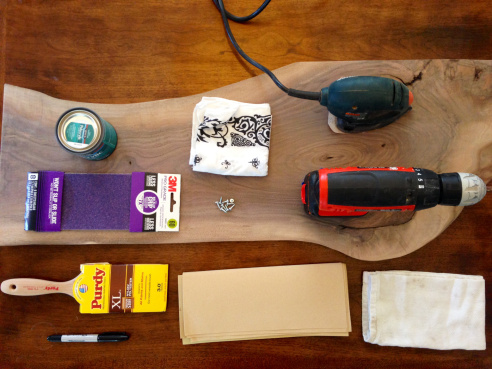
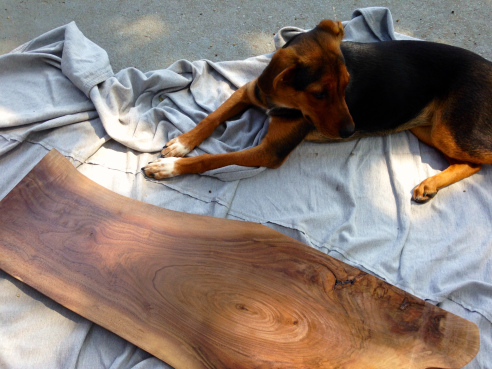
First, find a good place to do your project that is ventilated and dry (outside please–don’t sand in your house!). Put on the mask or tie the bandana over your mouth, and put on the goggles.(Confession: I wore my glasses, and I survived. But put on some goggles as a precaution).


Start by sanding your entire board with the 60 or 80 sandpaper and the electric sander. I used 80 on the flat surface of my board, and used the 60 for the nooks and crevices on the edges.


If there is a thick area of bark, it may help to quickly chisel it off with a hammer and nail. As the bark is soft, it comes off quite easily–or you can choose to leave it on. Both ways look great!


After you have finished sanding the whole board, wipe it clean with a damp rag. Then sand it again with the 150. Wipe again, let dry, and sand with the 220. Wipe again, and let dry. The board should look pretty awesome by now, and feel baby-smooth.
After the board is completely clean and dry, set up your area so that you can apply the sealer. If you’re working outside, be conscious of dust particles or other items that could settle into the finish.


READ THE DIRECTIONS ON THE BACK OF THE CAN AND FOLLOW ACCORDINGLY.
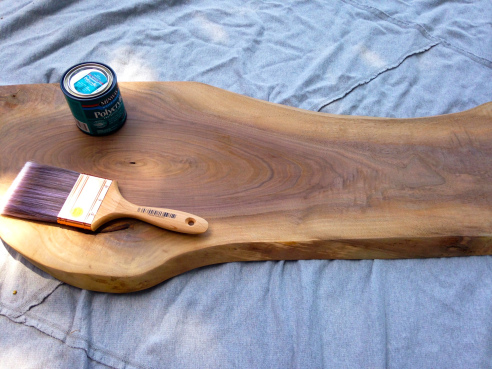
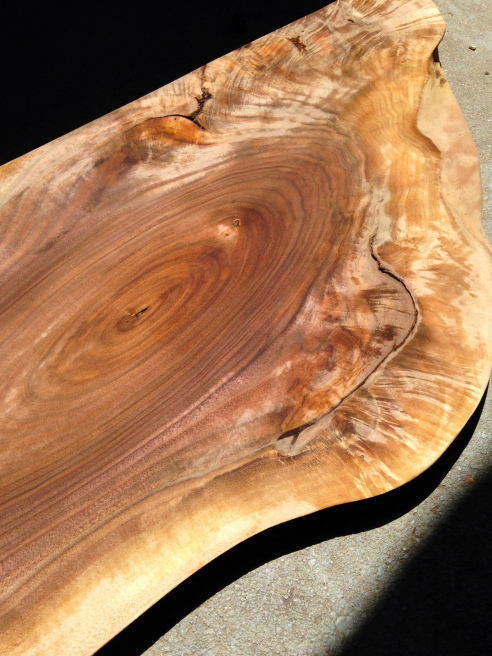
Lie your board with the bottom side facing up (that way if you mess up, you get a second chance on the top). Get a small amount of sealer on your brush and start making long, light strokes on your slab. Make sure all your strokes are in the direction of the grain, and your final strokes are one long sweep from end to end. Keep the coat very thin, and don’t forget the edges. I immediately flipped my slab over, leant it against my house, and sealed the top. It didn’t make a mark, but if it did, who cares? No one’s going to see the bottom.


Wash your brush with warm soapy water, and let the slab dry for 2 hours. Afterwards, sand with the 220 grit sandpaper, wipe with a damp cloth, and let dry. Apply another coat of sealer in the same manner as before (make sure your brush is dry, too). Let dry another two hours (and wash that brush again!).
While you’re waiting for the table to dry, clean the hairpin legs with soap, water, and the steel wool. Wipe with a paper towel and lay them down on a piece of cardboard outside. Using the sponge provided, apply the sealing wax to all surfaces and then wipe clean.


If you’d like the legs to look like brass, spray them with the gold spray paint and let dry. Wait 15 minutes and apply another coat. Again, READ THE DIRECTIONS on the spray paint).
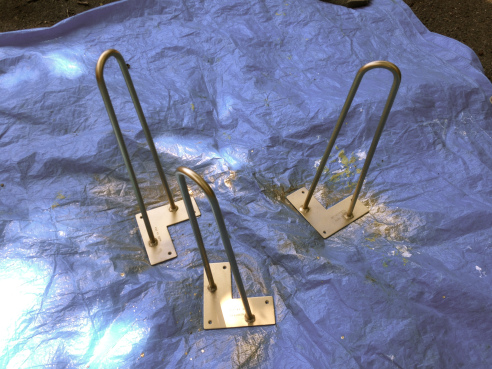
Spray the hairpin legs with the clear enamel and let dry for at least 30 minutes. If you prefer their natural look, skip the spray paint and move on to the next step.


Now flip your board over so that the top is face-down on a soft surface. Position the hairpin legs according to how you’d like them to look. I chose to keep the legs at 90 degree angles and to keep the two that were on the same side in line with each other, but it’s really up to you. Make sure there is at least 1/2″ between each leg and the edge. Mark the screw holes with a sharpie, and remove the legs.
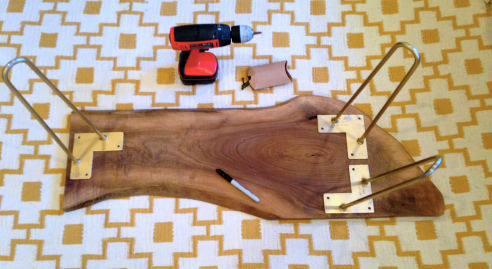
Using a 7/64 bit, drill a hole over each mark. Switch to a phillips bit, reposition the legs, and drill the screws in. Now turn the table right side up, and admire your handiwork :).


Note: I used washers on my screws, as I was afraid of drilling too far through the slab


Voìla! You did it! You made a hairpin leg table! I knew you could. Pat yourself on the back, and enjoy your general awesomeness :).
For more DIY projects, be sure to check out Annabode.com by clicking the link below!
Anna @Annabode
Want more details about this and other DIY projects? Check out my blog post!
Go
Frequently asked questions
Have a question about this project?
Comments
Join the conversation
2 of 25 comments
Next