


Maximize use of narrow kitchen table area

by
Carl G
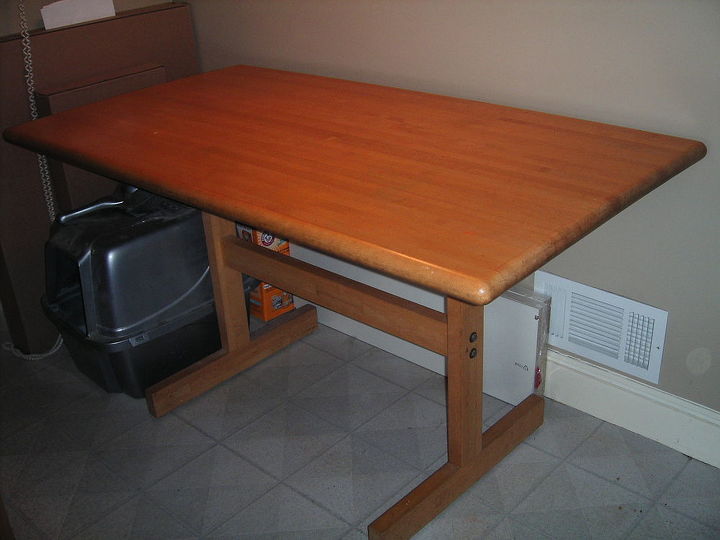
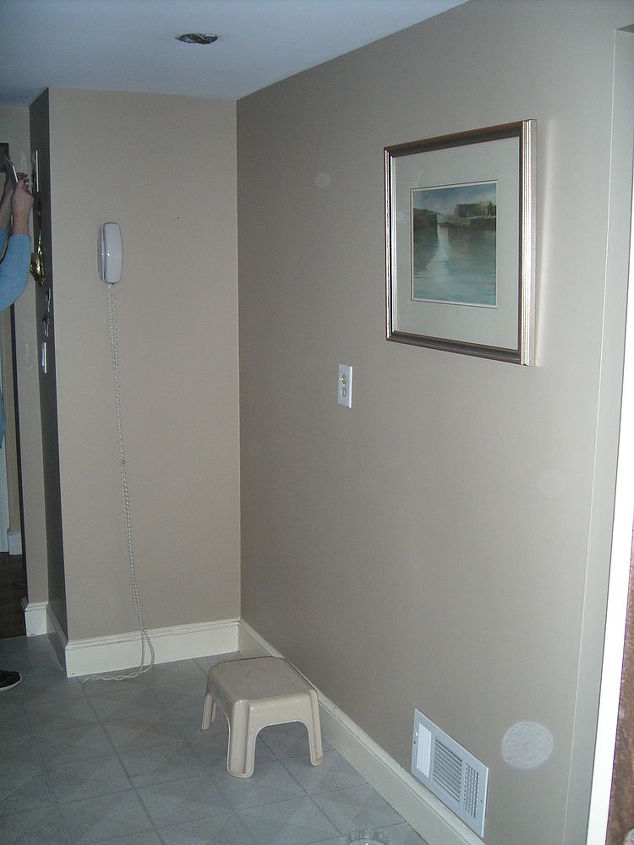
Our kitchen has a narrow part (27" X 76") where we for many years had a parson's table. The table was rarely used as we eat at our dining room table. After many years of using the kitchen table as a counter to hold mail and miscellaneous things, we decided to get rid of the table and install a built-in counter with cabinets below and above. The project involved determining size and style of new cabinets and counter, obtaining the cabinets and counter, preparation of the wall surfaces, construction of a base for the lower cabinets, mounting the hung cabinets, removing the previous hanging light, obtaining and installing a new contemporary light.
* Cost Comments:
cabinets - $350
counter $130
Light fixture $140
Misc. $300
Advice:
You need a lot of room to layout cabinet parts and assemble and then store the assembled cabinets. Clearing the work area at the start will save a lot of frustration.
My wife had the idea of getting rid of the parson's table and installing a counter with cabinet above and below. The basic design is her concept. She is an incredible cook and baker (and cute too) and has never had adequate storage in this kitchen. We started by shopping for cabinets at the major home improvement stores. We were not interested in high end cabinets because the entire kitchen needs to be done over someday and this project is an interim measure. Hence, one goal was not spending so much that tearing it out in a years or two or three would be disconcerting.
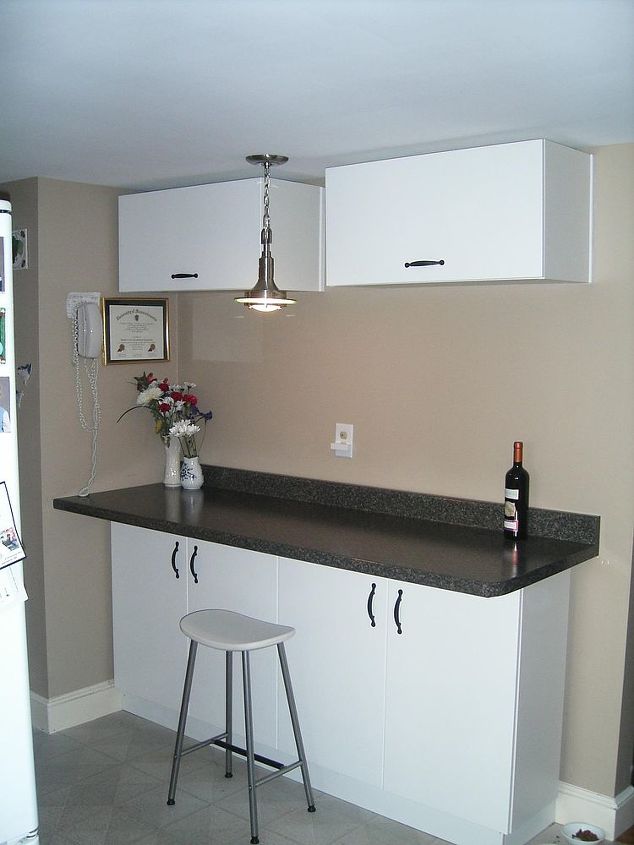
We settled on cabinets from IKEA that were the right size, style, depth, color, etc. We then went to a local counter-top company and had a Formica counter fabricated to order. After that, all I needed to do was assemble the cabinets, build a base for the lower cabinets - just 2X4s - with 4" X 3/4" pine perimeter. Then I needed to prepare the upper wall to be able to hang the upper cabinets. That simply involved finding the studs and screwing strapping to the walls on to which the cabinets were screwed. I recruited some friends to help with the lifting and holding the cabinets while I secured them to the wall. The lower cabinets set on to the base and were easy to secure to the wall. The lower cabinet was set out from the wall the distance needed for the lip of the counter to overhang and be flush with the wall.
The final step was installing a new light fixture - contemporary in keeping with the style of the new cabinets. Although IKEA assembly is not difficult, the only part of the project that I found tedious was assembling several cabinets. Overall it was an easy project and it came out fine. The best part is now my wife has more room to store her kitchen utensils and dishes so she is happier in the kitchen and I continue to eat exceptionally well.
* Cost Comments:
cabinets - $350
counter $130
Light fixture $140
Misc. $300
Advice:
You need a lot of room to layout cabinet parts and assemble and then store the assembled cabinets. Clearing the work area at the start will save a lot of frustration.
My wife had the idea of getting rid of the parson's table and installing a counter with cabinet above and below. The basic design is her concept. She is an incredible cook and baker (and cute too) and has never had adequate storage in this kitchen. We started by shopping for cabinets at the major home improvement stores. We were not interested in high end cabinets because the entire kitchen needs to be done over someday and this project is an interim measure. Hence, one goal was not spending so much that tearing it out in a years or two or three would be disconcerting.
We settled on cabinets from IKEA that were the right size, style, depth, color, etc. We then went to a local counter-top company and had a Formica counter fabricated to order. After that, all I needed to do was assemble the cabinets, build a base for the lower cabinets - just 2X4s - with 4" X 3/4" pine perimeter. Then I needed to prepare the upper wall to be able to hang the upper cabinets. That simply involved finding the studs and screwing strapping to the walls on to which the cabinets were screwed. I recruited some friends to help with the lifting and holding the cabinets while I secured them to the wall. The lower cabinets set on to the base and were easy to secure to the wall. The lower cabinet was set out from the wall the distance needed for the lip of the counter to overhang and be flush with the wall.
The final step was installing a new light fixture - contemporary in keeping with the style of the new cabinets. Although IKEA assembly is not difficult, the only part of the project that I found tedious was assembling several cabinets. Overall it was an easy project and it came out fine. The best part is now my wife has more room to store her kitchen utensils and dishes so she is happier in the kitchen and I continue to eat exceptionally well.
Comments
Join the conversation
2 of 5 comments
-
Aren't the wall cabinets a little too high to reach? Do you find it easy to get things out of the cabinets?
-
I see the stool. Are you eating at this counter now after all that time of not using the table? Also, as the main cook in my house, I have come to the conclusion that I will just use up all the available counter space no matter how much I have, but more counter is always a plus.


Frequently asked questions
Have a question about this project?