


Slate Floor in Living Area

by
Steve E
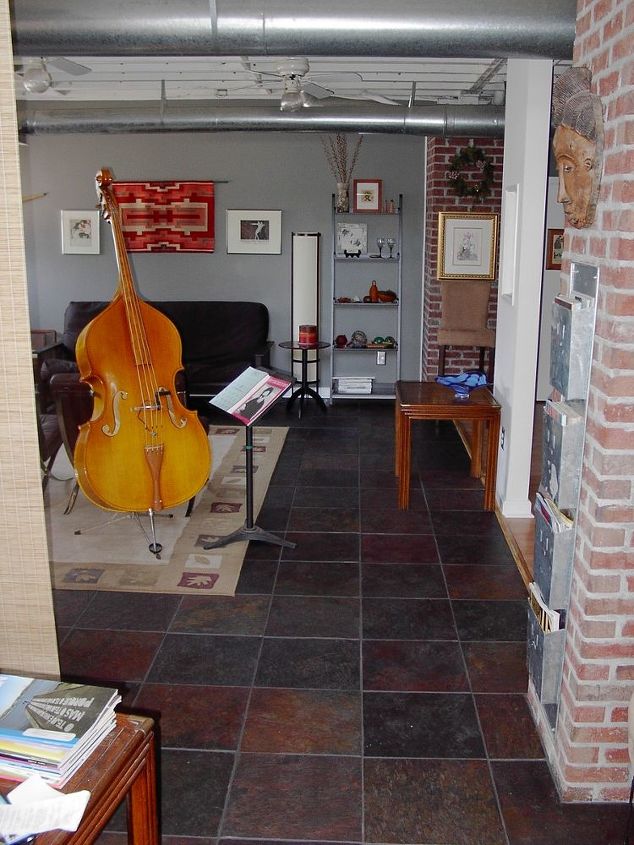
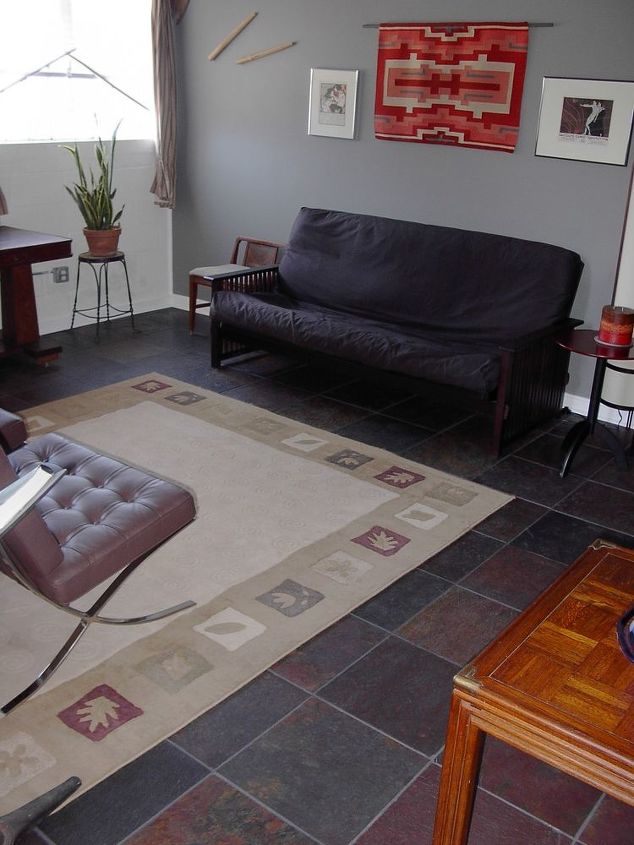
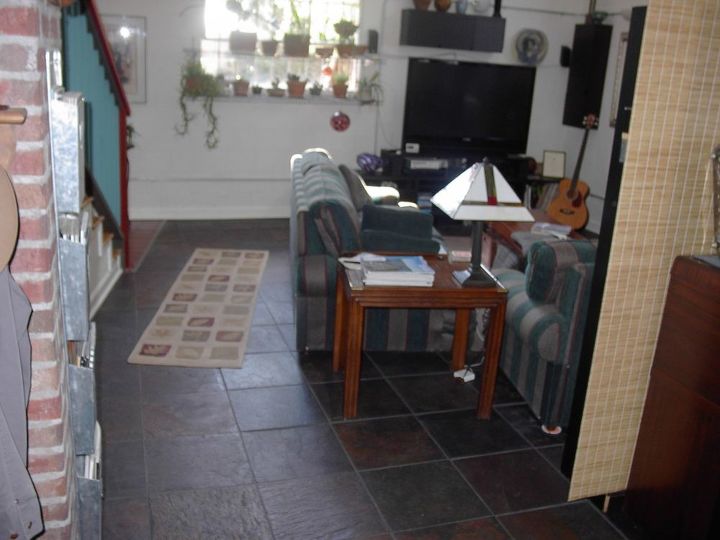
I put down approximately 600 square feet of 16x16 inch slate tile over a painted concrete slab. The project included cleaning/sanding the painted slab, setting, sealing and grouting the tile, installing new transition strips, and installing new baseboard trim around the new floor.
*Options I considered for this project:
I never considered anything other than the slate. I looked at different types of slate and sizes of tiles.
*Questions and unexpected events that arose during the project:
1) I knew that slate, as a natural material, would have some variations in thickness, but was surprised at the amount of variation. The tiles varied from about 3/16" to 3/8" thick. I found some small plastic shims in the ceramic tile section of Home Depot that I was able to use to raise up the thinner tiles, making sure there was enough thinset cement to fill any voids left from shimming.
2) I started grouting a portion of the floor, and when the grout set and dried, it was much lighter in color than the samples in the supplier's showroom, and was inconsistent in darkness. I was told that the light color and the color variations were due to my not carefully measuring the amount of water used in mixing the grout, and could also be caused by using too wet a sponge when wiping off the excess grout. I ultimately bought a dark color grout stain and hand-painted the grout joints with it. Time-consuming, but it looked 100% better for having done that.
*My motivation to do this project:
The painted concrete was unsightly and was never intended to be the finished floor.
*Project Steps:
1) Sand and clean the painted concrete slab, remoning most of the paint and old flooring residue.
2) Measure the floor area and purchase 10% more tile than the area to be tiled.
3) Lay out a grid starting in the middle of the area, using the nominal (16x16 inch) dimension. Plan for the cut tiles around the perimeter. Plan on laying all the solid tiles before cutting the edge tiles (not as critical if you have a heavy-duty tile saw- I had to rent one).
4) Starting in the middle of the area and working out, mix enough grout to set about a 10 foot square area and set the slate using tile spacers to control the width of the joints, and shims to level them.
5) After all the tile has been set, use a sealer to coat the top surface of the tile to protect it from grout staining during the grouting process.
6) Mix enough grout (carefully measuring the amount of water recommended by the manufacturer) to do about 10x10 feet, and use a grout float to force the grout into the joints and scrape up excess.
7) Before the grout has set completely (a couple of hours- see grout manufacturers' recommendations), use a damp, not soaking wet, sponge to wipe up residue. wipe up as much as possible with the sponge, and when the surface had dried, use a terrycloth towel to wipe off the remaining haze. (You should be able to give the grout a few more hours to set before using the towel to wipe up the haze.) Any residual cloudiness will go away when you seal the slate.
8) Following manufacturers' instructions, apply clear sealer to the slate and grout.
9) Install transition strips and base trim.
Advice:
1) Don't choose a grout color that is radically different from the slate. If it stands out, it will accentuate any variations in the width of the grout joints.
2) Do plan on shimming the tiles to avoid big differences inthe level of the finished floor.
3) Don't do this if you have back problems. My back has yet to forgive me.
4) do buy at least 10% more tile than the size of your finished space, to allow for breakage, waste, etc.
Materials:
660 sq ft slate tiles - $1287.00
Thinset cement, grout, tile sealer - $470.00
New base molding and quater-round - $35.00
New transition strips - $47.00
Sander rental - $37.00
Wet saw rental - $42.00
Grout stain - $59.00
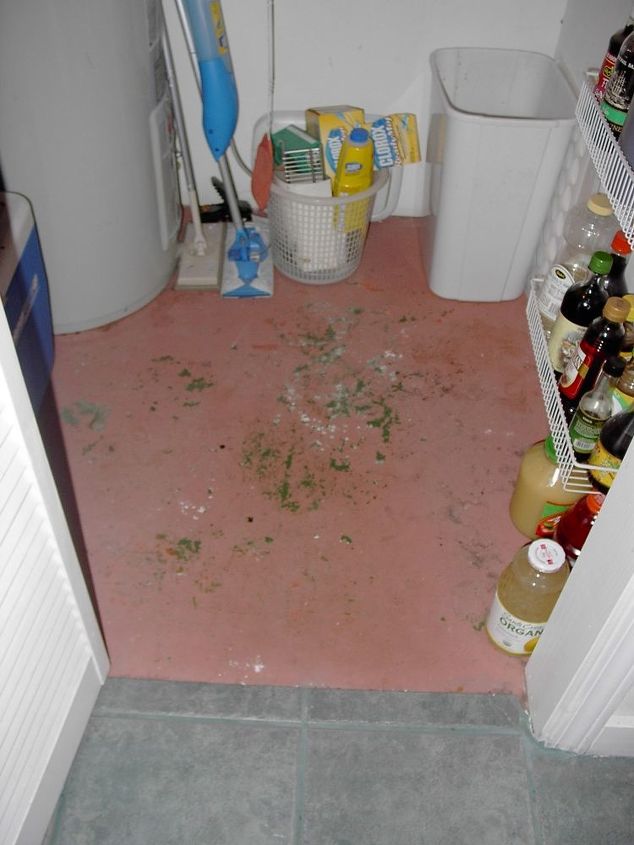
Painted slab looked like this before
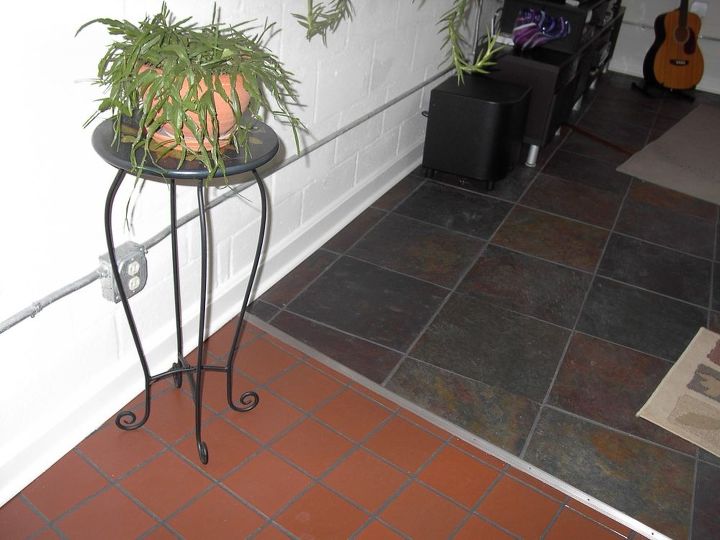
Slate to terra cotta metal transition strip and base wall trim
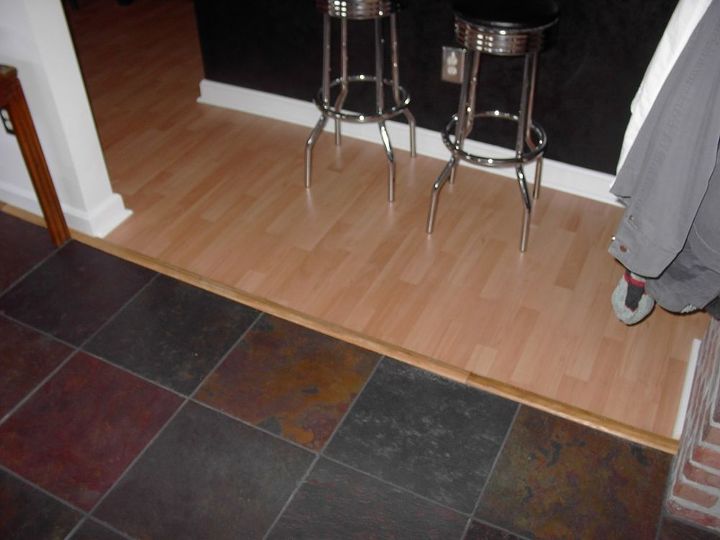
Slate to laminate floor wood transition strip (one of two)


Frequently asked questions
Have a question about this project?