


Quarter Round Molding

by
James A
Adding quarter round molding around the baseboard
*Options I considered for this project:
A contrctor could have done this faster but certainly not less expensively.
*Questions and unexpected events that arose during the project:
The number of cuts made on the miter saw. How confusing cutting angles.became. Getting up and down constantly was tiring.
* Cost Comments:
I had around 160 ft to be layed @ $.54 per ft. I chose the pine, natural color.
*My motivation to do this project:
New hardwood flooring had been laid. Adding this additional molding would cover some short cuts and improve overall appearence.
*Project Steps:
Installing quarter round molding along a straight line was no trouble at all. I simply measured the length of the wall on which you wish to install quarter round.
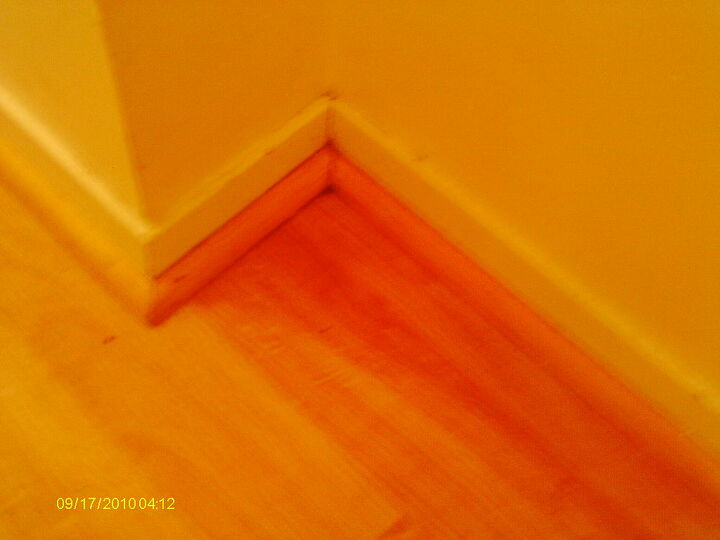
Marked a piece of quarter round molding at the desired length. Cut the length of quarter round molding along the pencil line. However, no room is straight lines. On outside corners, I had to cut a piece of quarter round molding to fit the wall, making it slightly longer than necessary so part of it sticks out beyond the wall where the corner is and mark the position of the corner on the back of the quarter round molding. Then I cut the quarter round molding using a miter saw set at a 45-degree angle, going from the outside to the inside of the molding. When encountering an inside corner, I had to cut the end of a piece of molding at a 45-degree angle. Measure the length of molding I needed, mark it and cut the molding with a miter saw, being sure not to cut the end on which I cut the 45-degree angle. I then fit the quarter round molding into the corner, cut side facing upwards. This sounds easy enough yet I made many mistakes and had to redo some pieces. Once all the molding was cut and set in place, making sure all pieces were cut correctly, I nailed the molding in at 12-inch intervals and punched in the nail head so that it is below the surface of the wood. I then puttied over the holes created by the nail punch to conceal them. Around the fireplace I used an old glue gun to attach the molding to the brick and floor.
Advice:
Do cut all pieces then lay them out before nailing. Do get a miter saw. Do get a small bench to sit on. Do buy a little extra quarter round for errors. Do buy the color you want to prevent having to paint.
Materials:
Quarter round - $86.00
Miter Saw - $9.00
Brads - $3.00
putty - $5.00
*Options I considered for this project:
A contrctor could have done this faster but certainly not less expensively.
*Questions and unexpected events that arose during the project:
The number of cuts made on the miter saw. How confusing cutting angles.became. Getting up and down constantly was tiring.
* Cost Comments:
I had around 160 ft to be layed @ $.54 per ft. I chose the pine, natural color.
*My motivation to do this project:
New hardwood flooring had been laid. Adding this additional molding would cover some short cuts and improve overall appearence.
*Project Steps:
Installing quarter round molding along a straight line was no trouble at all. I simply measured the length of the wall on which you wish to install quarter round.
Marked a piece of quarter round molding at the desired length. Cut the length of quarter round molding along the pencil line. However, no room is straight lines. On outside corners, I had to cut a piece of quarter round molding to fit the wall, making it slightly longer than necessary so part of it sticks out beyond the wall where the corner is and mark the position of the corner on the back of the quarter round molding. Then I cut the quarter round molding using a miter saw set at a 45-degree angle, going from the outside to the inside of the molding. When encountering an inside corner, I had to cut the end of a piece of molding at a 45-degree angle. Measure the length of molding I needed, mark it and cut the molding with a miter saw, being sure not to cut the end on which I cut the 45-degree angle. I then fit the quarter round molding into the corner, cut side facing upwards. This sounds easy enough yet I made many mistakes and had to redo some pieces. Once all the molding was cut and set in place, making sure all pieces were cut correctly, I nailed the molding in at 12-inch intervals and punched in the nail head so that it is below the surface of the wood. I then puttied over the holes created by the nail punch to conceal them. Around the fireplace I used an old glue gun to attach the molding to the brick and floor.
Advice:
Do cut all pieces then lay them out before nailing. Do get a miter saw. Do get a small bench to sit on. Do buy a little extra quarter round for errors. Do buy the color you want to prevent having to paint.
Materials:
Quarter round - $86.00
Miter Saw - $9.00
Brads - $3.00
putty - $5.00
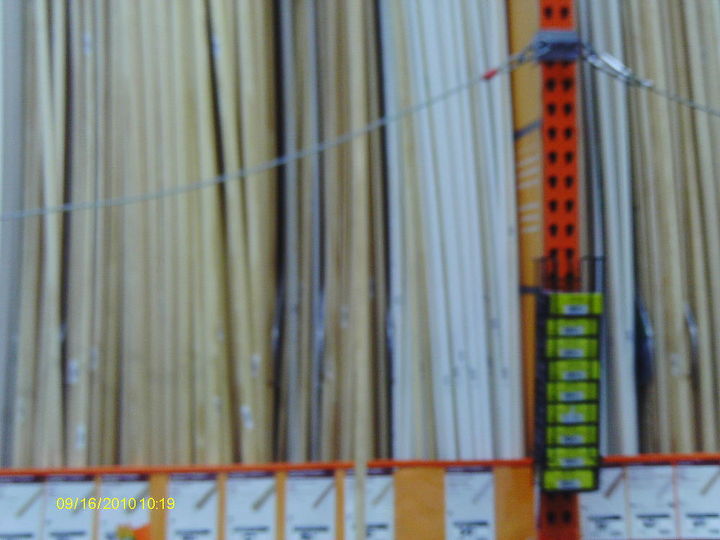
Wide range of molding. I chose quater round in a natural pine color to match to floor. White was also available.
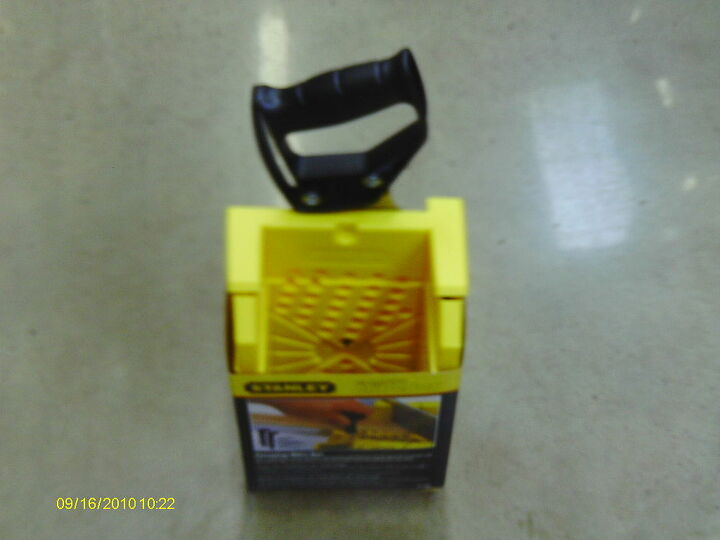
A miter saw and box is critical to cutting sharp, uniform angles. This one was $8.
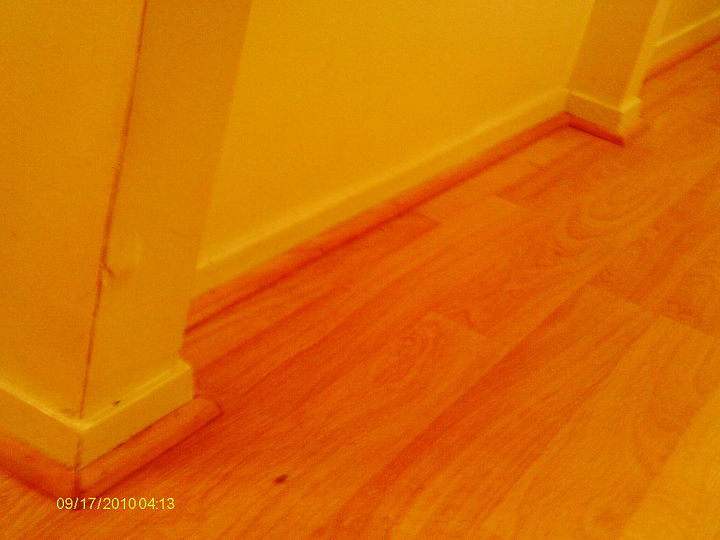
If walls were a straight line this job would be easy but it never happens.
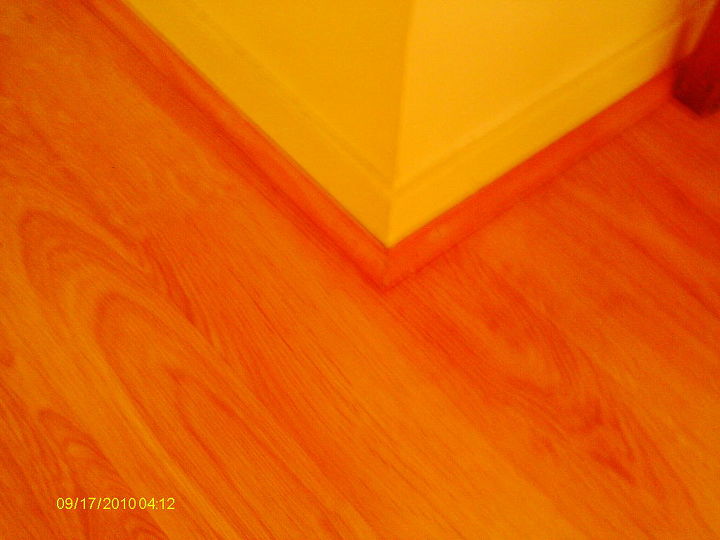
Sharp edges where the cuts are seamless makes all the difference.
I pieced all the small pieces together before nailing. Making sure all were there and they were cut correctly.
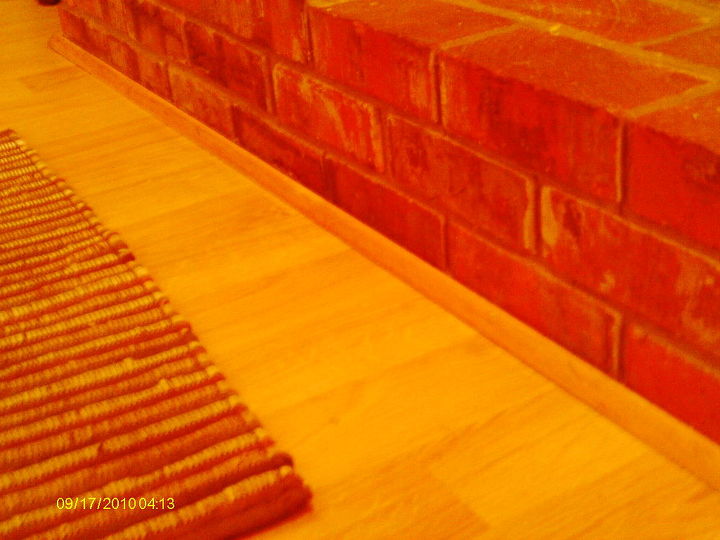
Used my old glue gun to attach the molding to the fireplace.
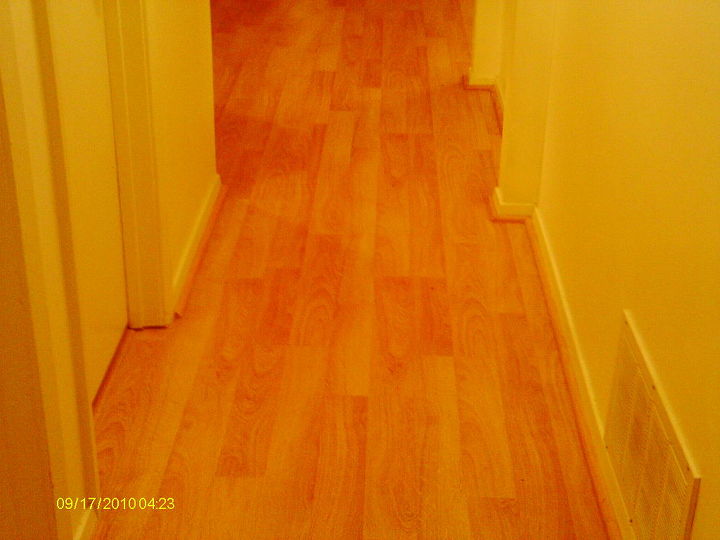
The molding tied the new floor and walls together well as a finishing touch. A job I am proud of!
Comments
Join the conversation
2 of 8 comments
-
That was a lot of measuring and cutting. Having a helper would have saved a lot of time, you think? Do you prefer a hand saw verses an electric one? What about a nail gun? I love power tools!
-
Wow you can really use a miter saw.


Frequently asked questions
Have a question about this project?