


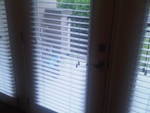
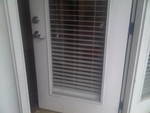
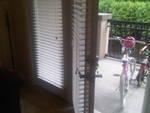
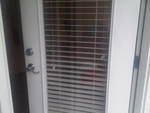
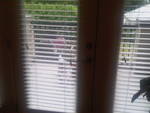
REPLACE BACK DOOR

by
M J
Replace back door.
*Options I considered for this project:
Hiring someone to delivering and install.
*Questions and unexpected events that arose during the project:
None
* Cost Comments:
Additional materials I needed but already had.
•1 tape measure
•1 pencil
•1 panel saw
•1 plane
•1 narrow chisel
•1 medium-sized chisel
•1 hammer
•1 battery drill kit with drill bits
•some sand paper
•some wooden wedges
*My motivation to do this project:
I wanted the outside of the home to look appealing. I also wanted a door that wouldn't Dent, Rust or Rot, and for this reason alone I choose a fiberglass door.
*Project Steps:
Measure the door opening
Before you buy your new door, use your tape measure to measure the height and width of the door opening. Purchase a door that is either the right size or slightly larger than the door opening.
Apply measurements to the door
Remember that you will need to leave a little space between the door, the frame and the floor. The recommended clearance for the top and sides is 2mm (1/16 inch). For the bottom the recommended clearance is 6mm (1/4 inch) but if you have particularly thick carpet you may need to leave a little more. However, be extremely careful not to overestimate the clearance needed.
Trim the door.Once you have finished trimming the door, sand until smooth.
Try the door in the frame
Place shallow wedges underneath the door and see how it fits in the frame. You may need someone to help you hold it up. If it does not fit properly, you will need to take it down and trim accordingly.
Mark the hinges
Doors tend to open into a house or room. So the hinges will be positioned on the right side of the frame as you walk in.
Place the door on its side with the hinge side upwards. Measure and mark 15 cm or 6 inches from the top and bottom of the door.
This mark represents the bottom of the hinge at the bottom of the door, and the top of the hinge at the top.
Now open a hinge and place it on the door in line with the mark you have just made. Draw around it with a pencil. Repeat this for the other hinge.
Cut hinge recesses
Before you pick up your chisel, remember your chisel safety. Make sure that you are wearing safety goggles and clear the area of potential hazards. Find a steady standing position and remember to watch your fingers when you do start chiselling.
Make a series of cuts along your pencil outline. Now chisel out a shallow recess for the hinge. Keep testing the fit – if you chisel out too much, it will be very hard to fix. Stop when the hinge lies flush with the door. Repeat this process for the other hinge.
Mark and drill pilot holes
Position each hinge flap in its recess and, using your pencil, mark the screw positions.
Now select a drill bit that is slightly narrower than your screws and attach it to your drill.
Before you begin, remember drill safety. Put on your goggles. Make sure all loose items of clothing, hair and jewellery are tucked away. Clear the area of any potential hazards and find a steady standing position.
Drill some pilot holes. These will guide the screws. When drilling take care to keep the bit horizontal and square to the door edge
Screw on the hinges
Remember drill safety. Use either a screwdriver or your drill to screw in the hinges.
Mark the hinge positions on frame
Get somebody to hold the door in position with the hinge flaps open on the frame. Insert two screwdrivers or shallow wooden wedges underneath the door so that the hinges are at the correct height against the frame.
Make sure that the hinge knuckles are parallel with the frame. Then use a pencil to draw around the hinges.
Now carefully remove the door and place it safely to one side.
Chisel hinge recesses
Remember your chisel safety.
Carefully chisel out shallow recesses in the frame in the same way you did previously on the door.
Strip away the surplus wood and trim the recess until it is level. Be careful not to chisel out too much.
Test the fit
Get somebody to help you hold the door against the frame and place wedges or screwdrivers underneath the door to support it. Check that the hinges fit into the recesses you have just made. If not, trim as necessary
Fix hinges to the frame
Use your pencil to mark the position of the screw holes on the frame. Remember your drill safety. Remove the door and drill more pilot holes. Then drill in the screws to secure the hinges to the door.
HANDY HINT
Only put one screw in each hinge to begin with so you can test the door closes easily in the frame. If you are happy, then screw in the remaining screws.
The door stop
A doorstop is a narrow strip of wood built into the frame to stop the door and prevent it from swinging through.
Depending on the thickness of your new door you may have to replace your existing doorstop.
In a new frame, such as this, you will have to fix a doorstop once you have hung the door.
Mark and measure the frame
With the door shut mark around the frmae at the point where the door stops needs to be fixed. Then measure across the top of the frame and transfer this measurement to the wood for the doorstop.
Cut to size
Remember your saw safety. Put on your goggles. Make sure all loose items of clothing, hair and jewellery are tucked away. Clear the area of any potential hazards. Find a steady standing position and remember to watch your fingers when you do start sawing.
Place the wood across a portable bench or a sturdy surface, and cut the wood according to your measurements.
Screw the doorstop to the frame
Remember your drill safety. Place the top of the doorstop in position and drill it in place.
Use at least three screws to secure the doorstop to the frame. When you have successfully fitted the top piece, repeat this process for the two remaining sides of the doorstop.
Advice:
None
Materials:
FIBERGLASS DOOR - $310.00
ELECTRIC SCREWDRIVER - $100.00
SCREWS BOX OF 200 - $25.00
HINGES - $9.50


Frequently asked questions
Have a question about this project?