


Replacing a bathroom faucet

by
James A
Replaced bathroom faucet and drain
* Cost Comments:
May need a basin wrench ($12), Plumber's putty ($2) and teflon tape ($1)
*My motivation to do this project:
The faucet was old and did not work well.
*Project Steps:
First, I removed the old faucet. I turned off the water supply shutoff valves using the cutoff under the cabinet. I then opened the tap to allow the water to drain out of the lines and remove any water pressure.
I removed the hot and cold water supply lines running to the faucet with an adjustable wrench. I disconnected them at the faucet base since I was reusing the existing lines.
This was a faucet held in place by nuts located on the underside of the sink. I needed to get under the sink to remove them, and it was a bit of a squeeze. I did manage to get a wrench to loosen the nuts. So I did not need a basin wrench.
Once I removed the nuts holding the faucet, I just lift it up off the sink. I removed the old caulking and "grunge" that had built up around the old faucet. I used fine steel wool to remove most of it.
Next, I installed the New Faucet.
I laid a bead of plumber's putty then put the faucet in place. Then working underneath, I put on the washers and mounting nuts, and then hand tightened.
Once the faucet is firmly attached to the sink, I reinstalled the water feed lines using plenty of teflon tape on metal ends. I hand tighten these, then turned them ¼ turn with a wrench. I turned the water back on and checked for leaks. When cleaning, I made sure to clean up any plumber's putty around the faucet before it had a chance to set up.
The final job was to take off the aerator from your new faucet, turn on the tap and let water run for a couple of minutes to flush out anything that might be inside the faucet and ensure the new faucet ran clean.
Now, it was on to the Popup assembly and drain replacement. I loosened the retaining nut under the cabinet closest to the top. I then loosened the two large plastic nuts and removed the gooseneck from the drainpipe. I was able to free the flange from inside the sink but it would not turn. Finally I drilled a small hole in the flange, careful not to chip the ceramic sink. Then held a screwdriver in the drill hole to secure the flange while I turned the drainpipe underneath. After spraying with WD40 and scraping off all old putty and grange, it finally came off. I removed the lift rod and then reinstated the drainpipe into the gooseneck. I cleaned the drain hole in the sink very well and reinstalled the flange then the lift rod per supplied instructions.
No leaks, I was ready to go!
Advice:
The drain flange is sharp! Don't cut your fingers trying to screw it off. Do use a basin wrench if needed. Do have a bucket and towels ready at hand. Do have a flashlight handy. Do arrange all tools so that you can reach them easily when you are under the sink. Dont leave old putty on sink, clean new putty before it dries.
Materials:
1 X Faucet - $29.00

My old faucet was grungy and did not work well.
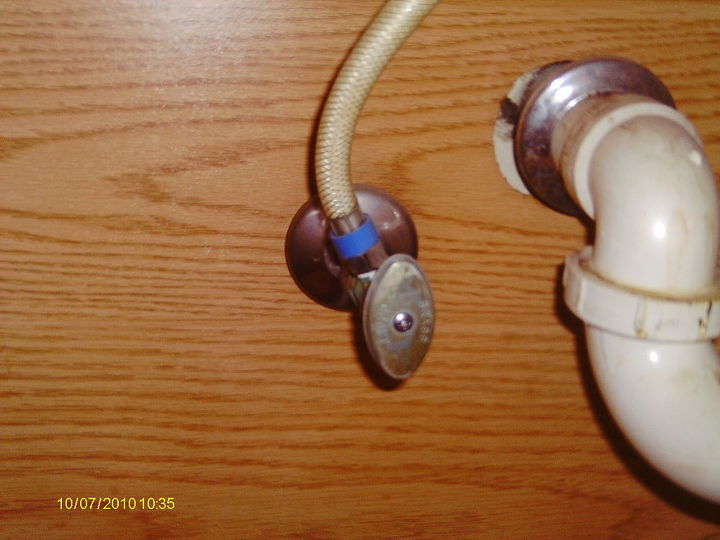
My water cutoff valves were easy to access in the cabinet under the sink.
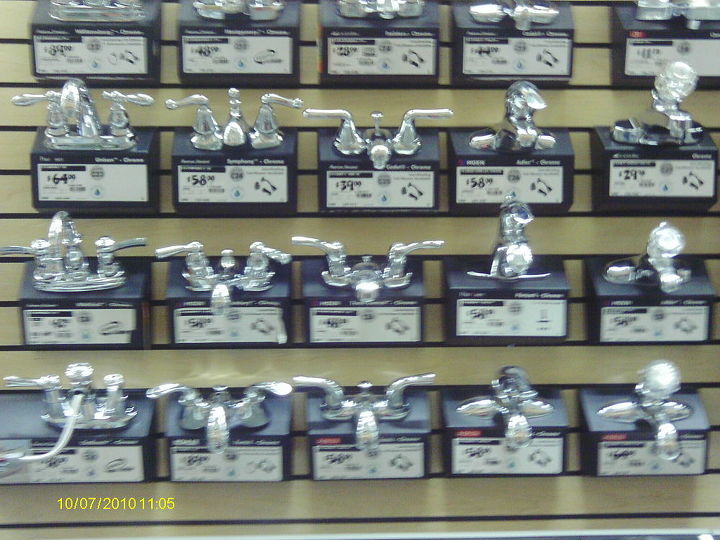
There were many choices at the local home improvement store. All shapes, designs and finishes. i went with the one on sale!
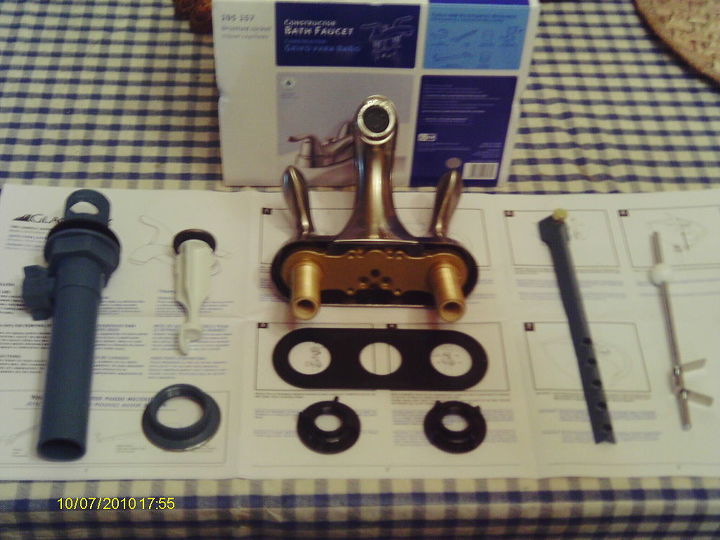
Laying out all components before you start helps make sure all is there and helps get familiar with the faucet assembly.

I cleaned around the openings on the sink with very fine steel wool. Household cleaner and a platic scraper also works well.
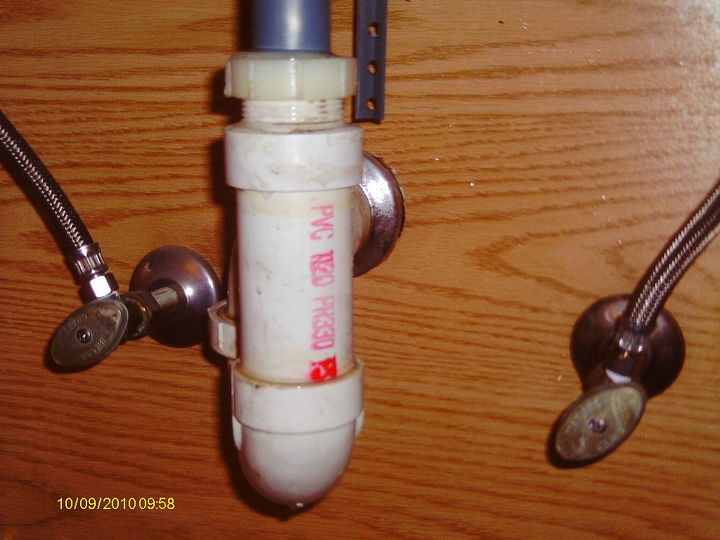
I disconnected the tw large plastic nuts and dropped the drain pipe out to install the new one. Removing the flange was the most difficult. WD40 was needed to unscrew the flange from the drainpipe.
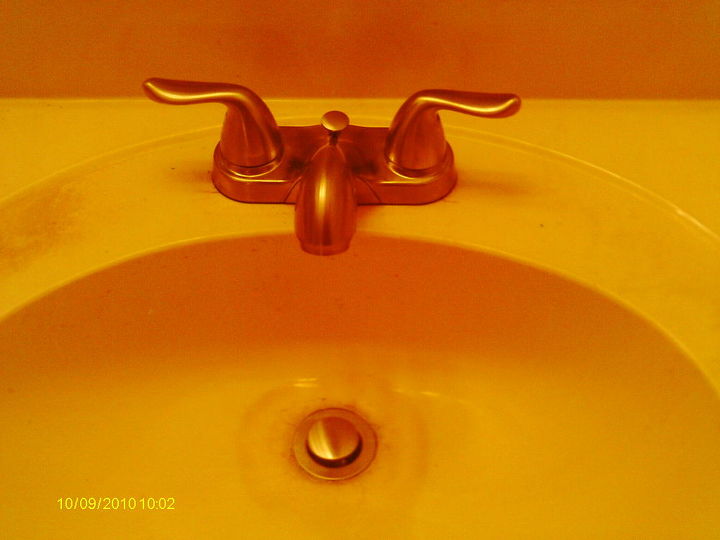
No Leaks! I have a new faucet that works well. I will be reminded of my success each day as I use my sink and new faucet!
Comments
Join the conversation
2 of 4 comments
-
That was one ugly faucet!! The new one looks MUCH better : )
-
New faucet works great. I did have a slow drainage problem. I realized that my stopper was not raising high enough to let the water drain quickly. So, under the sink, I loosened the adjusting nut from the drain pipe to the the lift rod until the stopper was opened wider, and retightened the adjusting nut. It works fine now, easy fix.


Frequently asked questions
Have a question about this project?