


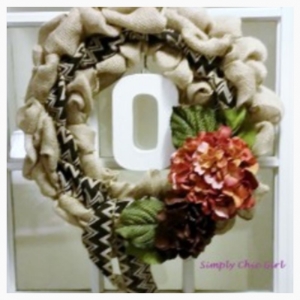
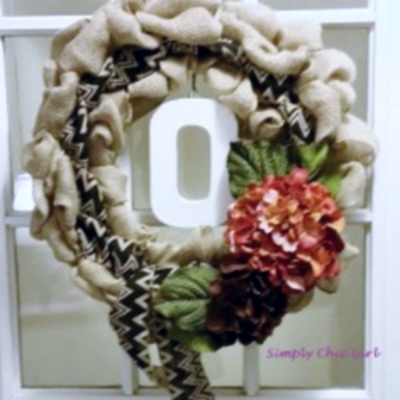
DIY Crafts Burlap Wreath
Have you ever had an idea but you didn’t know where to start? This happens to me quite often with my DIY Crafts, Check out how easy it is to make your own Burlap Wreath.
I love searching websites and putting together my idea. This one started at Wal-Mart one morning. I’m going to confess, I’m not a huge fan of Wal-Mart. I was there one morning before work (perfect time for me) and I saw a burlap table runner for $5.99. The runner was perfect for the fall/winter decoration on my dining room table. My idea for this was just to stencil something on the ends to give some character, then decorate it. So, how did I get from burlap table runner to burlap wreath? No clue, that’s how my brains works! Ideas just pop in every once in a while and I run with them.
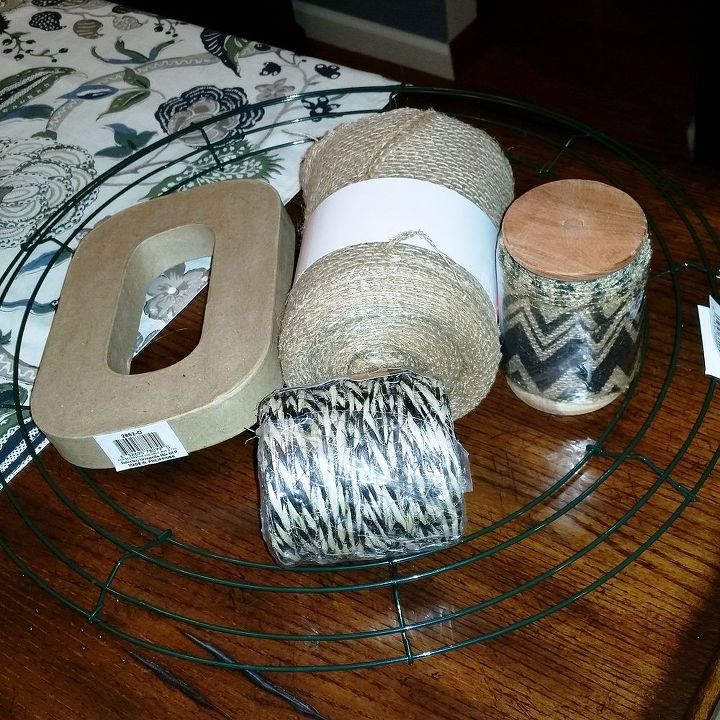
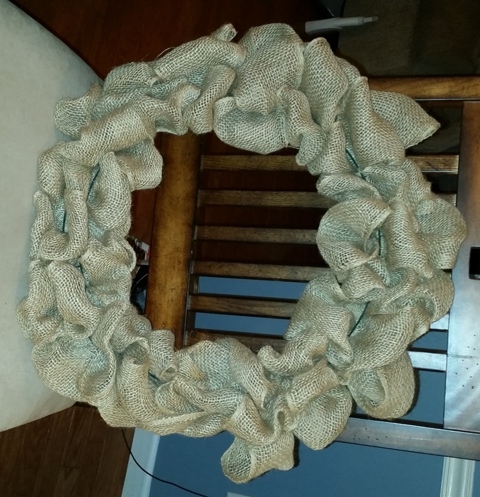
We decided on the medium size wire wreath frame ($2.99) and a bigger bundle of burlap garland ($4.50 -we used our coupon on this). I wanted to put a letter "O" in the middle of the wreath ($2.99). We found everything and as we were checking out they had a wire edged chevron burlap ribbon for ($3.97 - more than 50% off and it had a great wooden spool, how great was that!!!) So my initial project cost under $15.00. I added two hydrangea flowers later for about $6.00 total… so my whole project cost about $20.00. Not too shabby.
If you remember from the start of this blog I still had the burlap table runner. Here’s what I did: I painted the letter with some white paint and “stamped” it on my table runner… then I added another coat of paint and attached it to my wreath with some twine.
xoxo,

Want more details about this and other DIY projects? Check out my blog post!
Comments
Join the conversation
2 comments
-
check out my website at www.simplychicgirl.com
-
I love your creativity, I was looking for ideas for Christmas sorry never too early! Your wreath looks great and you could adapt the basic make in so many ways, I.e. Easter, Thanksgiving, Wedding, Baby shower almost any occasion. Thanks for sharing.


Frequently asked questions
Have a question about this project?