


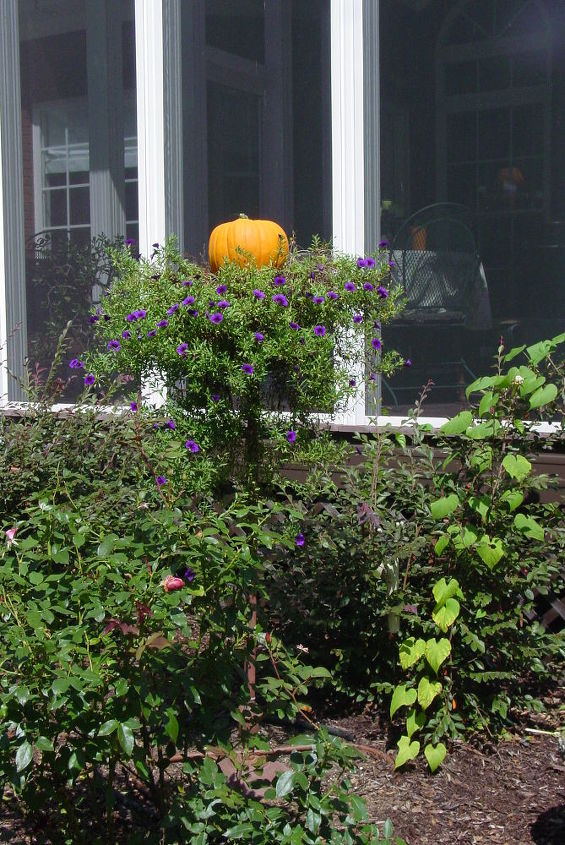
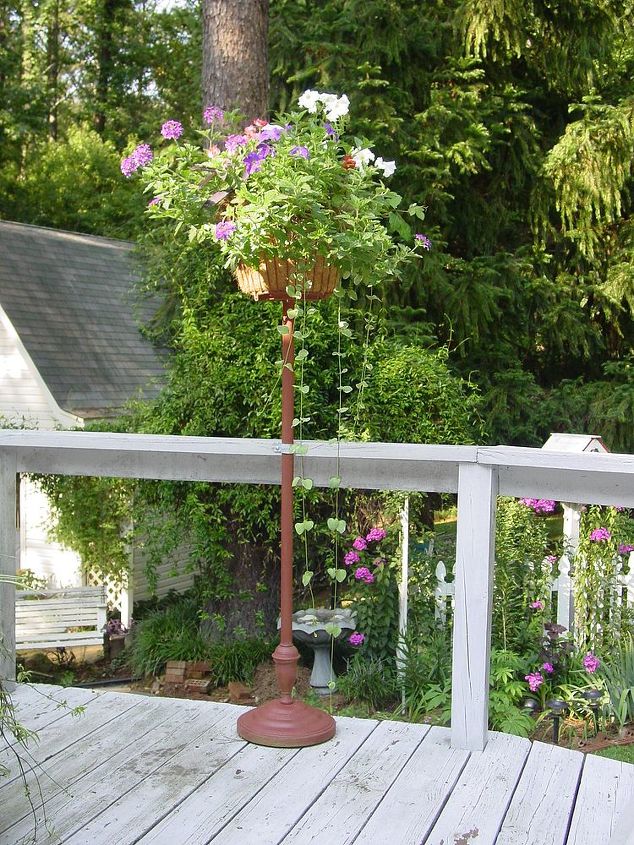
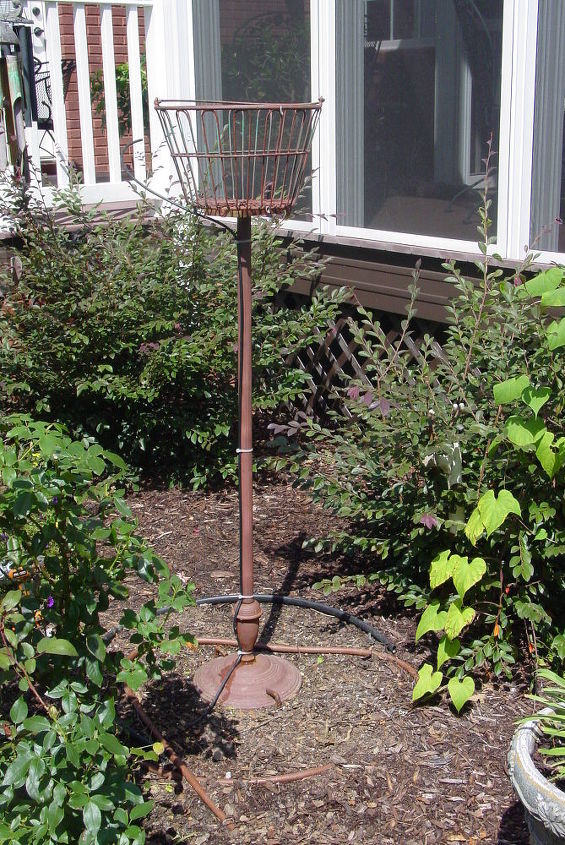
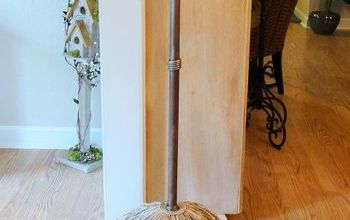
Old wire egg basket and thrift store floor lamp stand repurposed into an outdoor planter

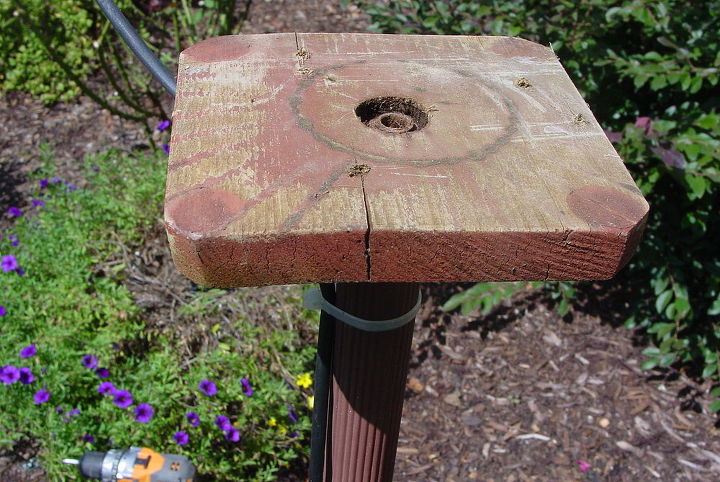
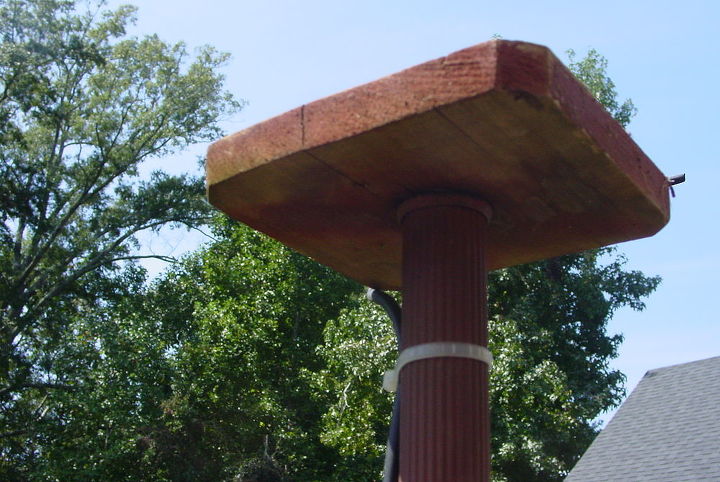
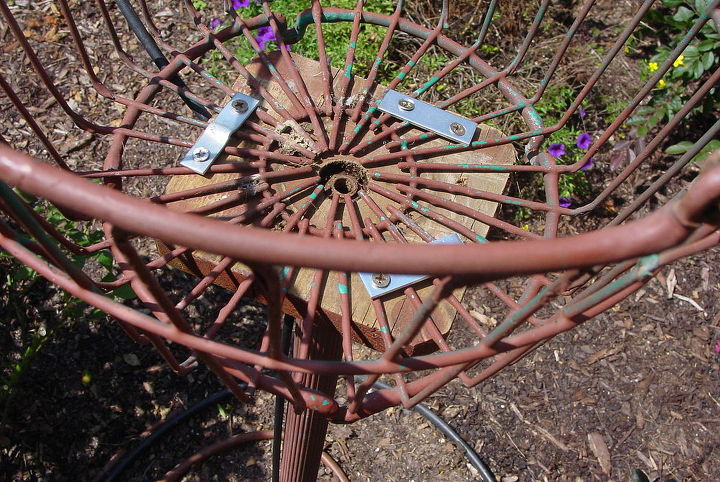
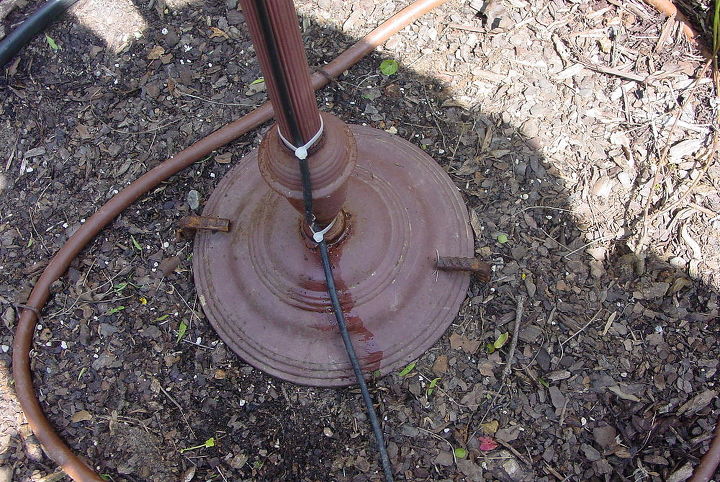
I used an old wire egg basket and a thrift store floor lamp stand to make this outdoor flower stand. The basket is lined with black landscape cloth and a hanging basket liner. ASSEMBLY INSTRUCTIONS FOR PLANT STANDRemove lamp assembly and wiring from lamp stand, leaving the threaded nipple that connected it to the stand.Paint the stand & basket if desired. We used rust preventive outdoor paint. Cut a block from a piece of pressure treated wood. We used an old piece that we had on hand and cut our block approx. 1"x 5 ½ " x 5 ½".Then drill a hole in the block that will allow it to slip down over the nipple and fit snuggly onto the stand. You will now need to countersink a nut onto the nipple. The block should now be firmly seated.Next, center the basket onto the block and attach as shown in photo.If using the plant stand outdoors you will need to anchor it to the ground. We used two 1/2" pieces of rebar that were about 2 feet long. This will depend on the soil type. If using rebar, you will need a torch to bend a 90 degree angle that will fit over the top of the base as shown in photo. You can be creative with any of these steps, but be sure that it is weather proof and sturdy.
Comments
Join the conversation
2 of 54 comments
-
This is such a great idea! If you add a second tier planter with the chicken wire, it will lookjust like the ones in expensive garden magazines! I plan to make one for my garden.
-
Love the idea. Thanks for sharing.


Frequently asked questions
Have a question about this project?