


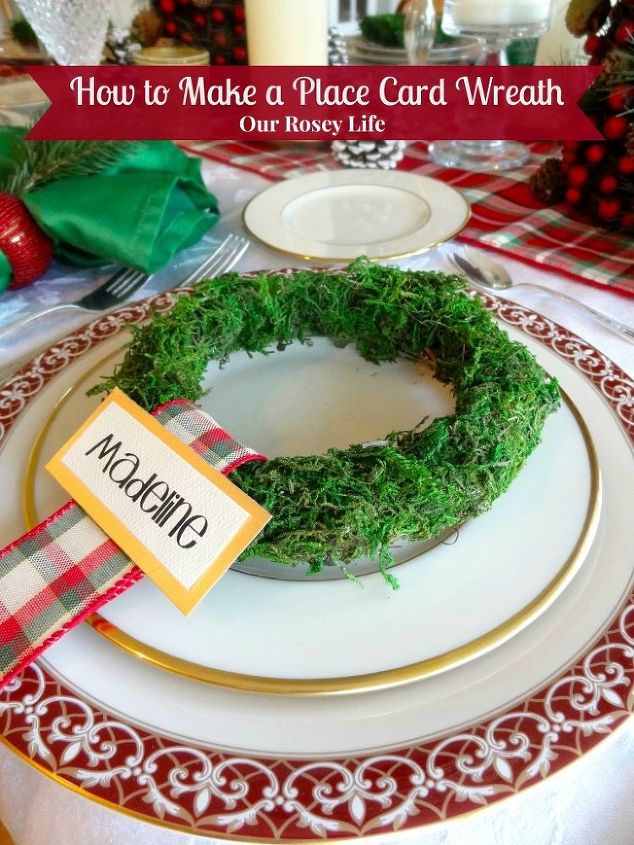
Christmas Place Card Moss Wreath
Easy
When we host a dinner for family and friends, I love making place cards. I think everyone feels special seeing his/her name. I know my kids do! Place cards help to make sure my daughter gets to sit next to her favorite cousin. (A happy kid makes for a happy Mom, too.) Lastly, I think they add a special, personal touch to the table setting.
For Christmas, I made moss covered wreath place cards. They are very easy to make. Really easy!
For Christmas, I made moss covered wreath place cards. They are very easy to make. Really easy!
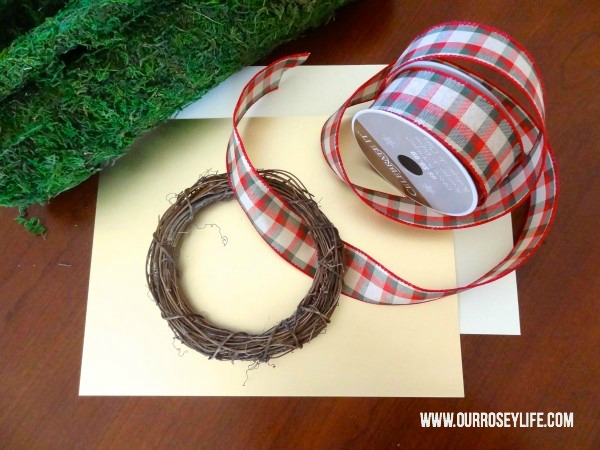
I got all my supplies at a local craft store: 6 inch grapevine wreath, sheet of green moss, favorite ribbon (does not need to be wired), card stock in two colors to coordinate with your table setting (mine are off-white and gold) and a hot glue gun.
Cut out a circle on the moss sheet using the wreath as a template. With a hot glue gun, glue the moss to the grapevine wreath wrapping around the inside and outside edges of the wreath. Be careful not to burn your fingers - yes, I did, but only a little bit.

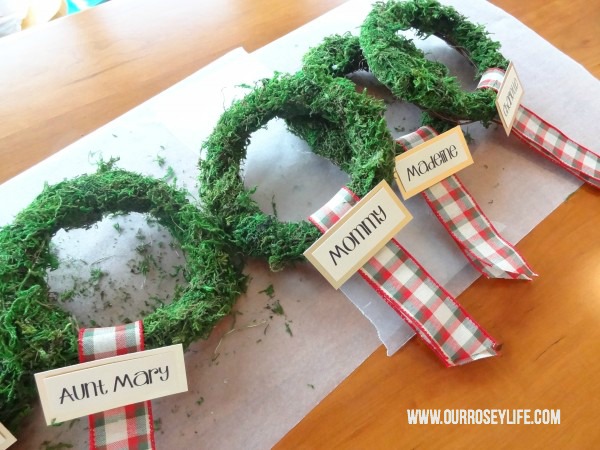
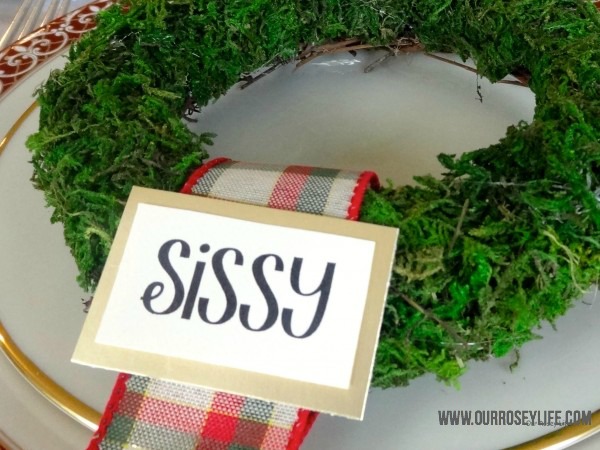
Print your guest's names on off-white card stock and trim with a 1/4 inch border. I used Janda Truly Madly Deeply font (in case you're wondering). Glue onto gold card stock which is 1/4 inch larger on all sides than the off-white card.
Set your table and joyfully add your wreaths. The moss covered place card wreaths will add a festive touch to your beautiful Christmas table! And your guests will feel extra-special too!

Want more details about this and other DIY projects? Check out my blog post!
Comments
Join the conversation
2 of 18 comments
-
Cute but I do not want all that shedding on my table.
-
Don't care for this messy moss being blown on my table or floor. How about omit the moss completely.


Frequently asked questions
Have a question about this project?