


DIY Wood Photo Transfer Gift Idea
Create a Wood Photo Gift for Christmas gifts. Sometimes it’s hard coming up with the perfect gift idea for your loves ones. So I didn’t have to think to long about this cause everyone loves photos! So I decided to do a DIY Wood Photo Transfer Gift Idea using wedding pictures of my son and our daughter-in-law.

This image looks great on the wood. The wood photo images are pretty EASY to make. But you do need time to do these – due to the drying time. This isn’t a project you wait on until the night before you need them. But the great thing about this project is I purchased everything at Michaels and there was no need to cut any wood – yes!! The 12" x 12" birch squares are cut already.
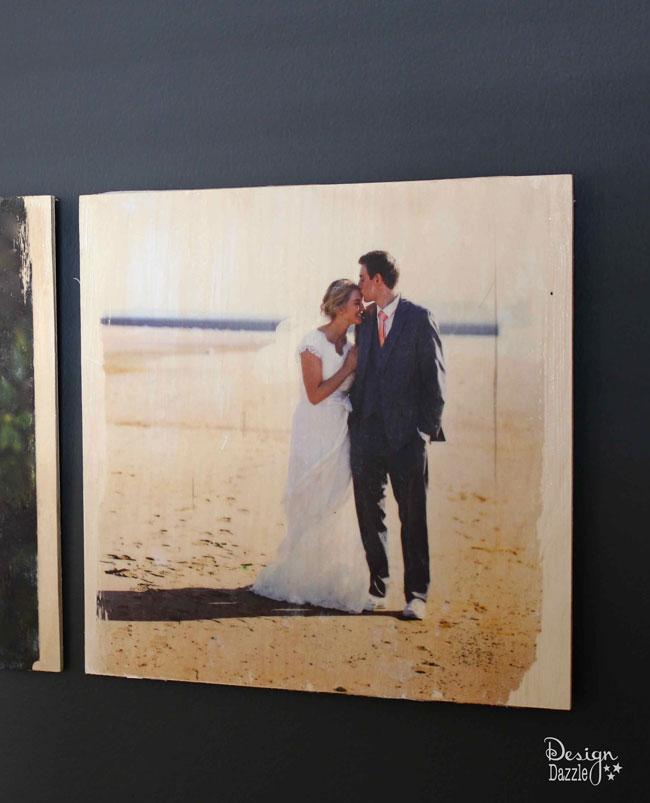
I love this beach scene they took during their bridal session.
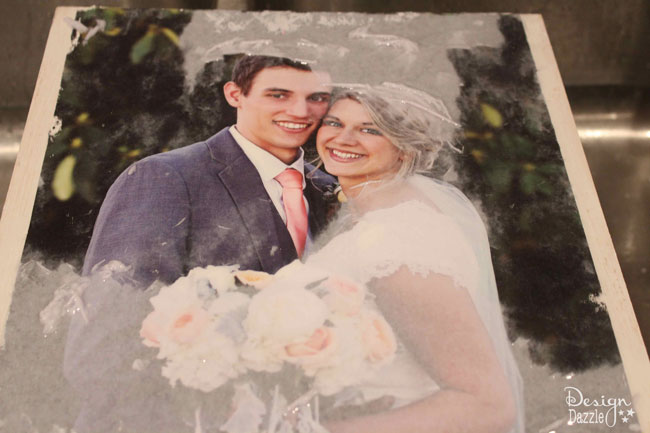
Run the dried image under the sink tap or use a damp cloth and wet the back of the paper. Begin rubbing gently to remove the paper. What you will see is the exposed transferred image coming to life – this is the fun part! Rub gently!! Once I the paper layer is off, let it dry slightly, and then repeat the process as needed to remove any paper that was left behind. Let dry completely.

Want more details about this and other DIY projects? Check out my blog post!
Comments
Join the conversation
2 of 6 comments
-
You might want explain that you need to use a image printed from a ink jet printer
-
I enjoyed your page but boy it was a long search for this project......


Frequently asked questions
Have a question about this project?
I am a little confused you are adding the actual photo to wood, not a copy, right?