Asked on Oct 21, 2012
Repairing or resurfacing Drywall
by
Mike Bianco
+13
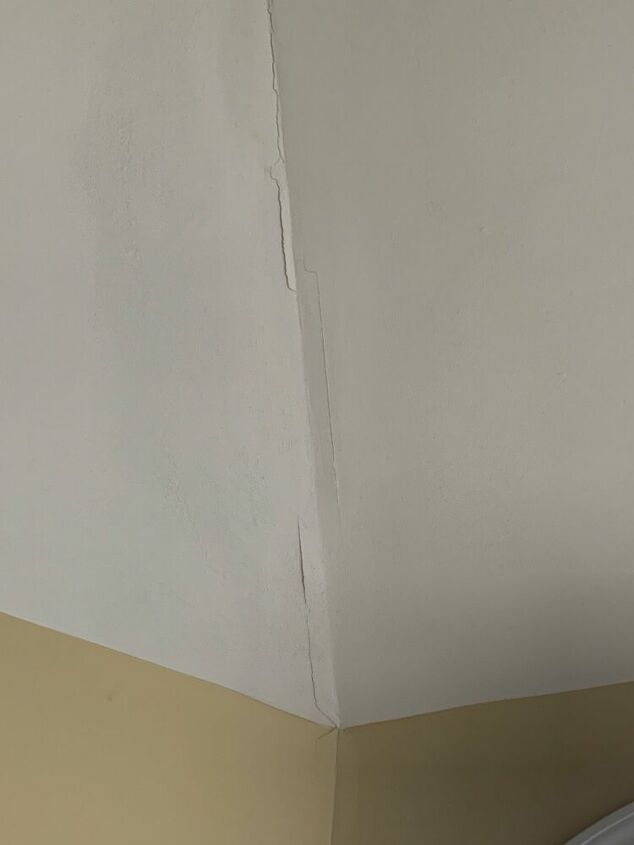
I need advice on how to repair or resurface drywall. Tore down old wallpaper in a small bathroom and the original drywall is in solid shape (from the 70s), however there are large patches where the surface is down to the brown paper looking stuff, and other spots just make the whole area an inconsistent surface to work with so it is more than a patch job. so the entire wall needs to be resurfaced i suppose. this is just the top half as the bottom half is all tile, so i want to keep this project to working with the top half and hope that the drywall doesn't need to be replaced. would the best option be to apply and sand down a couple coats of joint compound over the entire wall area? or are there other techniques or products that would be better?
16 answers
-
I would sand the high spots first with a drywall sanding screen...somewhere in the 80 to 100 grit range...this would take care of any "high" spots of glue that might be still present...avoid the brown paper areas and this could tear them more. With the high spots gone, skim the brown paper areas with some joint compound...the "light weight" type will be easier to sand. allow this to fully dry then skim sand and repeat as needed. It can sometimes be tough to see where you may still need to do some work..when you think you are pretty close prime the whole wall with a decent primer. I like the procoat from SW...(not the multi stuff) once the whole wall is primed you may see some areas that may need a second touch up.
 KMS Woodworks
on Oct 21, 2012
KMS Woodworks
on Oct 21, 2012
-
thanks. high spots dont seem to be a concern here. the wall paper came off very easy and there is almost no glue residue. just seems through the years as this house was remodeled by the previous owner, there are different surfaces of drywall and different ages to contend with, and all of them are in various conditions. trying to find the best way to even out the surface so it can be painted and the wall doesn't look like a big patch job. is joint compound the right thing to use?
 Mike Bianco
on Oct 21, 2012
Mike Bianco
on Oct 21, 2012
-
I've used it for this exact same job as well as skimming a cinderblock wall. Just take your time and you can get is flat and smooth as needed.
KMS Woodworks
on Oct 21, 2012
-
thanks. just got back from Lowes and got one of those. also some conflicting opinions of what type of joint compound product to use. Lowes guy recommended a bag of veneer JC to mix in a bucket, and a contractor who was evesdropping came over immediately after he left and said don't use veneer because you'll never be able to work with it and it's tough to sand, so unless you're a pro not to use veneer. he recommended a bag of 45 grit lightweight sandable JC. seem to have everything i need, hope my skills are up for the challenge.
Mike Bianco
on Oct 21, 2012
-
The contractor was correct. Use the powder form of spackle. 45 or 90 min type is best as it gives you a greater working time. Do NOT mix to much at a time. First off it will set long before you will be ready to use i all up. And you will be amazed on how far it will go with just skimming it over. Use a large taping/finishing knife. We use a large trowel that has rounded corners on it to make the surface smooth. It is a bit tricky when you first try doing this, but it can be done. Apply the material using thin coats, try not to build it up. This type of spackle can be a real dog to smooth out. So again do not mix to much at one time. After 90 min or so, you can use a smooth sponge that is slightly wet to sand the wall smooth. This will remove a lot of material if you end up with some larger ridges. Let dry well for a few hours. Then you should use a sanding block. The longer the better and smooth the wall by blending the damaged area with the good area. If you need another additional coat, use a damp sponge and clean any sanding dust off of the wall before you mix and apply another new coat on the wall. Be sure to clean your tools well before the spackle hardens. It is much faster that way. Do this outside and do not clean in sink. The plaster will end up hardening in your sink trap.
 Woodbridge Environmental Tiptophouse.com
on Oct 22, 2012
Woodbridge Environmental Tiptophouse.com
on Oct 22, 2012
-
Yes Mike you should skim the whole upper half of the exposed wall for a consistent surface before texturing, (if you will be texturing), If the surface is very irregular it might take a couple coats however I wouldn't think this would be necessary. If you use the powdered mix as recommended above there will be less shrinkage. Use a 12 or 14" drywall knife if you have access for best results. One important thing to note is that, before applying the final coat of paint you should use a Killz or other brand of inhibitor to coat the drywall. Otherwise there is a pretty good chance the residual glue from the wall paper will bleed through and cause yellowish brownish stains.
 Hiline Builders Inc.
on Oct 22, 2012
Hiline Builders Inc.
on Oct 22, 2012
-
Hi Mike, I think you are on the right track as far as the technique you are attempting. I don't think there is an easier way except to recover the wall. It looks like you already have some great pro advice here. I might just add a couple of thoughts to what was already suggested. When we skim coat over the exposed drywall paper, the first thing we do is rub a hand across it to remove the major loose paper layers. It sort of rolls up as you run your hand across it. Only focus on the really loose areas. The rest will be rough and have small paper shards.. but that's ok to leave. Then, prior to applying drywall compound, I would suggest applying a sealer over the paper such as Zinsser cover stain or BIN shellac. The sealer will help keep the paper from bubbling when you skim over it. The two I suggested are not water cleanup products, but would do the best job. Usually we wash down the walls where wallpaper was to remove the glue. If you do not, the drywall mud will drag quite a bit and may take more coats. Usually hot water and a drop of dish soap is enough to cut it, and just wash with a damp sponge, then rinse and repeat. In your case, if there are a lot of areas where the drywall paper is exposed, this may not be a good idea or completely necessary. If it were me, I would likely wash what areas I could after sealing the exposed paper areas, or possibly paint the sealer coat over the whole wall first and forget washing. Then, use the lightweight mud and apply, sand, and seal again. In bathrooms, we always use a primer such a Zinsser 1-2-3 for the final prime coat because it has mildew inhibiting properties. Like KMS said, after the final prime coat you will likely see some spots to touch up with additional compound. Hope that helps.
 Hamtil Construction LLC
on Oct 22, 2012
Hamtil Construction LLC
on Oct 22, 2012
-
Great advise from all.... Zinsser is the only primer I use.....
 Straight Nails Construction
on Oct 24, 2012
Straight Nails Construction
on Oct 24, 2012
-
heyfolks, thanks for the advise. finally got around to starting this todayand ran into some issues that could use some troubleshooting. using the#45 powder, i mixed about 1/4 of the bag and it mixed up really well and waseasy to apply, and i did about 1/2 one wall (about a 4x4 area). however,after doing about a 4x4ish area i found that going back to even things out wasreally challenging, so that 20 minute working time was quicker than i thought. thinking i should probably have done it in 2x2 areas at a time and goback and sponge to smooth right away. is that the best way to work withit and get an even finish? or is there a better way to do larger areas? itried the sponge after doing the 4x4 area and that did an ok job of getting ridof some ridges however there are tons of spots where areas just doesn't lookright (can still see some of the ridges, and other areas the size of a pennythat have less depth/material than the rest). whatis the best way to go back and fix this? tried block sanding with 120grit paper but think it was still a little too wet, and i have a feeling thatwhen i do the sanding when completely dry it will still leave me with some ofthose areas. i also have a mesh sander but it is a thin coat and i thinkit will take off too much material. shouldi go with the sanding and do the best i can, then go back and touch up theuneven areas? or just do an entire 2nd coat (and per above even it out asi go in small areas?), or don't bother with the sanding and just go right tothe 2nd coat? thanksfor the help
Mike Bianco
on Nov 18, 2012
-
Wait over night and use a block and sand paper to smooth out. You should have used the 90 min stuff if you wanted to cover a larger area at once. As soon as this stuff begins to set, stop trying to smooth it any more, You will not be successful in doing so, But I think you figured that out already. The screen sanding method will work, you just need to get a rougher surface type.l But if the mud is not really dry, you will gum up the screen really fast. You might want to use a palm sander with 180 grit paper. Use one that has a vacuum attachment to pick up the excess dust. It will be dusty regardless so wear a mask, eye protection, Close off the area well with plastic etc. Run the sander around fast, it will cut into the mud quite quickly. When floating a larger area use a large flat cement trowel, You can purchase these with rounded corners so it becomes easier to use. You may want to consider using the mud that is pre-mixed. It does take a bit longer to dry, but if all your doing is a skim coat to even out any damage from paper removal, it will dry fairly fast.
Woodbridge Environmental Tiptophouse.com
on Nov 18, 2012
-
thanks. ended up trying the screen sander with 120 grit and it looks much better. however as expected there are still alot of imperfections in the surface that would show up after painting, from trowel marks, various thickness in how much material i applied, and at various stages (towards the end the mud was starting to get tough to work with and went on a little thicker in some spots). i think the palm sander will help with some of these spots, but think some of the lower spots would need to have more mud applied. wondering if i can almost apply a very light coat using just the sponge. just applying a little mud onto the wall with the trowel and spreading it around with the sponge instead of the trowel. seemed like the sponge picked up a good amount of mud and was doing a good job of spreading it around a little. the surface is level and correcting the drywall damage, just needs to be made more consistent. do you think that would work?
Mike Bianco
on Nov 18, 2012
-
Nope,the sponge will hold to much moisture, This is what causes the shrinkage as it dries. Use out of the bucket mud mix with a little plaster of paris so it dries a bit faster. large 16 inch trowel with rounded corners will allow you to work the surface smooth as it dries. But as soon as you see it pulling, regardless if its smooth or not, stop and allow it to dry. Also use a very clean pan and trowel when working as even the slightest amount of junk or dried plaster will cause all sorts of damage to an already smooth surface. What your doing takes time and experience to master. But once you get it, it will work really easy.
Woodbridge Environmental Tiptophouse.com
on Nov 18, 2012
-
If you use premixed lightweight mud from a bucket, you'll find that it is much easier to work. Don't be afraid to apply it over the base coat of quickset as a top coat. When mixing quickset from a bag, be sure to use cold water to help with the working time. Also, one tip in addition to using a large drywall knife is to apply the mud from left to right, or vise versa, then pull the knife down from the top of the wall, or up from the lower part of the wall. Might help you get a more even coat. If you have air bubbles, or other imperfections, you can certainly touch them up or apply additional mud after you prime paint. Priming usually helps to show the bad areas. Like Woodbridge says, this is something that takes time to learn. Pressure and angle of the knife makes all the difference.
Hamtil Construction LLC
on Nov 18, 2012
-
We rent.The bathroom that's off the master bedroom is small. There's a sink, toilet and shower. Without doing anything major; how can I make the bathroom look bigger and add some storage space?
 Andrea Julian
on Nov 20, 2012
Andrea Julian
on Nov 20, 2012
-
@Andrea Julian It might be beneficial to start a new post on that topic. Include a photo if you can. You will find much more information and help if you just start a new post. @
Hamtil Construction LLC
on Nov 22, 2012
-
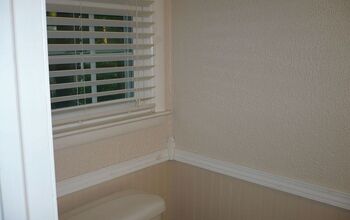
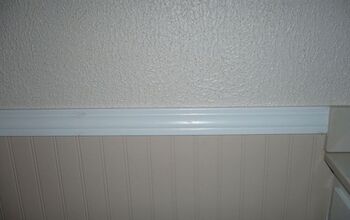
When you go to buy your drywall mud, be sure and get the one that is...I think the term is whipped....it will be extremely lighter. We use this because the sanding time is almost nothing. Also pick up a couple of those diamond coated sanding screens...these can be used like sandpaper. Since this is a small area, you won't need an applicator on a pole for this. Or you can do as we did and use textured paint and bead-board...which I absolutely love! We dressed it out with molding and accent pieces in the corner. Our color choice is very mellow.
 Jeanette S
on Nov 23, 2012
Jeanette S
on Nov 23, 2012
Sign Up to Answer
Related Discussions

Suggested Project Book
