


Ballard Inspired Decor

by
Margita
I recently received my new Ballard catalog and was inspired by the vintage tape measures. I thought they would look great in my craft room.
I had already had two boards, that I had purchased for $1.00/each at Home Depot and had all the other supplies on hand. I went to work:
I had already had two boards, that I had purchased for $1.00/each at Home Depot and had all the other supplies on hand. I went to work:
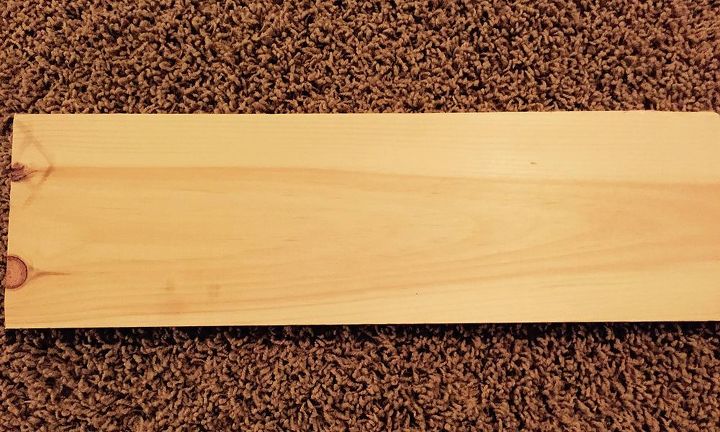
This is what I started with, a couple of boards from the dollar pile at Home Depot.
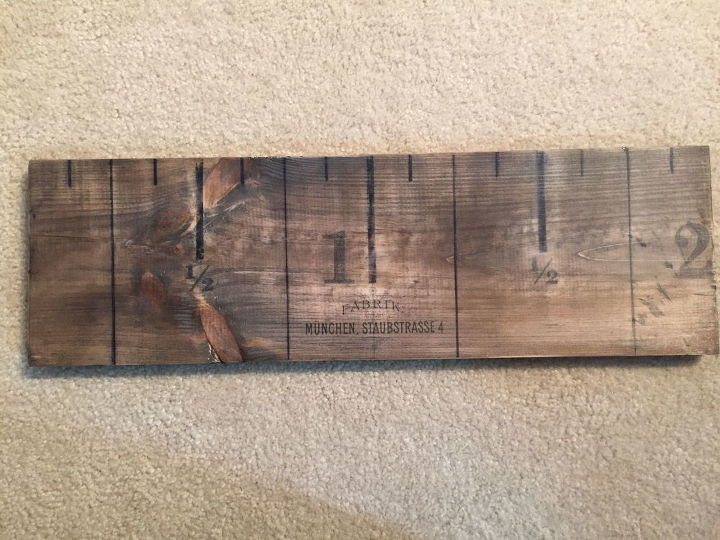
First I applied a stain wash to the wood. I made a mixture of half Plaid water-based stain in walnut and half water. I used a sponge brush to apply the mixture.
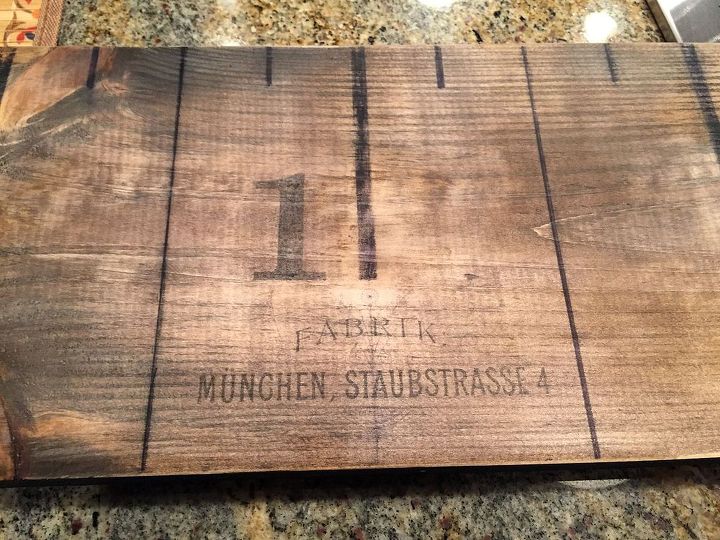
Next I applied the measuring lines to the wood. I used a black Sharpie for that.

i also choose to apply a graphic.
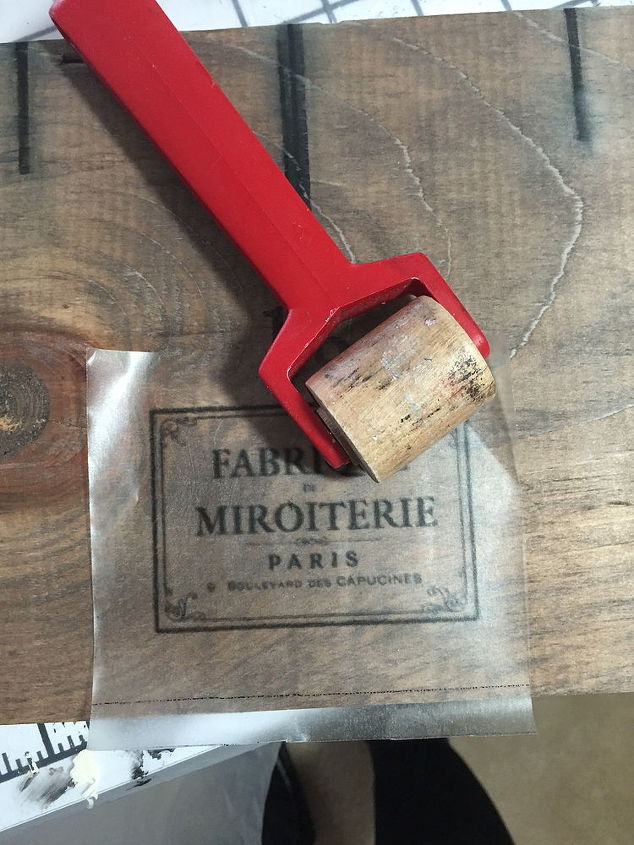
I came up with a great way of transferring a print. I printed the graphic on the glossy side of a sheet of contact paper. Then I cut another piece of contact paper and peeled away the backing. I laid the sticky side onto the print, to transfer the ink. Then I pulled the top sheet away and placed, it on the wood. I used a seam roller to apply pressure and peeled the contact paper off. That's it! I also applied the numbers that way. I will be happy to give more detailed instructions, if anyone is interested.
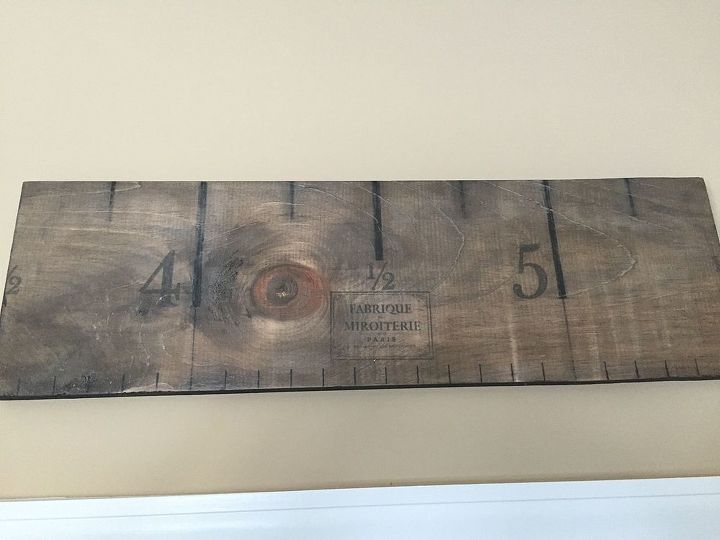
I made each tape measure slighlty different.
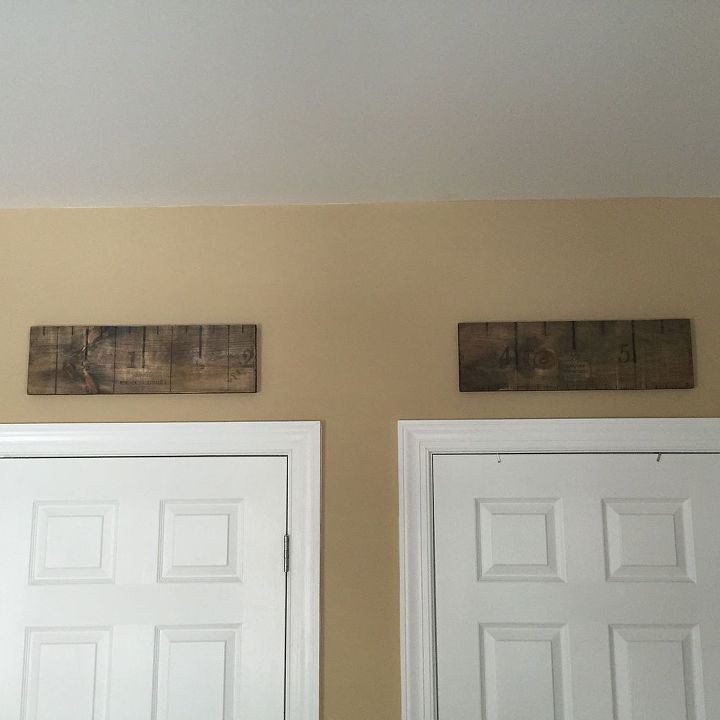
I used my tape measures as door toppers.
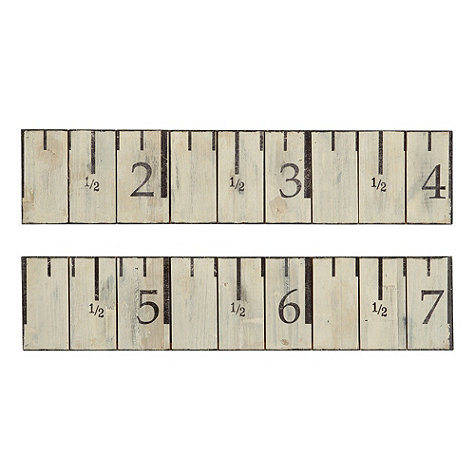
And here is the inspiration piece. Ballard's tape measure wall decor $69. My cost $2.
Comments
Join the conversation
4 of 12 comments
-
This is great! Can I get more info on how the graphic was transferred? I'm having a hard time picturing how to do this.
- See 1 previous
-
Very cool! Thanks for sharing your transfer idea...I'm going to give this a try on some old drawers I've got.


Frequently asked questions
Have a question about this project?