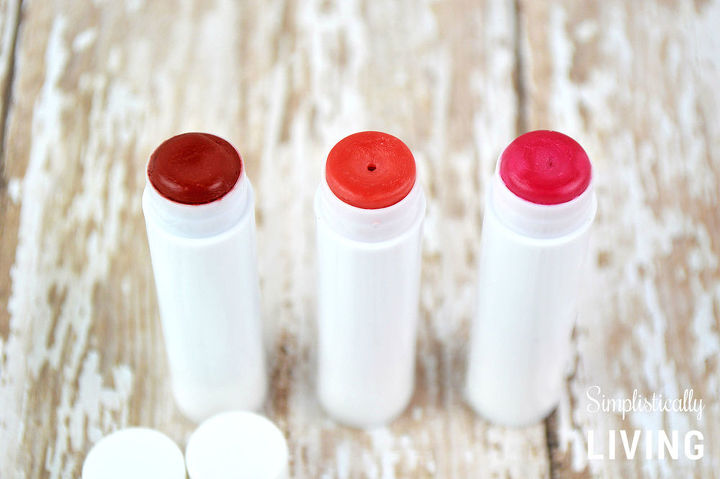
Homemade Lipstick

I’ve never been much of a lipstick person but it’s because I could never find the shade I truly liked. That is why I’ve decided to starting making my own Homemade Lipstick so I can get the perfect shade every time!
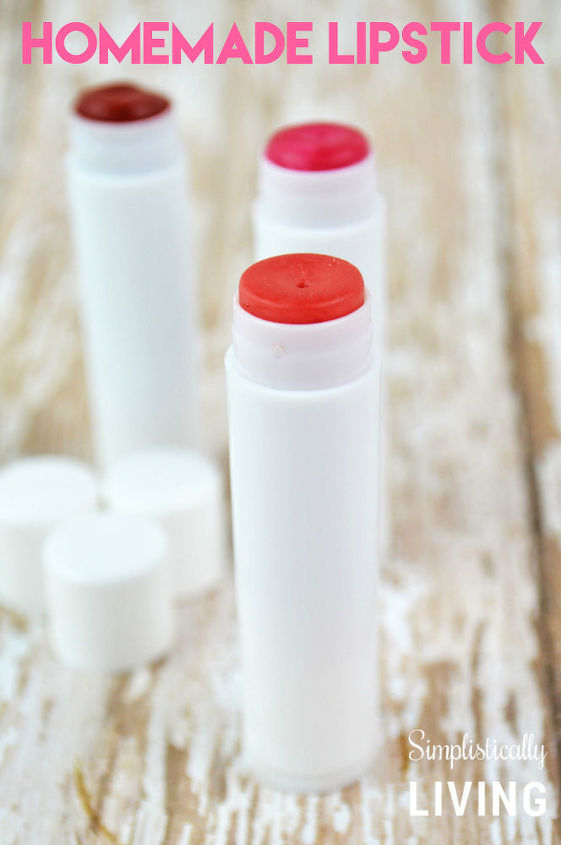
Homemade Lipstick is great because you can not only control your shade, but you can also control the kind of ingredients you put into it. Commercial lipsticks contain all sorts of ingredients including some you can’t even pronounce. Those ingredients can be doing more harm to your lips and body than you think. So next time you need lipstick give this recipe a try!


I want to mention that while you can order all these supplies online individually, there is actually a new monthly subscription box called Handmade Beauty Box. It is a DIY subscription service that makes it easy for anyone to craft custom beauty and spa products by delivering all-inclusive ingredients and easy instructions right to your doorstep. Did I mention it is inspired by the DIY Queen herself, Anne-Marie Faiola, owner of Bramble Berry Soap Supplies and Soap Queen? She is awesome and I have followed her for quite some time now! They were kind enough to send me the box to make this homemade lipstick! You can learn more about Handmade Beauty Box HERE.


Ready to learn how to make your own Homemade Lipstick? Check out the tutorial below!


Homemade Lipstick


Supplies Needed:


Lipstick base


Mica colors (coral, brick red, and cellini red mica is what I used)


Lipstick tubes with lids


Microwave safe glass bowl


Plastic droppers


Lipstick sticker labels (optional)


Side Note: All the supplies mentioned above (and a few more) are included in the Handmade Beauty Box. It is awesome!
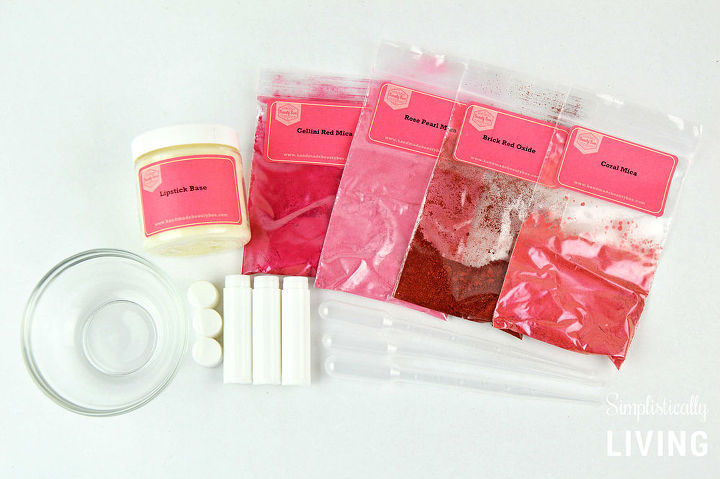
Additional Supplies Needed:


A few small heat safe containers


Spoons (I like using plastic for easier clean up)


Hot water


Measuring spoons


Microwave


Paper Towels


Directions:


1. Fill your microwave safe bowl with your lipstick base.homemade lipstick


2. Place the bowl into the microwave for 30 second increments. Stir in between heating sessions until all the lipstick base is melted.


3. Separate the lipstick base into your small heat safe containers. If you plan on making your lipstick all one color you can skip this step.


4. Place a mica color into each of the bowls. These will serve as your different colored lipsticks. Note: If your lipstick base hardens place back into microwave to reheat.


5. Stir the mica into the lipstick base until it is evenly distributed. You have to work fast or the base will harden. I ended up having to reheat the mixture several times in order to work with it.


6. Using your plastic dropper, transfer the melted lipstick base mixture into your lipstick tubes. It only takes a few minutes for the base to harden inside the tubes.


7. Place the lids onto your lipstick tubes and enjoy your homemade lipstick!


Helpful tip: If you are unsure if you will like the color of your lipstick you can place two spoons in the freezer before starting this process. Then after step 5 dip the frozen spoon into the liquid lipstick mixture and the lipstick will harden on the tip of the spoon.


You can then rub this bit of lipstick onto your hand to get a feel for the shade. Add more mica colorant for a deeper shade and add more lipstick base for a lighter shade. Repeat this as often as you need until you reach your desired shade.
Brittanie Pyper
Want more details about this and other DIY projects? Check out my blog post!
Go
Frequently asked questions
Have a question about this project?
Comments
Join the conversation
Next