A Kitchen of the 80's No More

Chic Geek House
by Chic Geek House
$6550
Medium
When I bought my house, I knew I'd need to update the kitchen one day. That day has finally come. Over the past twelve months, I've been slowly biting off chunk after chunk of this kitchen, and now I can say that it's finally (mostly) done. Here's where my hubs and I are at now.
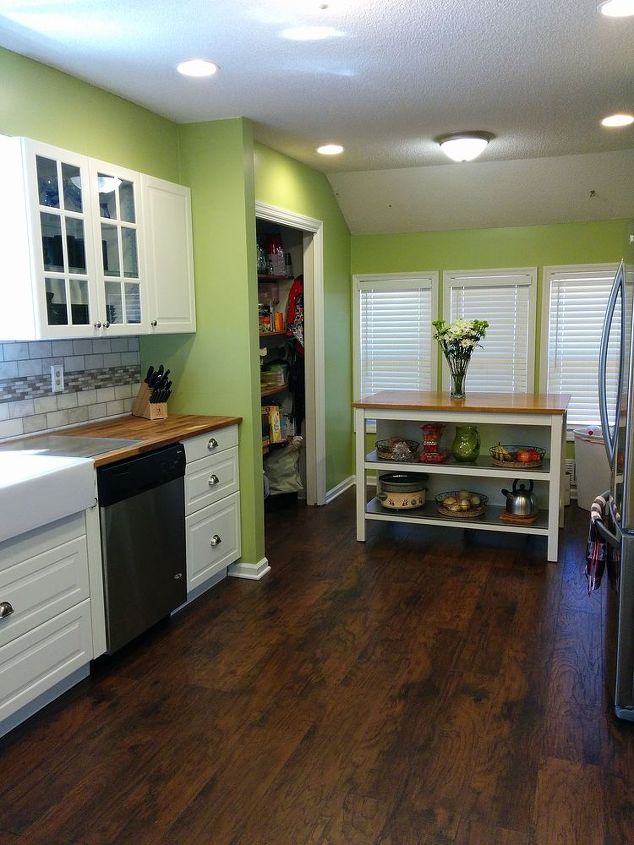
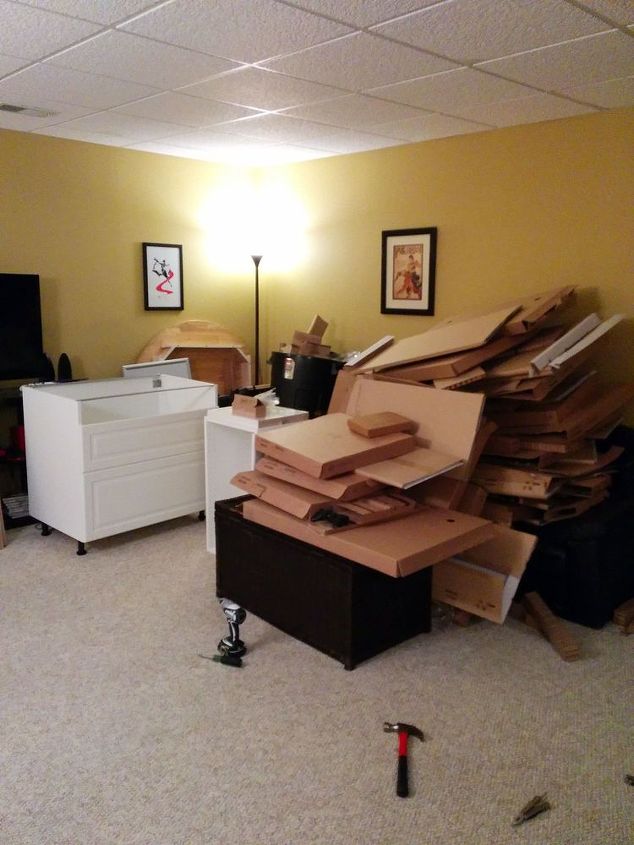
After new flooring, paint, lighting, countertops, cabinets, and plumbing, this is what I've come to. It's been a long, and awesome ride - particularly in these past two weeks wherein the largest amount of work was done when we gutted the cabinetry, counters, and plumbing all in one, fell swoop.
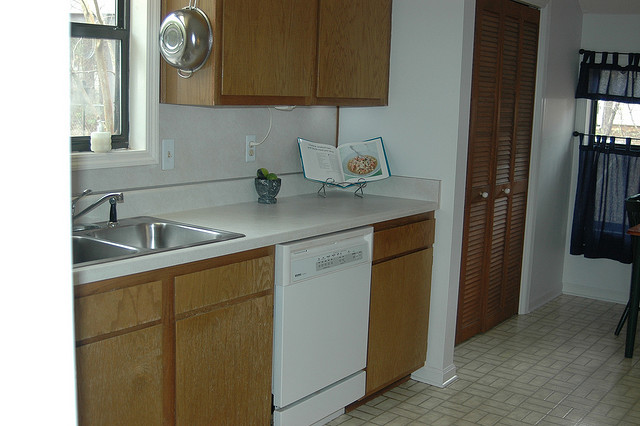
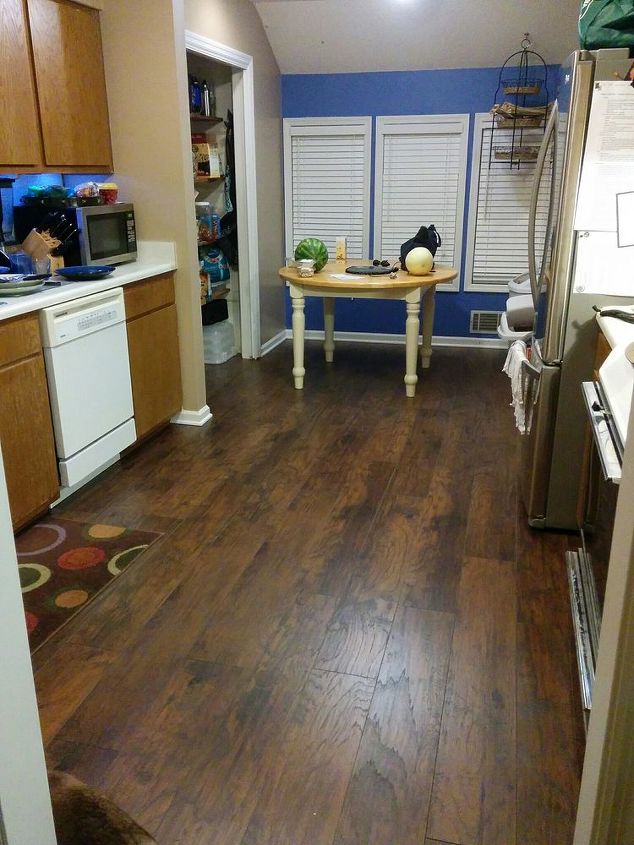
This is where I started from. I originally took this photo and the next one while I was touring the house. I hadn't yet decided if I was going to buy it yet, but I liked photos for looking back on things later (houses begin to blend after a few dozen).


The walls were all white. Off-white laminate counters with off-white linoleum floors. Two big, opaque white orbs - one at the front of the kitchen and one at the back - were all that lit this shady kitchen. The cabinets were all plywood covered in vinyl faux-wood sheeting. The front framing behind the cabinet doors were the only actual wood on these cabinets. Even the doors were false. The backsplash was just a sheet of the same off-white laminate used on the countertops.
Old fridge, old electric stove with some of the eyes popping up. Awesome, right?
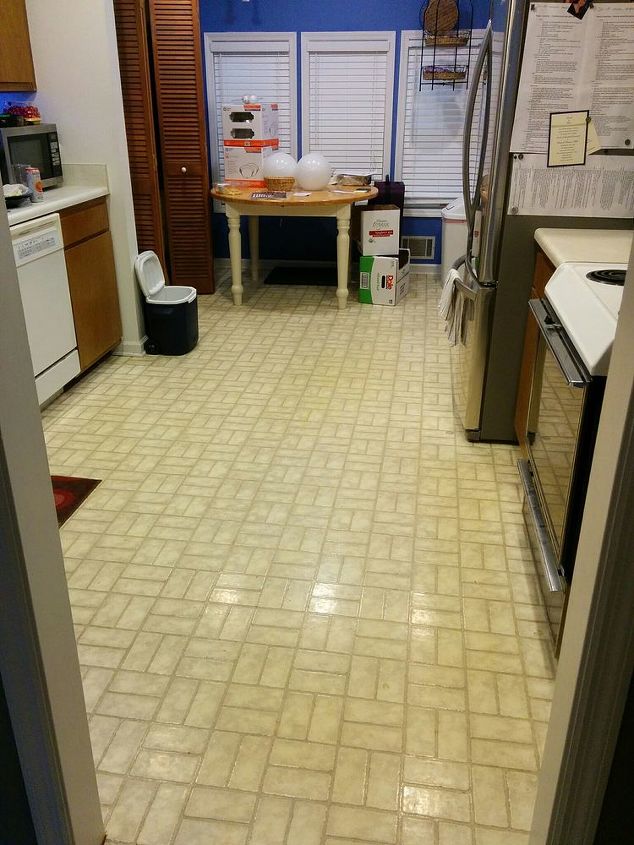
First, we added six new recessed can fixtures using a drill and a hole cutting attachment. We also replaced the opaque orbs with flushmount fixtures. You can already see the huge difference. I always wanted to know exactly how dirty those linoleum floors were!


We also replaced the fridge with a french-door, pull-out freezer combo from LG. I'd originally intended to buy this from the big box store, but I found better deals at local appliance places here in Atlanta, even better than the ones on Black Friday and the 4th of July.
With the new lighting in, we couldn't bear the floors any longer. We found these hand-hewn looking, wide laminate planks at our local big box store for $0.99 a square foot. Since there was a fully finished basement underneath, we just laid down an equally cheap foam underlayment, and snapped the floating floor into place. We liked it so much, we replaced the entire house's flooring with it, with the exception of the bedrooms.


It's been in for almost 9 months now, and even skittering cats and our excitable chihuahua have been unable to make a dent in them.


I tentatively painted the kitchen blue and tan, but that lasted all of a week before I decided I just couldn't stand the tan and repainted to a lush grass green (seen later).
I asked for quotes from four different cabinet shops around Atlanta, but eventually, we decided to go with IKEA for our cabinets. They'd just released their new line called Sektion in February 2015, so we went to check it out. The modular nature of it made it a highly customizable choice for us and our little galley kitchen. We also liked that we could add on a lot of high-end features such as soft closing drawers and doors for about the same price we'd have paid for an all-wood kitchen.
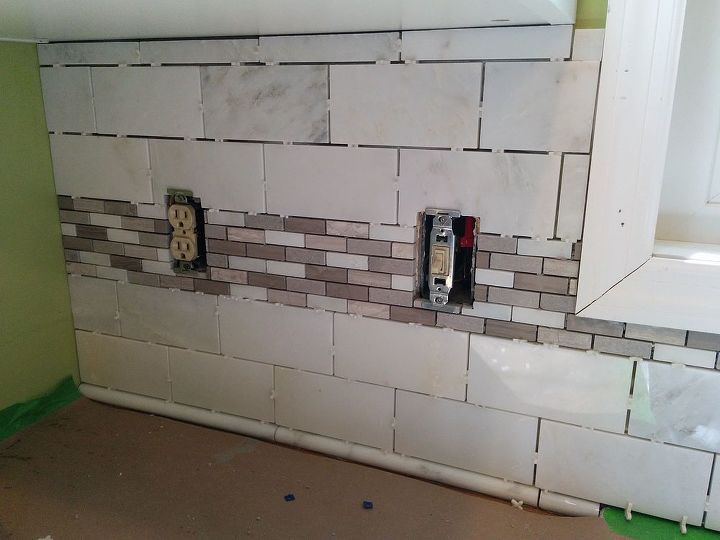

To save on money, we also decided - like so many other things - to assemble the cabinets ourselves. This was at about the halfway assembly point. My downstairs den was an absolute mess for about two weeks.
Pre-grouting
As the cabinets finally started going in, we had another big choice to make; what would we do with the backsplash? I'd considered subway tile (classic and timeless), as well as glass mosaics, and even thought about sealing beadboard along the back wall. In the end, price decided it for us. Why not do both subway tile and a mosaic?


Pure mosaic was too expensive for our tastes, even with the small square footage of a backsplash. We couldn't find anything we liked for under $10 a square foot. However, hubs came up with the brilliant idea to use a mosaic as an accent strip in combination with the subway. The subway tiles we found were a greecian white marble, and cheaper than most ceramics we'd even looked at. A full square foot of the stuff came in at just around $5.70. With a square sheet of the mosaic covering three feet of wall once it'd been cut up and divided, we were able to do the entire kitchen backsplash - grout, mortar, and all - for just under $600.


A lot of that was that we also opted to go ahead and purchase our own wet tile saw since my next two large projects are going to involve lots of tiling as well (yay, bathrooms).
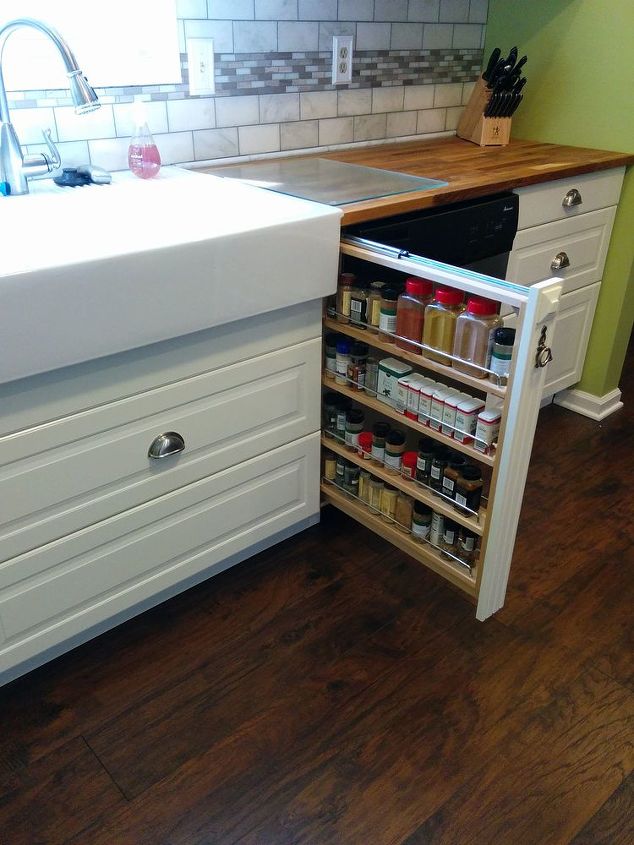
The kitchen did include some non-Ikea features however. I found out during my initial quoting process that 42" sink bases are largely only made for custom orders now. Anything pre-fab typically comes in a 36" or smaller. I was upset at first, but I got over it quickly when I found these awesome little 3" spice rack pull out cabinets online.


You can order them specially from a few cabinet hardware sites in various widths and heights (they don't always come with front filler panels though, just fyi), but I ended up finding the best deal for mine off Ebay at around $85 each plus $40 for shipping. Mine didn't come with front filler panels so I picked up some 3" fancy door casings from a local carpentry shop and just chopped them off to my desired counter height. Then, slapped a plate and a ring pull on the front. They are easily my favorite thing about this kitchen.
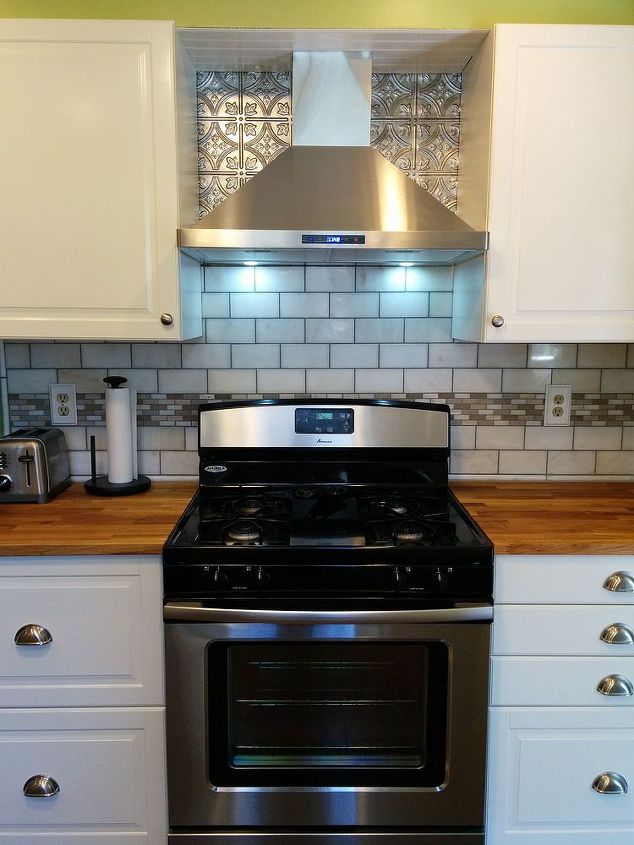
The conversion from an electric stove to a gas stove has been one of the greatest change-overs I've gotten with this kitchen reno, despite that I didn't do this change myself (I don't mess with gas lines - I call people for that). I picked this guy and a new stainless dishwasher up last Turkey Day in the midst of the Black Friday deals for about $600 together. The range hood I had to really hunt for though.


I just felt like $400+ for a range hood was excessive, and I'm kinda relentless when I want a good deal. Eventually, I stumbled across this Firebird model on Amazon's warehouse deals for $160 plus some shipping. I was hesitant, because a price like that could mean there's something awful about it, but aside from some (not all) of the fan settings being a little on the moderate to loud side (which doesn't bother me), this thing has been primo.


A happy mistake occurred when we were putting in the hood. The exhaust shaft of the previous almond colored, under-the-cabinet fan had been concealed inside an over-the-range cabinet. When we took the cabinet down, we noticed the shaft as it came through the soffit was not centered... at all. It was maybe 3" off center. A crawl through the attic revealed the reason for this being that two joists were married just above the dead center. The vent was having to work around it, and with a rigid aluminum shaft, this meant placing it off center.


We worked around it and replaced a length of the vent with flexible aluminum vent tubing. As long as the soffit remained in place (we considered knocking them out for modernism's sake), we could use the soffit's 12" space to realign the vent to the dead center below the joists. The other option was to get a custom vent shaft made for above the hood that would conceal the 3" off-centered-ness, but that being expensive and us already having the fexible vent available, we didn't do that.


All the trouble with the hood re-alignment meant we would have had a crazy time trying to tile the backsplash all the way to the soffit, so we just filled in behind the vent with these cool embossed "metal" ceiling tiles we found at the big box store (and are actually vacuu-formed plastic). We then covered up our messy vent re-alignment (so many holes in that soffit) and the popcorn ceiling under the soffit (a personal enemy of mine, popcorn ceilings...) with vinyl beadboard panels. We did the same above the sink's soffit on the other side, and it looks really sharp.
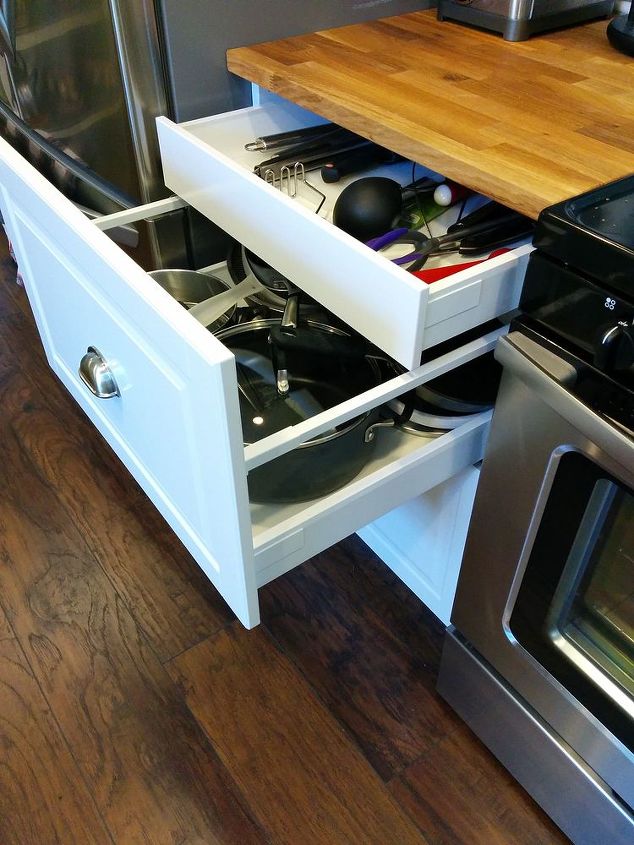
One of the really cool details I love about the IKEA Sektion cabinets are these drawers within drawers you can do. Another cool little feature of the upgraded cabinets.
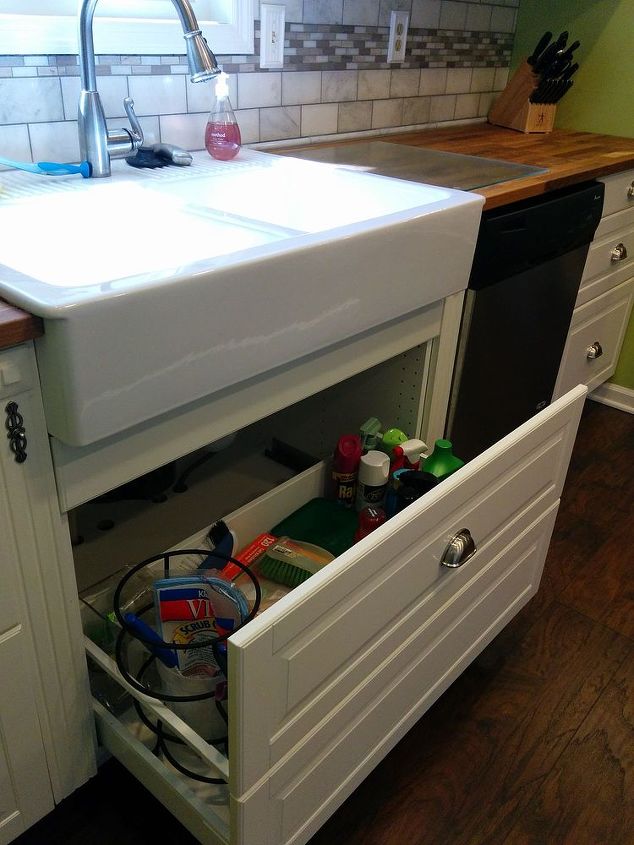
I didn't expect to love this as much as I do, but the sink base has this pull-out cabinet drawer. It's so easy to get to any cleaning item I want now. I don't have to get down on my knees and go digging through my cabinet now. We did have to rework the p-trap and some other plumbing to make this happen, but it's worth it in the end.
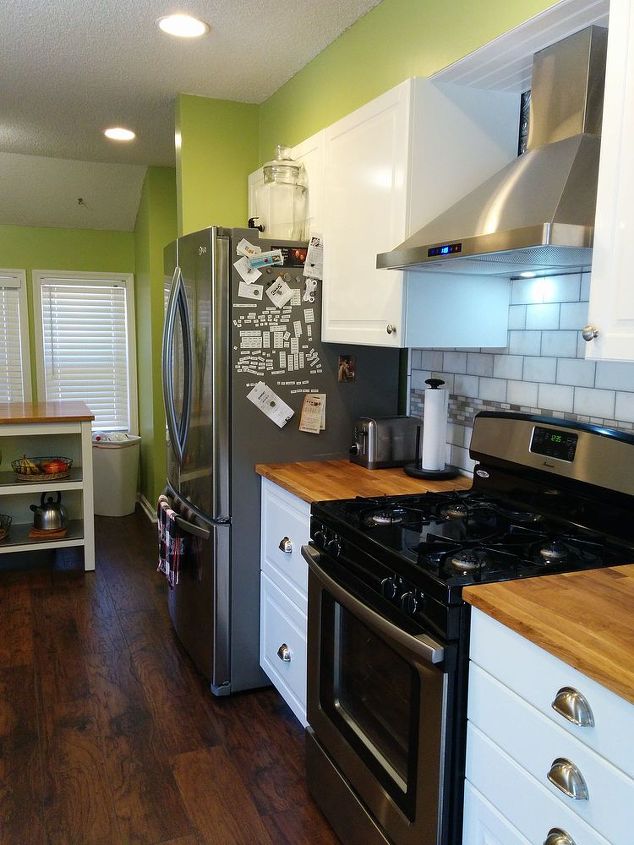
A parting shot of the other side of the galley kitchen now that it's redone.


Hope you enjoyed reading. Next project on the list is a minor one: front foyer staircase! Then, onto my master bath.
Chic Geek House
Want more details about this and other DIY projects? Check out my blog post!
Go
Frequently asked questions
Have a question about this project?
Comments
Join the conversation
3 of 48 comments
Next