


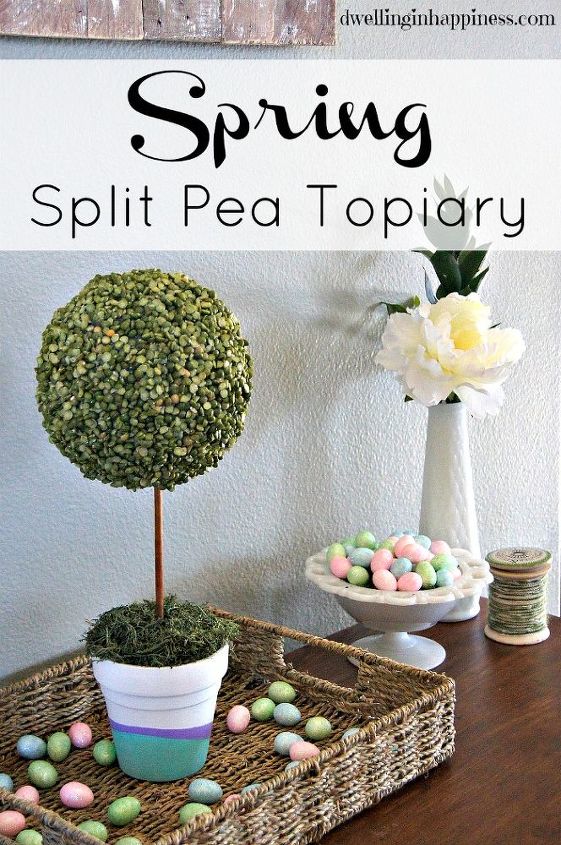
Spring Split Pea Topiary
Spring is just a few days away (finally!!), and I'm bringing it in to my house as much as possible lately! I've seen a few projects with split peas lately, so I wanted to give one a go, too! This Spring Split Pea Topiary is the perfect touch for any Brunch, too!
You will these items:

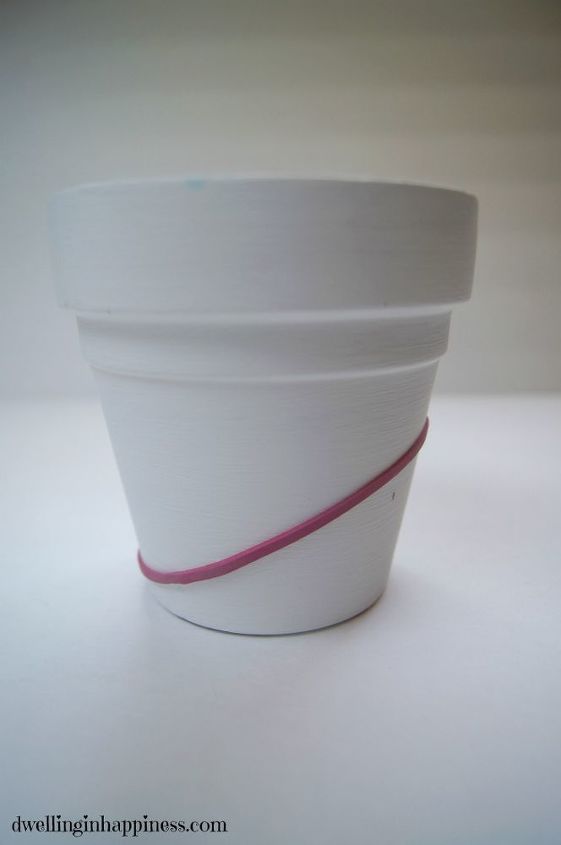
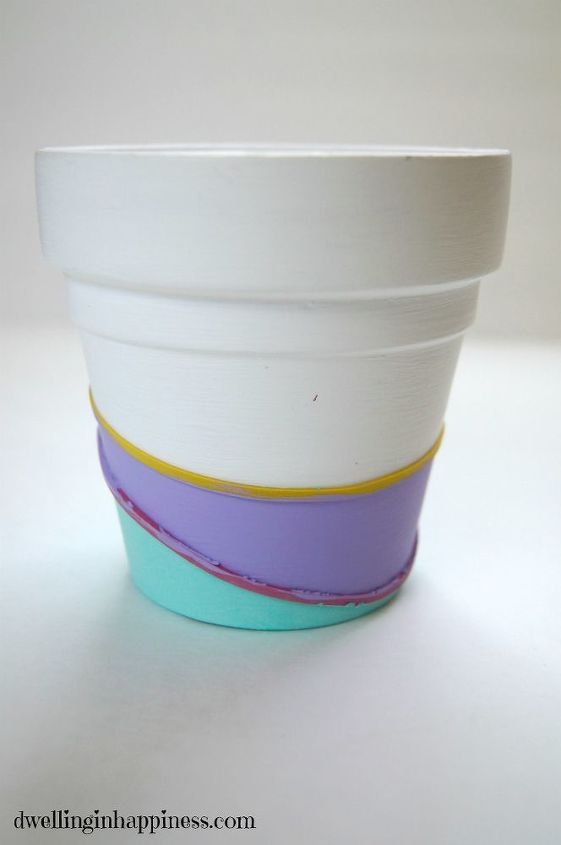
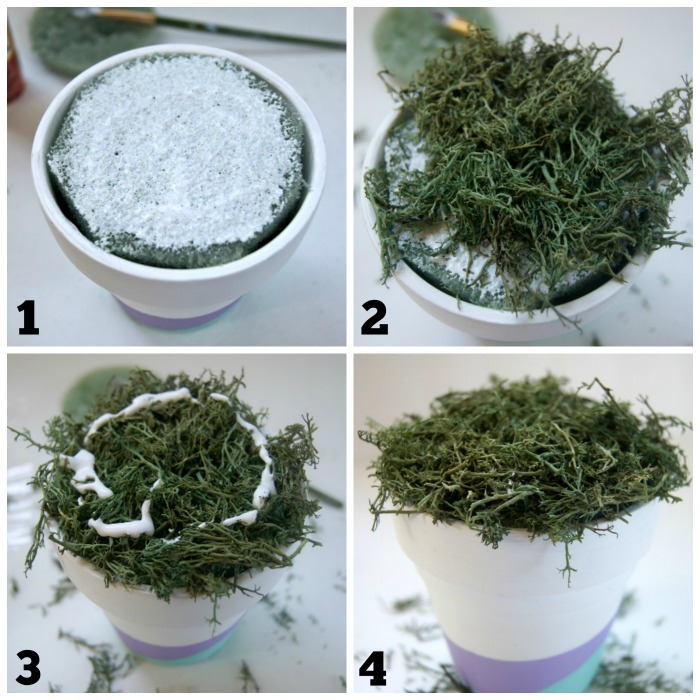
Start by painting the small terra cotta pot white. I wanted mine to have a "dipped" look, so after the white dried, I used a rubber band and put it on at an angle.
I painted the beneath the rubber band with aqua colored paint. Once dry, I added another rubber band above it and paint it with a lavender paint. When the paint was completely dry, I carefully removed the rubber bands.
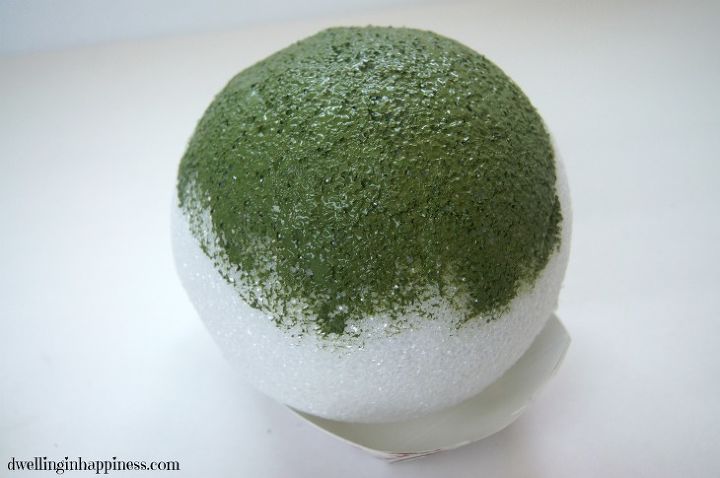
For the top, I painted my large foam ball with green paint to match the peas.
When it was completely dry, I started painting on Mod Podge in a thick coat, and adding split peas. I'd do a section at a time and turn the ball as it dried.
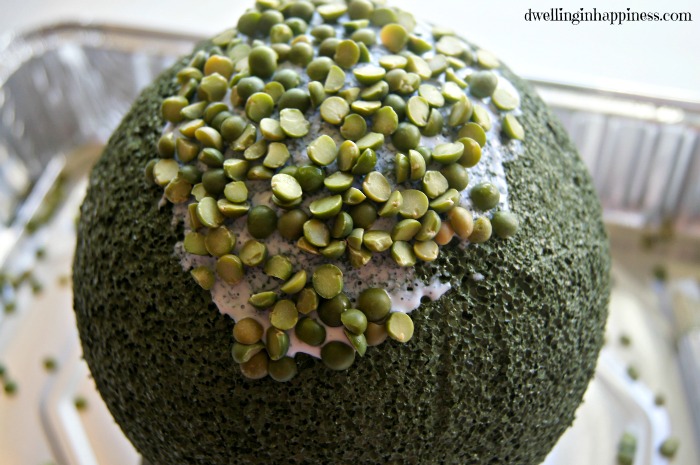
Once the ball was covered, I went around again and filled in any holes. I just dappe some Mod Podge in the holes, and added in more peas.

I let that dry completely overnight. I added moss to a foam insert as the picture shows.
I used a shish-kabob stick to attach the foam ball and the pot.
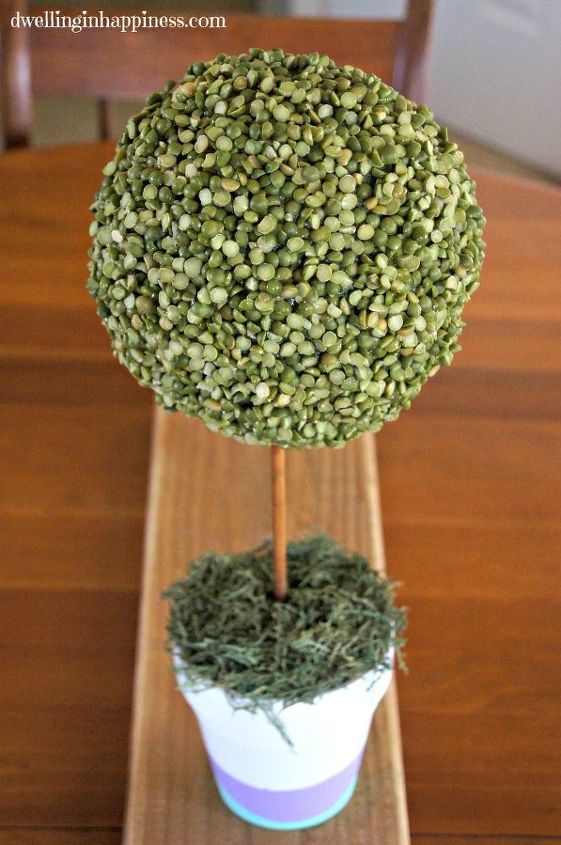
And, done! A simple and easy Spring centerpiece. You could easily go back over the peas with another layer of Matte Mod Podge if you were worried they'd fall off, but all of mine has stayed on. To see more detailed instructions, visit the blog below!

Want more details about this and other DIY projects? Check out my blog post!
Comments
Join the conversation
2 of 6 comments
-
Absolutely love this...
-
Love idea............darling Easter topiary!!!!!!!!! ~~ Good job!!!


Frequently asked questions
Have a question about this project?