


How to Make Bird’s Nest Christmas Ornaments From Trash
by
Bry29255733
8 Materials
$5
1 Day
Medium
I must definitely have some kind of “craft sickness” because I cannot bear to throw away anything without trying to make it into something else totally different and worthwhile (or crafty). (Of course, there are some who might say I’m just a little weird, instead. Perhaps true, but I still have fun.)
Maybe it goes back to my childhood, where we were as poor as poor-house dirt. Many a time our evening meal was nothing more than a piece of Mama’s humble cornbread with milk poured over it. We just didn’t have many creature comforts, and had to make do with what we had.
Mama never had any formal art training but she could make something into nothing any time of day. She’d cut the good parts from worn-out clothing and piece them together into cozy, warm quilts. We loved to visit craft shows together, find some things we liked, then go home and make our own unique, but different, designs for pennies.
Today, Mama is gone, and I’m sure she’s busy up there teaching the angels how to make something pretty from their cast-off feathers. Still, her earthly talents live on -- in me.
Most of us accumulate a flock of odd containers, leftover from yogurt, cream cheese, margarine and even small cans from other assorted goodies. And sadly, most of these ubiquitous vessels get chunked into the trash – and landfill.
But like I said, I hate to throw anything away without trying to create something from it. Plus, my favorite thing is fooling the eye by making a unique object that never reveals its original purpose.
Birds Nest Ornaments are one of my favorite projects.
These are so easy to make, and also perfect for keeping children occupied (though an adult should do any dangerous parts ahead of time, such as punching holes in the cups).
What materials will you need? First, gather the containers, and you can use just about anything small and plastic, including yogurt cups, sour cream cups, margarine and cottage cheese containers, and even small metal cans such as Vienna Sausage cans. And just think, there is an added benefit -- you're helping save the planet by keeping all these things out of the landfill.
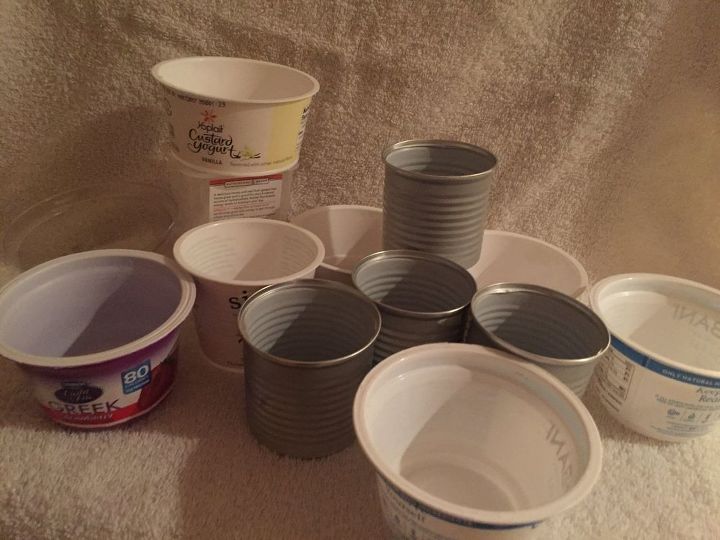
Plastic food cups and metal cans
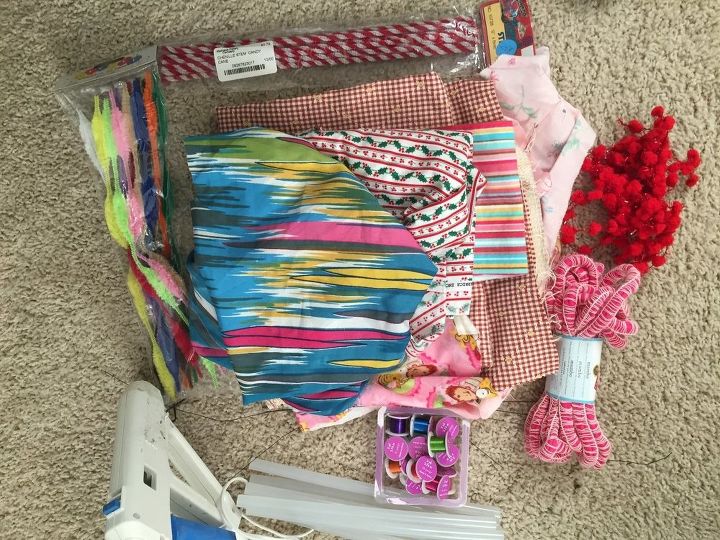
Besides the containers, you will need pipe cleaners, glue, fabric scraps, birds or flowers (need I say, artificial, not real ones), ribbon, jewelry wire, filler for the cups and anything else you want to decorate with. I will explain all that as we go. For tools, at a minimum you will need scissors, a wire cutter, and small pliers. Also glue sticks and a glue gun if you decide to use hot glue.
Below are some photos of possible things you may use, but really anything goes with these cute little decorations. Pictured are scrap fabrics, jewelry wire, pipe cleaners, ribbon and a glue gun and glue sticks.
Mardi Gras beads are a fun thing to add, along with small packaged ornaments. Use your imagination! Take advantage of whatever materials you may have, even buttons!
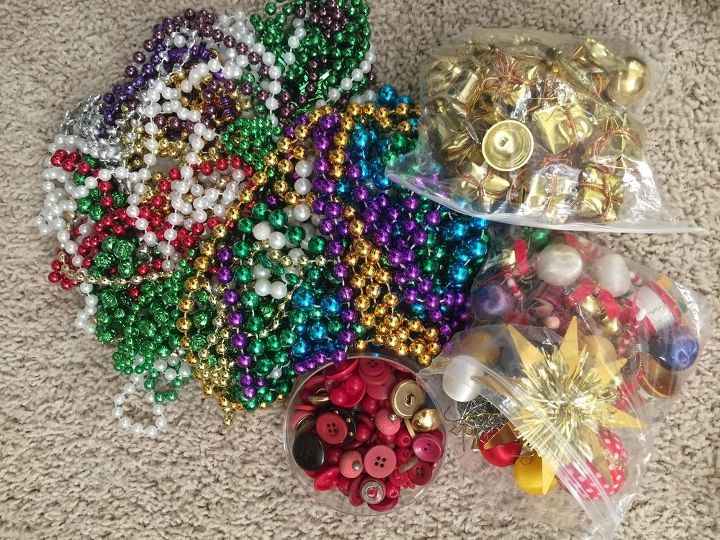
Anything goes for these cute little baskets!
I like to use red Cardinal birds for my baskets, and really prefer the smaller ones as they are more in proportion for the smaller cups, such as yogurt.
And I already had some of the smaller birds, also courtesy of a yard sale. Remember, if you are a crafter, yard sales are a blessing and save you money.
But, alas! All the dollar store had were larger ones which came in a pack of 2, both red and white, Although they were larger birds than I wanted, they were still usable -- just meant they needed a larger container. Perfect for cottage cheese cups.
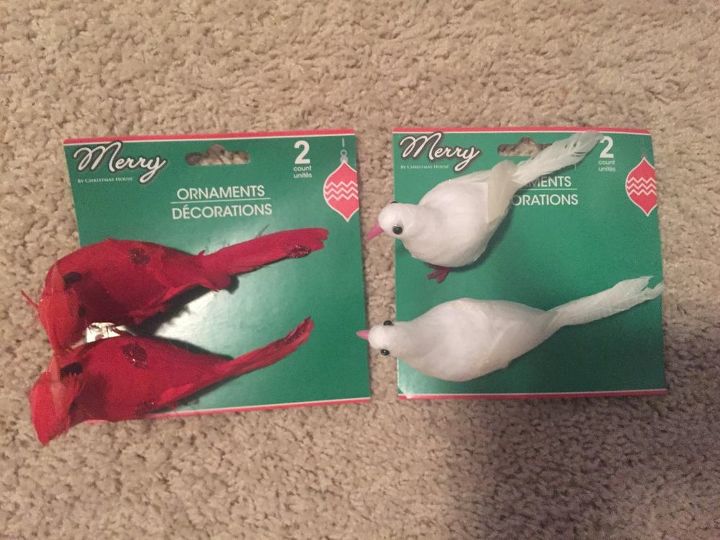
Cardinal birds from the dollar store.
First step as mentioned, start saving containers. That’s always fun because you get to enjoy all that delicious cheese and sour cream and yogurt. Wash them of course, then punch a hole in one side of the cup, and another hole directly across on the opposite side. This will be for the handle.
Your cup will look like this:
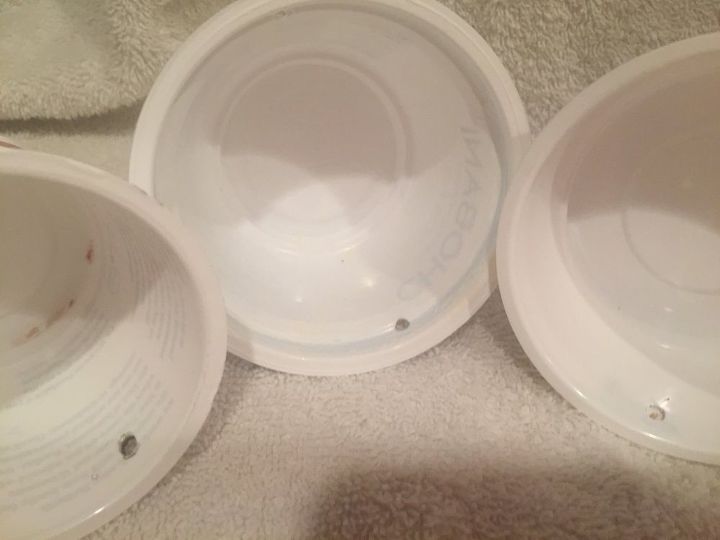
Yogurt cups showing punched holes.
Pipe cleaners make excellent handles, and they come in so many colors. Here I used red and white striped ones, mainly because they looked so Christmassy, but partly because I already had them, courtesy of a yard sale.
From the outside of the cup, pass the end of the pipe cleaner through the hole you just made. It will look like this:
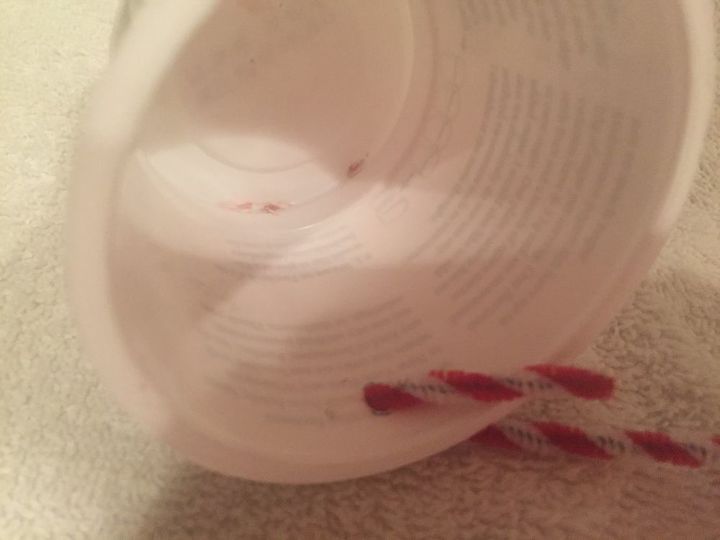
Push pipe cleaner through cup from outside.
Extend the pipe cleaner enough to wrap it around the main part of the pipe cleaner, then repeat on the other side. Here is how it will look:
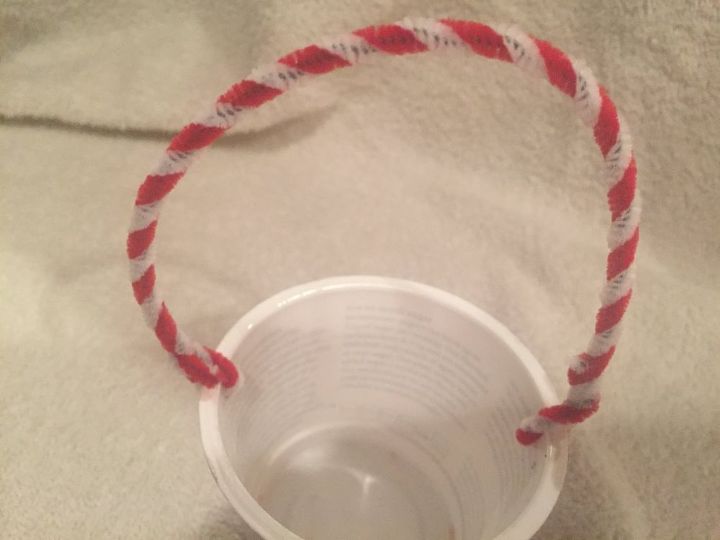
This will be your basket "handle."
I like to add some glue to each hole just for additional security. Next, you will need some fabric for the outside cover. You can use just about anything you want, including felt, but thinner fabrics work better as they are less bulky and easier to fold. Don’t worry if you don't have Christmas prints; just about anything you have will work and still look like the holiday.
And you don’t need a bunch of different colors. If all you have is one color, use it and decorate in many different ways, as you will see in the final photo. I had that pretty yellow fabric that was so bright and colorful, it just begged to be used. And then I decorated the covered baskets all differently.
I like to cut a circle of fabric about 12-14 inches in diameter because I have found it is easier to fold and glue; but cutting in squares may be easier for someone else. There is really no wrong or right way. Do what works best for you. You just need enough fabric to wrap over the edges of the cup, and it doesn’t have to be perfect. Don’t worry if the cut is jagged or imprecise – it will be concealed by your “nesting” material.
Spread some glue around the sides of the cup INSIDE the cup. Plain old White Glue works perfectly for this. Place your cup in the middle of the fabric. Where the handle goes through the hole, take your scissors and made a straight cut in the fabric towards the handle about 2 inches long on each side. The cut will make it easier to fold your fabric around the handle.
Now fold up the fabric, pleating and tucking the outside as you go so it looks neat, making sure the slit you made fits around the handle itself. Fold the fabric down into the cup, pressing the edges into the glue.
Once all the fabric cover is folded in, it should look approximately like this:
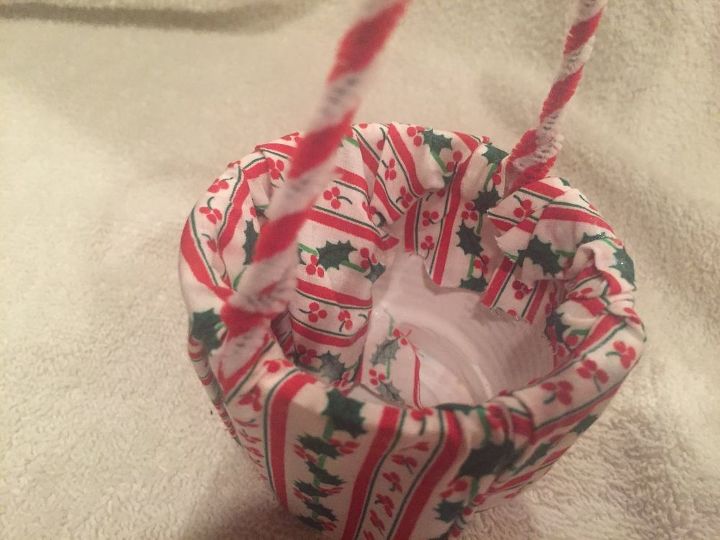
Fold fabric to the inside.
Now, you will need some “nesting” material. Remember, birds don’t lay their eggs in a bare nest -- they want their tender, delicate young to be comfortable.
And just like the birds, you can use anything you have handy. Fiberfill for pillows and even cotton works (I had a bunch of cotton used as padding in vitamin bottles – there you go, I can’t stand to waste anything).
Colored shredded paper, often used for gifts, works too. And you can even use Easter grass – green looks especially Christmassy. Use whatever you have – or can find. Remember, we are decorating with trash!
I didn’t take photos for this next step, as it is pretty basic. Make sure your fabric is pressed down firmly, so the glue holds it in place, and run a line of glue around the top edge on the inside.
I use hot glue for this – watch your fingers! – because it dries fast and holds better; but for children, safety is paramount, and white or school glue will again work fine. Press your filler material into the basket until it is level with the sides of the cup, and press the filler firmly against the glue.
Take some ribbon, place glue all along its length (again white glue works fine) and place the ribbon around the top of the nest on the outside. Overlap the edges a little and press ribbon down onto side of nest.
It will look like this:
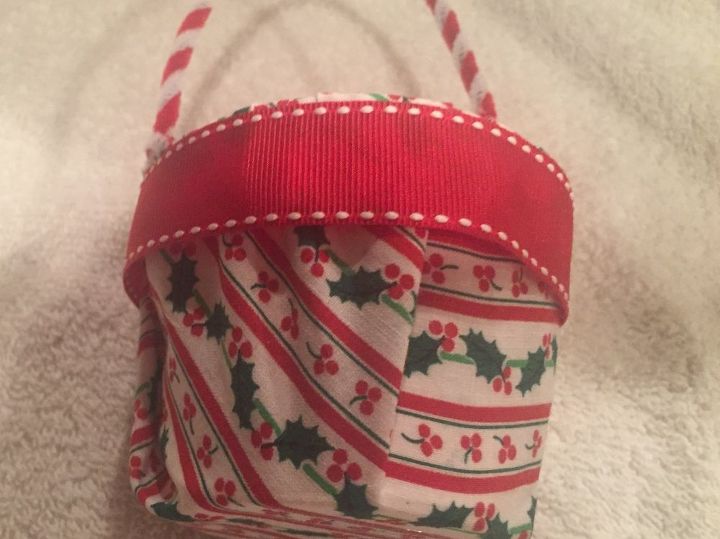
Basket from outside
Glue the bird into place in the center of the nest. If possible, glue the feet (or belly, depending on your style of bird) to the center, then the tail to the cup edge. And if it’s a large bird, you may also be able to glue the breast to the edge of the cup.
Now for the fun part. You can decorate your just-created basket any way you like.
If like me, you do crafts, or if you sew, you may have random materials left over from other projects. This is where you can use all that stuff without feeling you are being wasteful. Just about anything will work -- even bits of ribbon can be tucked into various empty spaces. Same for short lengths of lace, or bits of yarn, even stray orphan flower buds and buttons. Use whatever you have.
Speaking of ribbons, I like to create very simple two-loop ribbons. Take the ribbon end, fold a loop on each side, hold it in the middle and wrap a small piece of jewelry wire around the middle between the loops and use the pliers to tighten it.
Very fast and easy, and you can make tons of them quickly. Glue them every place the way I do, or you can create a more compact, neater design. Hey, it’s Christmas – there’s no such thing as too much!
I love pompoms – they come in all sizes and colors and lend a festive air to your basket. And Mardi Gras beads can add such a touch of elegance. I find them cheaply at yard sales, and sometimes free, because people don’t seem to want Mardi Gras beads after Lent Season. In March around Lent, you can also find them at the dollar store.
And Ta Da! Here's your finished project.
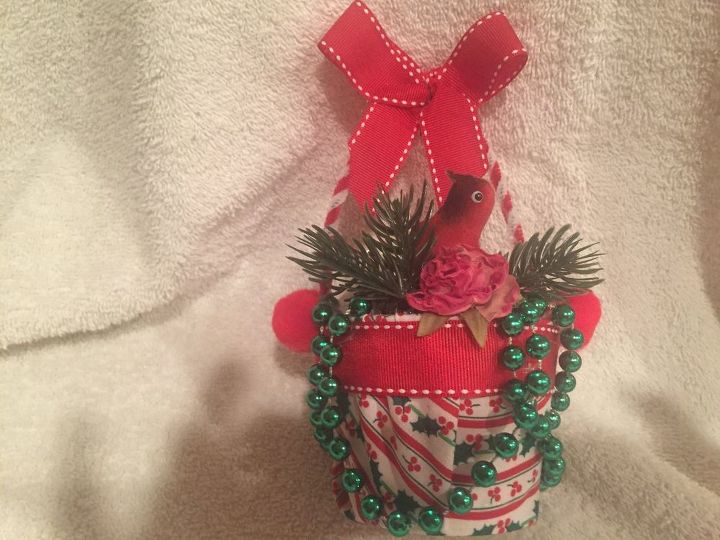
The completed basket with a small red bird.
Now, we all know, some folks soon tire of all the red and green. Good news! You’re not stuck with using colors that may not fit your particular color scheme. Use the colors you like, the tints that either make you happy or best fit your basic hues.
Here’s a blue one, and for this I used blue gingham, a scrap of light blue ribbon, some dark blue ribbon and balls, Mardi Gras beads, pompoms, and a few snips of greenery.
I used some wire for the handle and covered it with a length of plaid trim leftover from some long-ago project. I saved it because I knew it would come in handy one day.
This was born a cottage cheese cup. Since the bird was larger, a larger basket was needed.
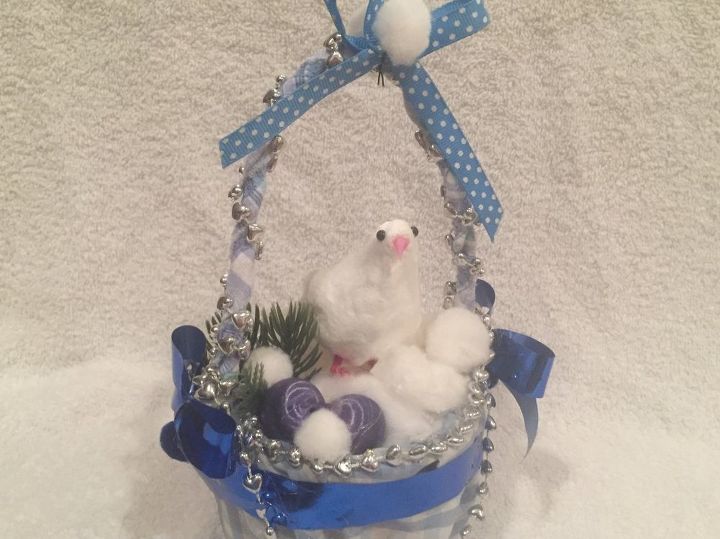
Even a "Blue Christmas" can be festive!
Pink is one of my favorite colors – and it still looks like Christmas! Gingham in a bright pink makes a perfect exterior cover.

For this one, I had a small scrap of this pretty child’s print I really wanted to use. Like a kid, I love bright colors -- they just make me feel good. Unfortunately, there was not enough of this fabric to cover the exterior of the yogurt container, so had to come up with a something new.
The pattern had a heart shaped design that I cut out to make a decal for the front. Then I cut a round circle from the remaining piece and used it as a cover for the nest filler so that the bird rests on it (see below).
I also used several different pink ribbons and some white pompoms and lace for a cute effect. If you look closely, you can see the darker pink print beneath the bird.
Again, I used wire as a handle, covered in some stray ribbon I had from a project I don't even remember now.
Again, the bird was one of the larger dollar store birds, so it demanded a larger chili container.
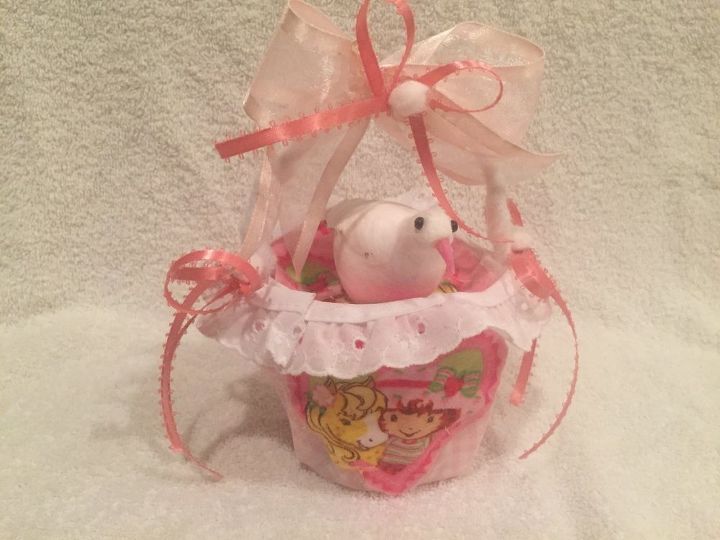
Even pink can look like Christmas!
You’re not limited to using birds. Perhaps everyone has already bought all of them up at the dollar store, or you just want something different.
Making flower baskets is just one possibility, such as the one below featuring dollar store poinsettias. The greenery came from my favorite thrift store which I love because they do so many good things, such as providing emergency help when someone needs groceries or can’t pay the rent this month. Everyone who works there is a volunteer and accepts no salary, so nearly all the revenue goes to helping others.
They accept just about anything for donations, even assorted small random items, which they throw into a plastic bag and sell for a nominal price, 50 cents to a dollar.
The whole package of greenery cost 75 cents and hardly any of it was used. The ribbons were four rolls for a dollar, and only a small amount was used so I have the rest for another project.
Most of my materials were left-overs that I already had. And I always have glue and a glue gun and glue sticks, along with my other tools, so no further expense was needed.
For the flower baskets, the one on the left was a yogurt cup, the right a sausage can.
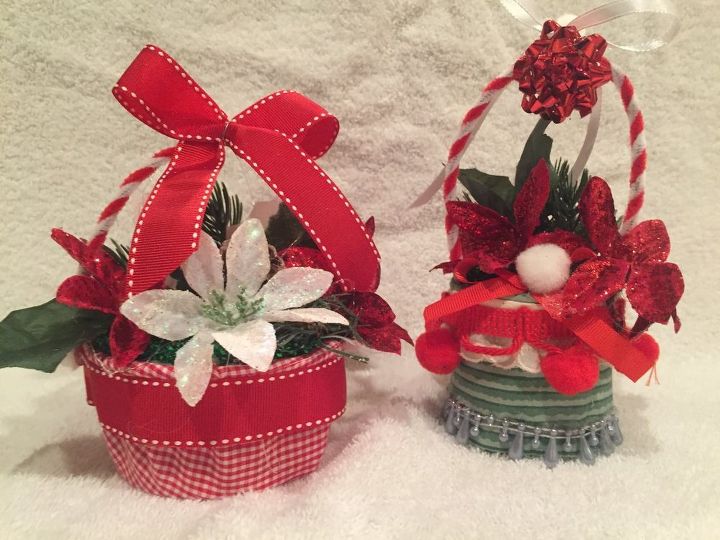
Flower Baskets are Christmassy, too!
You can either hang the ornaments by their own handles, or affix a wire hanger. Either way, these festive little ornaments look so cute and pretty, they really brighten up the tree.
And they’re a great way to keep the kids occupied and help tamp down all the energy and excitement so overwhelming in December. Let them have free reign with their decorating, and you will be quite surprised with their creativity.
Once I taught a Sunday School class for grades 1-3. About a month before Christmas, I brought in a tree.
“We can bring some decorations next week,” said an angelic 6-year old girl.
“No, we are going to make our own,” I said. “Including my favorite, bird’s nest ornaments.”
“But we don’t know how to do anything. We’re just little kids,” a 7-year old boy protested.
“Don’t worry. I’ll teach you how,” I promised. His face was full of doubt, but he nodded.
Ahead of time, I had done all the dangerous tasks, such as punching holes, and then carted all the materials into class. After a quick tutorial – they were smart kids and learned fast -- they dove into the project with enthusiasm. While they were busy crafting, we went over our Sunday lesson.
Our humble little Christmas tree turned out absolutely amazing, glowing brightly, as if suffused with starlight straight from heaven above. I was their teacher, but even I found myself in awe at the ingenuity and creativity of such small children.
The next Sunday, the pastor stood before the congregation and invited everyone to come view our tree.
“I am so impressed at what these little children have done,” he said.
The children, of course, were delighted. They had made something beautiful, and our pastor had acknowledged their efforts.
“But what does that have to do with Sunday school and the message you should be teaching?” you may ask.
One mother told me, “You taught my son more about the Bible than anyone else has ever been able to.”
We all seem to learn a little better if we're having fun.
Please bear in mind that although the cost for me making these is low, I already have many of the materials used, left-over from other projects. I hate to waste anything, and bits and pieces of just about anything can be incorporated into the design. Go wild, let your kids use their imagination. You will be pleasantly surprised!
And here are some results of this fun project. Would you believe they started out as plastic yogurt cups?
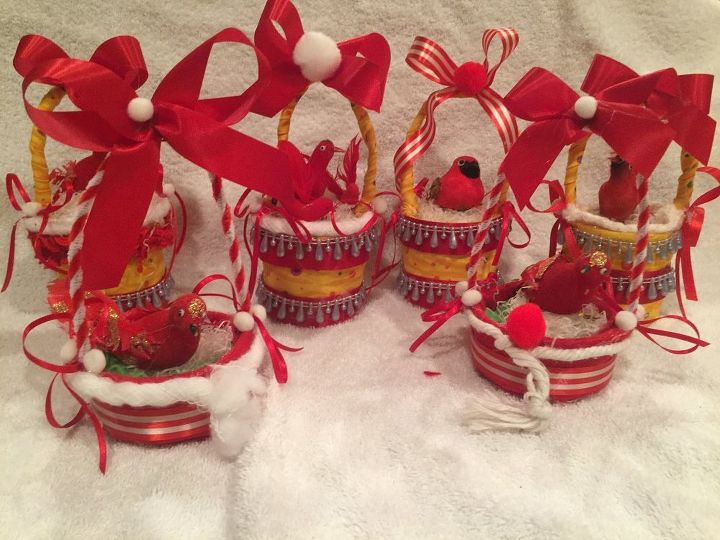
A few of my Christmas bird's nest baskets!
If you would like to see more of my posts, please visit my blog at https://wp.me/p8djUc-8y and my Tumblr account at: https://enchantingwitchpeach.tumblr.com/
Resources for this project:
See all materials


Any price and availability information displayed on [relevant Amazon Site(s), as applicable] at the time of purchase will apply to the purchase of this product.
Hometalk may collect a small share of sales from the links on this page.More info
Comments
Join the conversation
2 comments
-
These are so sweet!
-
Thank you so much, Wendy, for taking a look. These are so much fun to make, and easy for children, too. And it helps save the environment!


Frequently asked questions
Have a question about this project?