


IKEA Rast Hack: Industrial Side Table
$80
Medium
Confession time: I am a big time IKEA junkie – specifically when it comes to the upcycling and decorating potential. I could spend hours and hours walking through the different levels and imagining all sort of upcycled coolness.
So when Hickory Hardware asked me to participate in an IKEA Rast makeover project, I was super excited!
So when Hickory Hardware asked me to participate in an IKEA Rast makeover project, I was super excited!
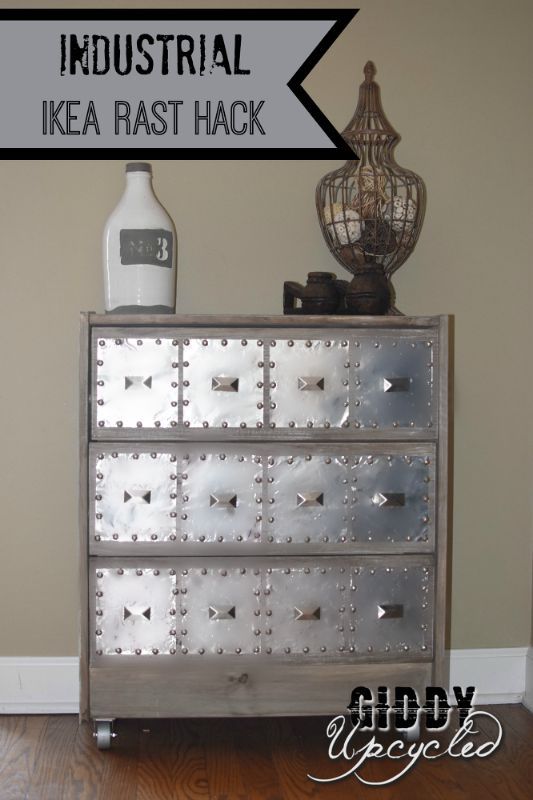
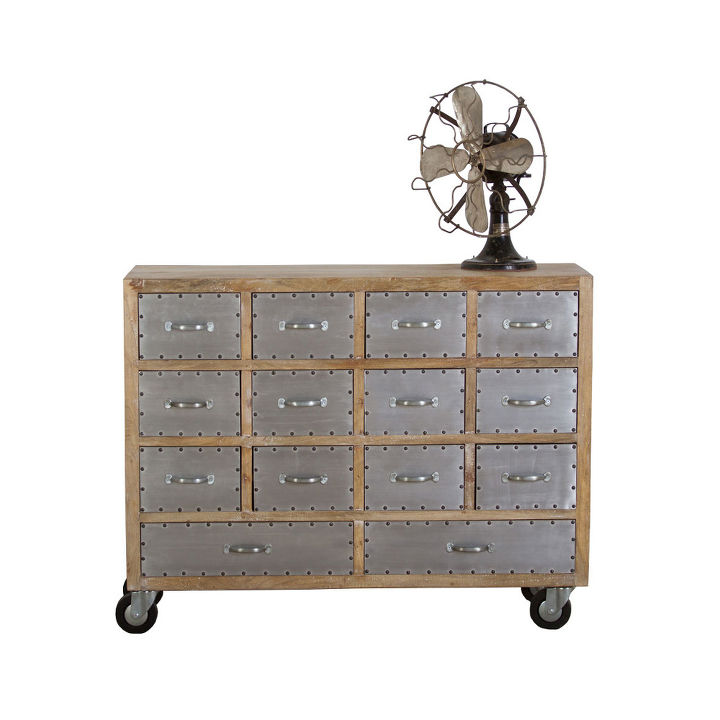
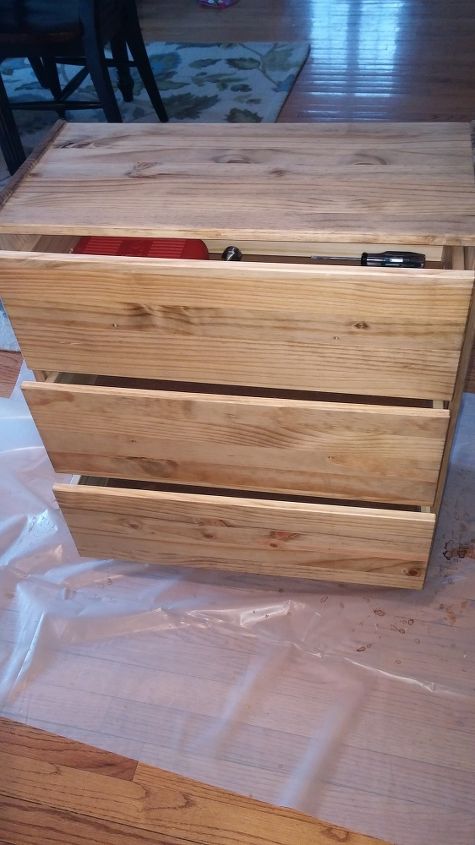
I came across this gorgeous $800 industrial dresser with cool caster wheels and metal panelled drawers on Dot & Bo (below), and I decided I was going to attempt to turn my IKEA Rast into a high end inspired industrial dresser.
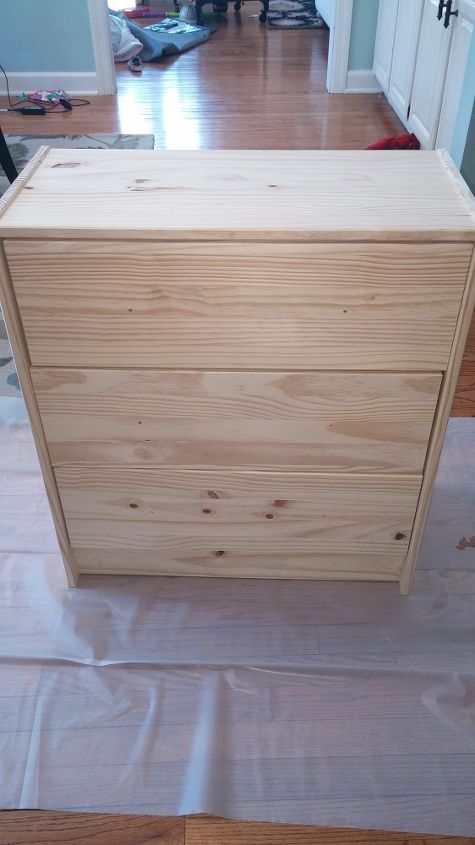
The other thing that convinced me to take on this particular project, is that I’ve been dying to try the Black Tea and Steel Wool & Vinegar aging technique on wood – and let me tell you, it is the BOMB!! I was pretty skeptical at first, but after seeing how it naturally aged the yellow coloring on the unfinished pine that comes with the IKEA Rast dresser, I was totally sold on it.
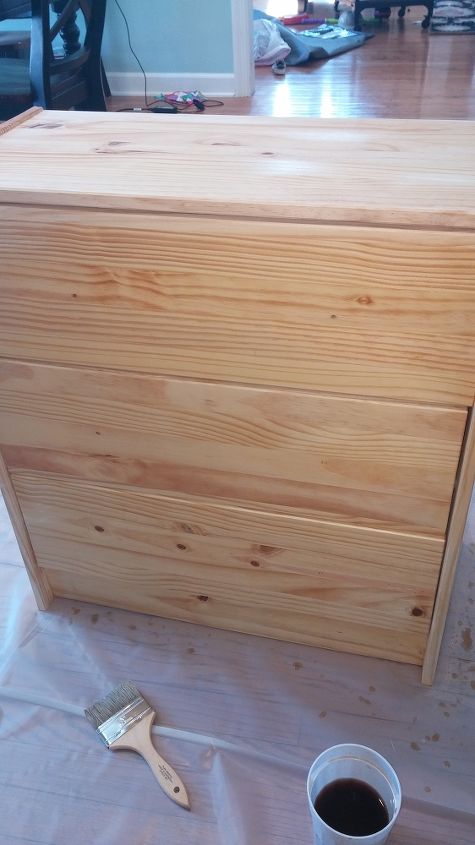
Step 2. Once your vinegar/steel wool solution has had a few days to sit and process, you’ll want to brew a pot of BLACK tea. This step is necessary for woods that are lighter in color, because they lack the tannins of darker woods. The tannins in the wood is what the vinegar/steel wool solution reacts with, to create the aging effect. Take a cheap disposable paint brush, and paint a 1-2 coats of the tea onto the wood. Here is how the dresser looked after this step.
Step 3. After the Black tea has dried, take the steel wool/vinegar solution and paint 1-2 coats onto the wood. You won't notice much change immediately, it takes awhile to set in and for the chemical reaction to occur with the tannins. Below is how it looked after about an hour.
But.... within 24 hours, it was starting to take on a perfect grey/weathered/driftwood look - no more yellow! This is how it looked a little over 24 hours later...
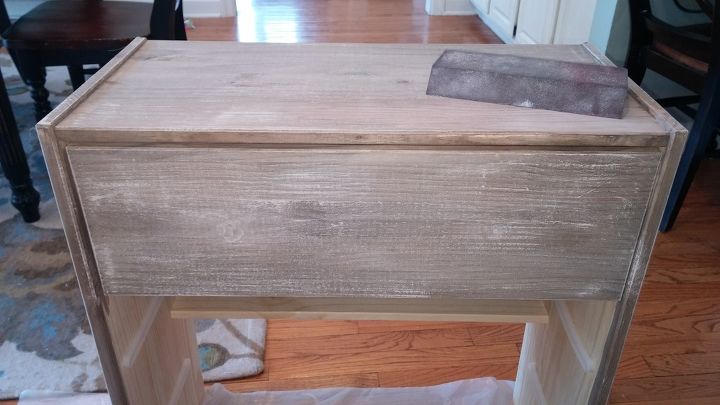
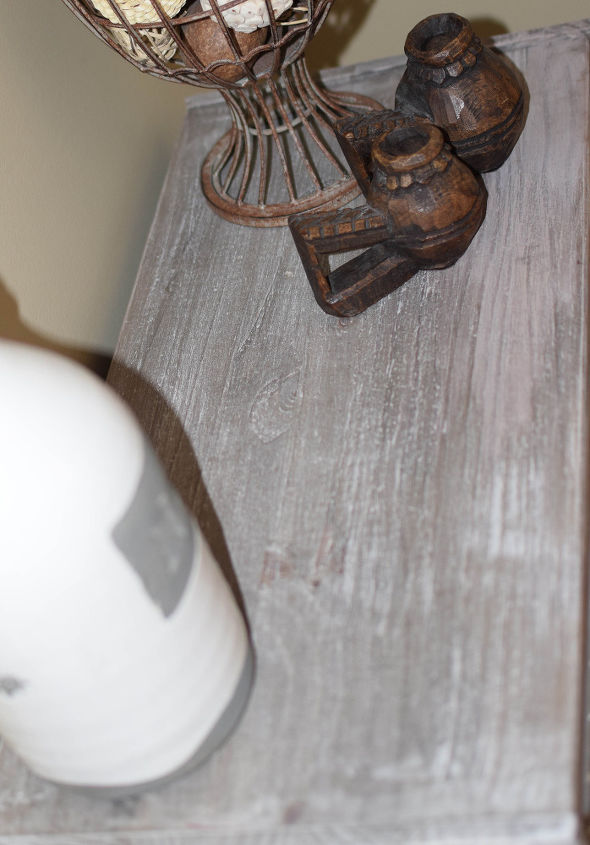
Step 4: Once the weathering was completed, I dry brushed on some faint lines of white/grey/off-white chalk paint, to give it a bit of a whitewashed look. This step is optional, but I really think it gave it a lot of texture and finished off the look I was going for.

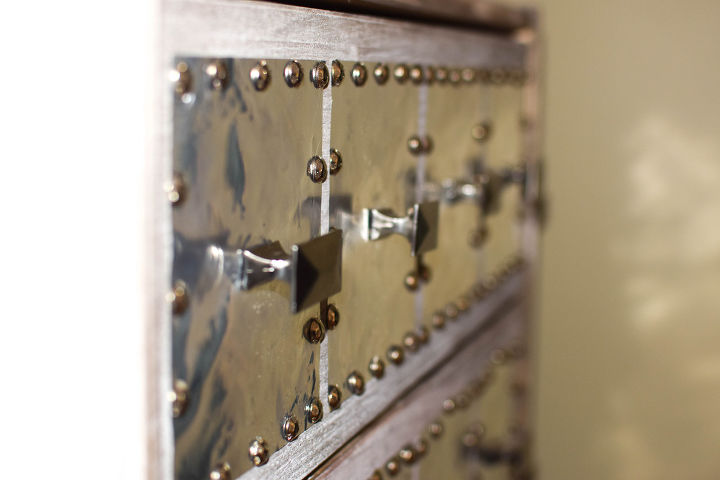
Step 5: Once the painting was completed, now came the real work. I had some left over Walnut Hollow brand Aluminum Craft Squares from a project I did a few months back. They were perfectly sized to place 4 across each dresser drawer, creating an industrial faux apothecary drawer look. I nailed in 16 decorative nails around each one of the squares – with 4 squares per drawer and 3 drawers total – that was 192 total nails.
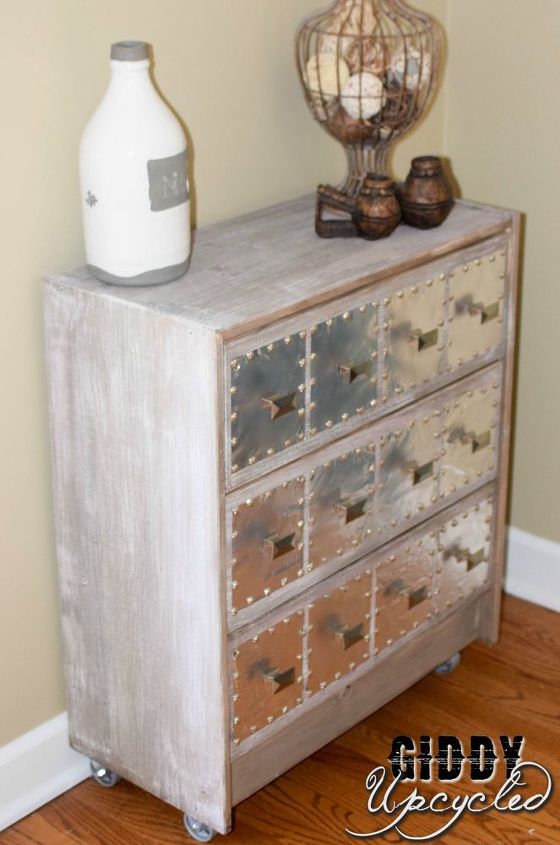
Check out that weathered wood grain!


Want more details about this and other DIY projects? Check out my blog post!
Comments
Join the conversation
2 of 66 comments
-
amazing job
-
Love it, make me one!


Frequently asked questions
Have a question about this project?