Cord wood (birch) counter top help help!

by
Bananas!
+27
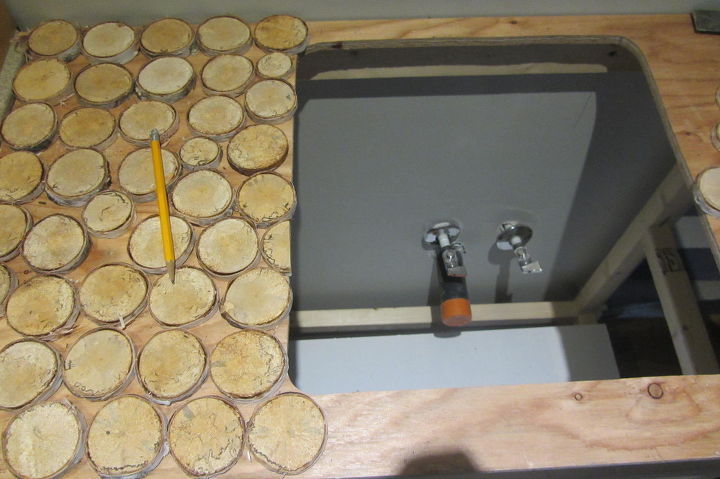
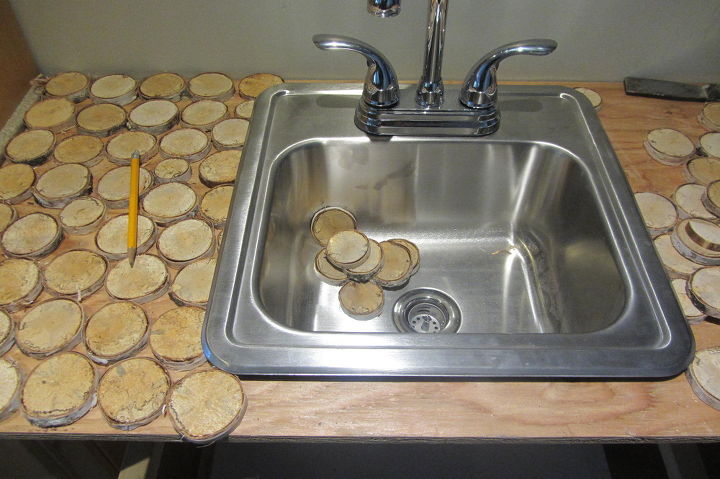
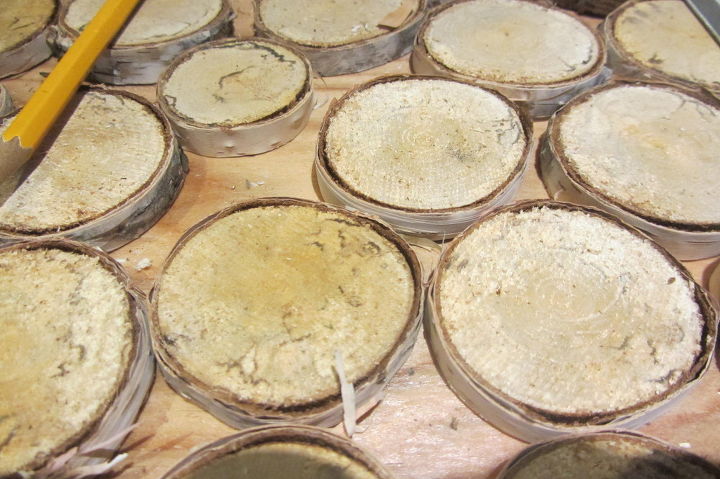
Please note photos: I'm going to glue each of these birch pieces onto the plywood, didn't want to grout, but more wanted a clear grout and thought instead maybe coloured sand then epoxy or some product over it to hold in place and waterproof it? I'm wondering if anyone has McGivered this sort of project? Can you help with product names etc.. as it's beside the sink, is needs to be waterproofed, epoxy? Do they make enough? It's a bar sink in a breakfast bar setting. Also, I am using pallet wood to panel the wall behind and considering adding some. I'm also open to other ideas on how to finish the counter top! Let your inner artist loose!!
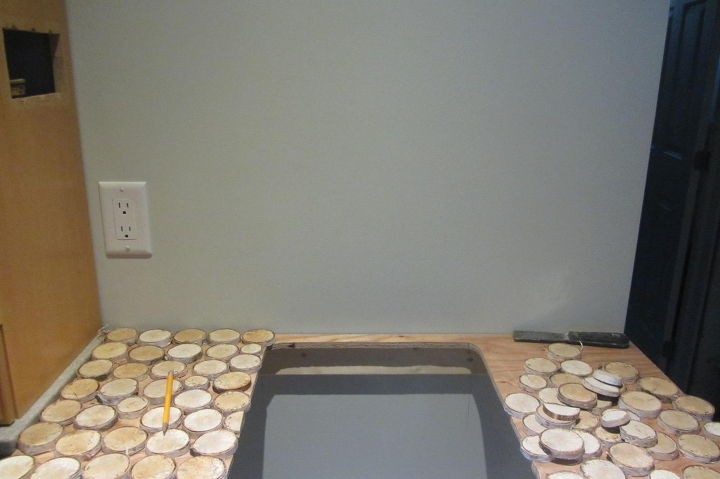
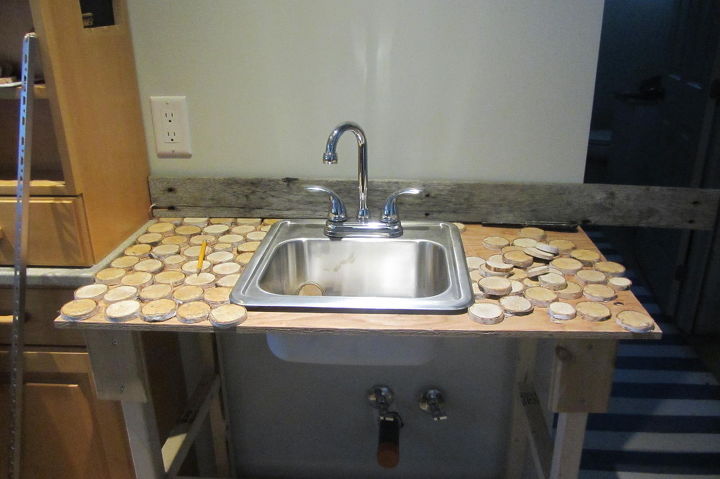
How to finish the front? joining ply to ply? or another idea?
20 answers
-
I think I would stain the plywood behind it a dark walnut color to make the birch rounds stand out, build a lip around the counter just above the height of the rounds, then use self leveling resin to fill it in without using any grout or sand that way you would still see the pretty birch bark through the resin. Once it's dry you knock the lip off so the edges are resin too. I personally have never done a project like that, but have seen it done on DIY shows, so I would do a little research before beginning.
 Katrina Warren
on Apr 15, 2015
Katrina Warren
on Apr 15, 2015
-
hmmm thanks @Katrina Warren! I just watched some guy's video making a table like that. I like your idea of painting the plywood dark first! I have some stain/varathane left over from another project, so can use that. Do you think I can get self leveling resin at a home depot? the video's in hyper speed, it's quite entertaining actually :)
 Bananas!
on Apr 15, 2015
Bananas!
on Apr 15, 2015
-
I don't have anything intelligent to add here - I just wanted to say that this looks like an insanely awesome project and I'd LOVE to see pictures when you're done!
 Miriam Illions
on Apr 15, 2015
Miriam Illions
on Apr 15, 2015
-
I recently used a self leveling resin product and was pleased with results. Plan to pour two layers when you do this. Also leave yourself plenty of time to watch for bubbles to appear so you can quickly get rid of them. The bubbles will continue to show up until the resin actually begins to harden. I've seen the two part resin products sold at Menards in the larger sizes. The other big box hardware stores near me didn't offer the product in gallon sized portions. You may want to set up a mini prototype to practice on before pouring over your big project. You'll get a much better idea of what you are dealing with and have more confidence when using it on your final project. It's not a difficult product to use, just follow the directions exactly. Best of luck, this will be awesome when you're done. Be sure to keep us posted.
 Sue
on Apr 16, 2015
Sue
on Apr 16, 2015
-
Check out SmoothOn.com They have some awesome epoxy, resin and rubber products. You can buy clear epoxy 2 part resin in small and large containers. Look for the ones with 1:1 ratio(easy to use) You would have to make a frame around the counter top to hold the liquid untill it sets. There are some that set within 25min to an hour. I would epoxy a thin layer to the bottom wood then set the birch in it while wet, once set then do the rest in thin layers for the clearest and bubble free effect. The company is VERY informative and if the site doesn't have infor pertinent to your use, and they respond to emails rather quickly, usually with very good advice on materials and use.
 Diana Pucci
on Apr 16, 2015
Diana Pucci
on Apr 16, 2015
-
Forgot to say the frame would get removed once the resin is set and then polish the resin for a very shiny and clear look revealing the wood from the sides as well as the top. This is basically the same resin used to embed objects for key chains and those paper weights found in gift shops. This might be Labor intensive, but will look awesome. You could even put several layers of the resin down, then the wood cuts, then several more layers until at least a eighth or quarter of an inch above the wood cuts. The end result would make the wood pieces look suspended in water and visible from top and sides. The base could be removed once set for a complete block of resin and wood and it would be rigid and strong placed on the counter base all by itself. Of course the counter would be see through between the cracks of wood. There are other resins that would do the trick but may have tints to them. I used one that was labled clear but came out blueish, and another that came out amber. Smooth on gave me the only one that was absolutely clear. No I do not work for Smooth On, just a craftperson and artist who has been very satisfied with their products.
Diana Pucci
on Apr 16, 2015
-
I would first cut smaller pieces of different woods to fill in between the larger pieces you have now, I think it would add more to the counter top with different cut pieces of wood in different sizes and then finish.
 Lori Hepp
on Apr 16, 2015
Lori Hepp
on Apr 16, 2015
- See 1 previous
-
Bananas, only one thing I would do in addition to the above great suggestions, is to do a small test tile, using all the same materials you will use in your final project. My experience with resin is, it gets hot during the curing.
 Shamrockcamper
on Apr 16, 2015
Shamrockcamper
on Apr 16, 2015
-
Easy cast or envirotex
 Slgibbs1
on Apr 16, 2015
Slgibbs1
on Apr 16, 2015
-
How about small river rocks/decorative gravel in between the rounds then cover with the epoxy? Oh...and maybe some found objects too, like an old key or some small charms or beads? That would make it interesting.
 EdiLeck
on Apr 16, 2015
EdiLeck
on Apr 16, 2015
-
I can't offer any suggestions as you are so far out of my DIY League with this project, but it looks like a great idea and would love to see pictures when it is finished! Good luck with your awesome creativity!
 Carol Tanner
on Apr 16, 2015
Carol Tanner
on Apr 16, 2015
-
I had a friend that did this with matchbooks/ movie tickets coins pebbles and smaller baubles, it was fantastic, she used only epoxy, it took her a long time to do it layer after layer but the finished product is truly beautiful.
 Lee Cunningham Green
on Apr 16, 2015
Lee Cunningham Green
on Apr 16, 2015
- See 1 previous
-
Envirotex is great. Awesome idea!
 Kris Kowalski
on Apr 17, 2015
Kris Kowalski
on Apr 17, 2015
-
I would fill in with smaller branches and sand every thing flat plus a little more support for the top then finish with thin layers of resin .
 Alton
on Apr 18, 2015
Alton
on Apr 18, 2015
- See 1 previous
-
I'm sorry I can't be helpful, but I can't wait to see the finished project, it already looks amazing!
 Shira
on Apr 22, 2015
Shira
on Apr 22, 2015
-
Thanks @Diana Pucci great website! I bought little river rock but don't like the busy look it's giving me so not even going to epoxy it.....made a trial piece about 8 x 8" glad I did...think just painting the plywood and going with the birch pieces will be a nice tidy look...
Bananas!
on Apr 22, 2015
-
Yes the SmoothOn site is awesome and very informative about rubbers, resins, concrete and all the techniques for using them. Perhaps a few found objects, like pretty buttons broken jewelry etc... glued to the center of just a few pieces of the wood circles in a pattern might add the glitz others have talked about with out making it busy. Before the resin process of course. Making a small mock up is indeed wise. What about in between the wood rounds push in moss, in place of where caulk would be on tiles? The moss would have a more natural look with the wood. Mock it up of course. You can get several colors of dry moss at Hobby stores that sell model train supplies. Art supply stores like Michaels or Hobby Lobby might have it in the silk flowers section. If you like the moss idea I would recommend just one color, unless you fade from one color to the other rainbow fashion green to yellow to red going from one end to the other. Both ends start with one color then meet in the middle with the 3rd color.
Diana Pucci
on Apr 24, 2015
-
Good luck I think a lot of us are interested in seeing what you end up doing.
Diana Pucci
on Apr 24, 2015
-
@Jan Elizabeth ooooh Jan great idea! I'm waffling all over and have bought some glass mosaics cause I was just too unsure of the process I'd use. BUT, with your idea I think I'll do this, but make a 3D picture with them instead for the wall.... just have to throw together a frame :) thanks and will post once I'm done!
Bananas!
on Apr 29, 2015
-
I'm so excited to see this when it is done!
Shira
on May 31, 2015
Sign Up to Answer