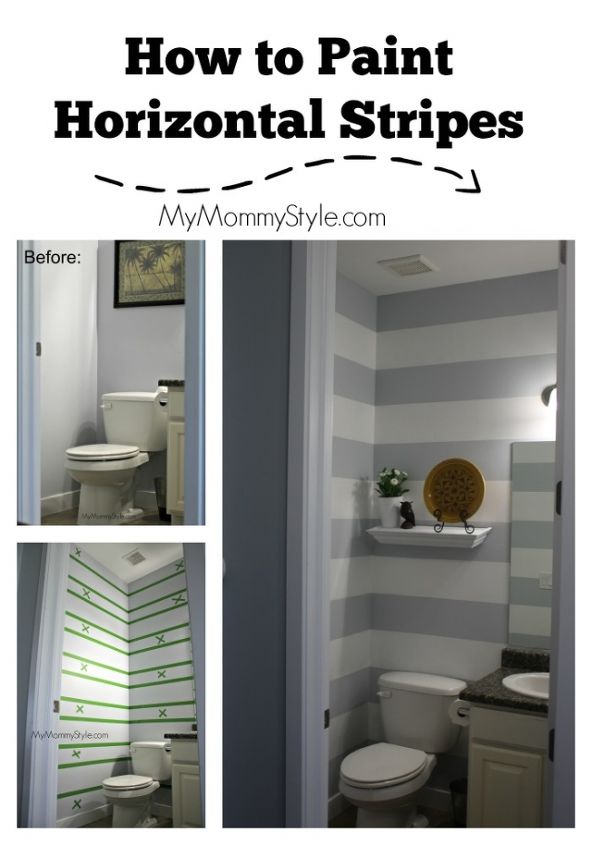
How to Paint Horizontal Stripes

Camille Walker
by Camille Walker
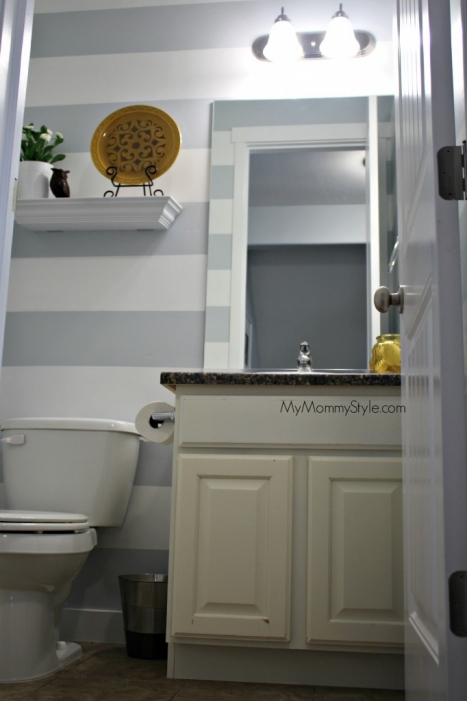
I have had a project floating around in my head for a few years now that I knew I would LOVE…HORIZONTAL STRIPES! I knew I wanted it in my small powder bath by the kitchen because it is a small space and horizontal stripes would actually help it to look larger. We moved into our home only two years ago and my husband LOATHES painting. We chose a light blue/gray color that we loved and it is in the whole house. We even did a vinyl project in the nursery because my husband hates painting so much! HA! So when we were approached my Frog Tape to do a project using their tape I knew EXACTLY what I wanted to do but just had to convince the hubs it was a great idea too!
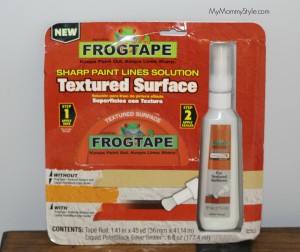
This is the first time I have ever used FrogTape® and I know from experience using other tape before that there is a HUGE difference in quality especially if you are trying to paint a textured surface (which all of my walls are), and if you are wanting to paint a very sharp, distinct line.
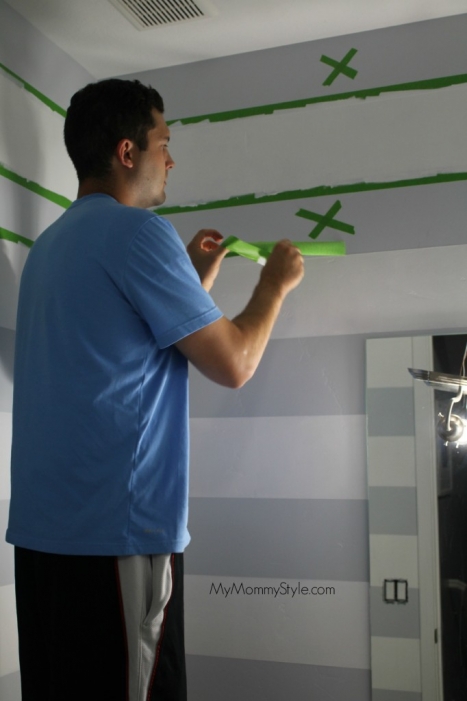
Full Kudos goes to Paul for doing the taping. He is something of a spacial/measuring genius who is great with numbers. I on the other hand, am better at the actual painting part which made this project a lot more fun because it was broken up that way. If you have a partner in crime to help you paint the stripes take them up on it!
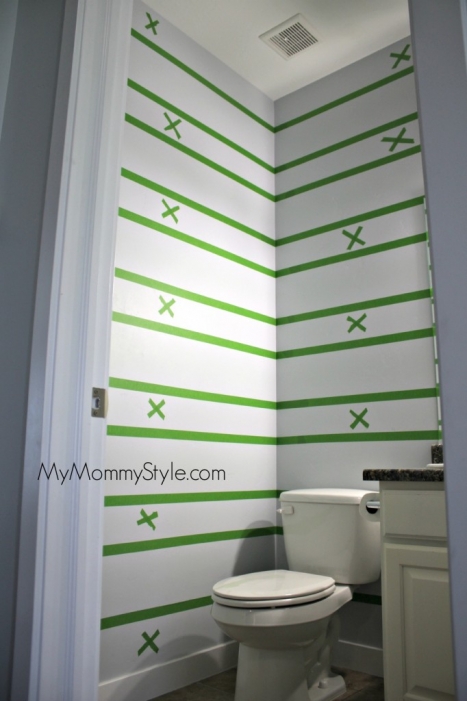
6 TIPS FOR MEASURING/PUTTING UP TAPE


1. Measure twice cut once!


2. Measure from the baseboard to the ceiling in all 4 corners of the room. Your room will most likely not be completely straight, so you will need to choose one corner that will be slightly off. I chose the corner that is least visible.


3. Draw a diagram of your project and do the math. This is the most important step! From the ceiling to the top of our baseboard was 104 inches which made for 13×8 inch wide stripes. I wanted to do as little taping as possible so I made sure my stripes were not up against the baseboards or ceiling. It always pays to diagram your project and think about it before jumping in to taping.


4. Measure from the baseboard not the ceiling – i.e. start from the bottom.


5. Make sure your tape edge is against the side you are painting. This will make your taping look uneven, but once removed it will look perfectly even.


6. X-out the areas you will not paint, so you can easily paint without thinking.
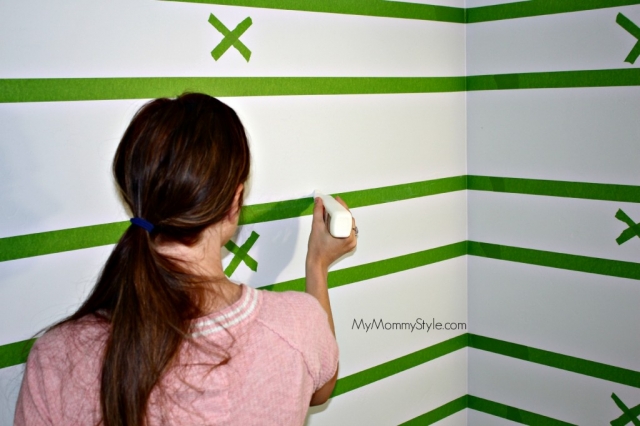
5 TIPS FOR PAINTING/REMOVING TAPE


1. Prep tape with Paint block FrogTape® is treated with patented PaintBlock® Technology, a super absorbent polymer that reacts with the water in latex paint and instantly gels to form a micro-barrier that seals the edges of the tape, which helps prevent paint bleed. This step is VERY important! I missed a few spots and could tell a difference…ha! They were hard to reach places. So if you can, really try to get it every place you will be painting.


2. “Cut” in corners with paint brush and hard to reach places, paint first coat. Let dry a couple of hours. Notice that we put an “X” in the spaces where you will not be putting tape. This is extremely helpful when you are in the middle of painting because those lines can really get confusing.


3. Repaint corners and hard to reach places a second time, paint second layer. Make sure that you are using the roller to create a nice thick layer of paint. I found that the results were just as good if I painting up and down or side to side so just do whatever is comfortable to you.


4. Bring someone in the room to see if you missed any spots. This is so important because sometimes you will miss a spot that isn’t as thick as the others and another person can step into the project and spot these things easier than you can when you’re in the middle of the project.


5. Remove tape Make sure to keep a constant pressure and pull. You are supposed to do this while the paint is still wet. Confession: we had to run off to a birthday party and didn't get to taking the tape off until a few hours later and it was just fine. I was really scared but the results were beautiful and hubby loves it too!
FrogTape® is selling sharp paint lines and we need to ensure that all posts display sharp paint lines. Here are a few tips for obtaining the sharpest paint lines:


Textured Surface by FrogTape


1. Burnish Edges of Tape – best done with fingernail, credit card or a plastic squeegee. This ensures proper adhesion on all edges.


2. PaintBlock® Technology – This technology can be pre-activated with water by wiping the edges of the tape with a damp cloth. *Note – this step is required when using non-water based paint.
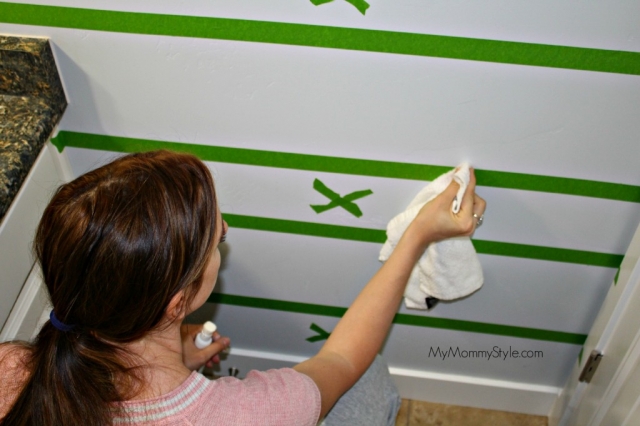
3. Make sure surface you are taping is dirt and dust free to ensure proper adhesion.


4. Avoid stretching the tape while applying to the surface to prevent the tape from lifting.


a. This is especially relevant on curved and round surfaces. For best results, make sure there aren’t any gaps between the surface and the tape.


5. Choose the right tape for your project!


a. Any freshly painted surface (1-3 days cure time), wallpaper, finished wood and other delicate surfaces, use FrogTape® Delicate Surface


b. Any textured surface should require FrogTape® Textured Surface Sharp Paint Line Solution Kit


c. For all other surfaces, use FrogTape® Multi-Surface **Note – this includes Shape Tape**


6. Always remove painter’s tape while paint is still wet
Camille Walker
Want more details about this and other DIY projects? Check out my blog post!
Go
Frequently asked questions
Have a question about this project?
Comments
Join the conversation
 1 comment
  • Hannah V Hannah V on Apr 23, 2015
    I love horizontal stripes! It's definitely on my to-do list to do this one day :)
Next