


How to Upholster and Paint a Bentwood Rocking Chair
$15
3-4 Hours
Medium
“Michael Thonet, an Austrian cabinetmaker who lived from 1796 to 1871, was obsessed with innovative design. In 1830,Thonet experimented with ways to steam and bend beechwood from the local forests into curved and sturdy, graceful chairs. By 1853, he had opened his own shop, Gebruder Thonet, and by 1860 was producing bentwood rocking chairs with woven cane seats and backs. Thonet’s innovations included the first, affordable, factory-produced, assembly-line chairs that could be shipped in pieces and easily assembled.” (Source)
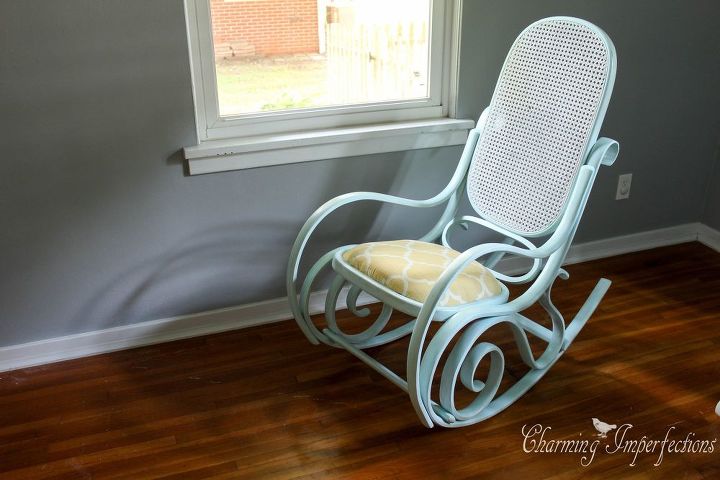
I don’t know if you find the history of rocking chairs to be interesting, but when I found this fascinating piece of furniture I had to do some research. The story above is what I learned about the $5 garage sale rocking chair I was so fortunate to stumble upon.
The woven seat was completely missing out of the seat frame, it had dings and dents, and a hole in the back. The woman I bought it from had attempted to fix it but life happened.
I decided to create an upholstered seat because I have no experience weaving wicker :). I’d like to share the process with you and hope to inspire you to add upholstery to a rocking chair someday.
Check out my full blog post for a full list of materials you'll need to upholster a chair like this.
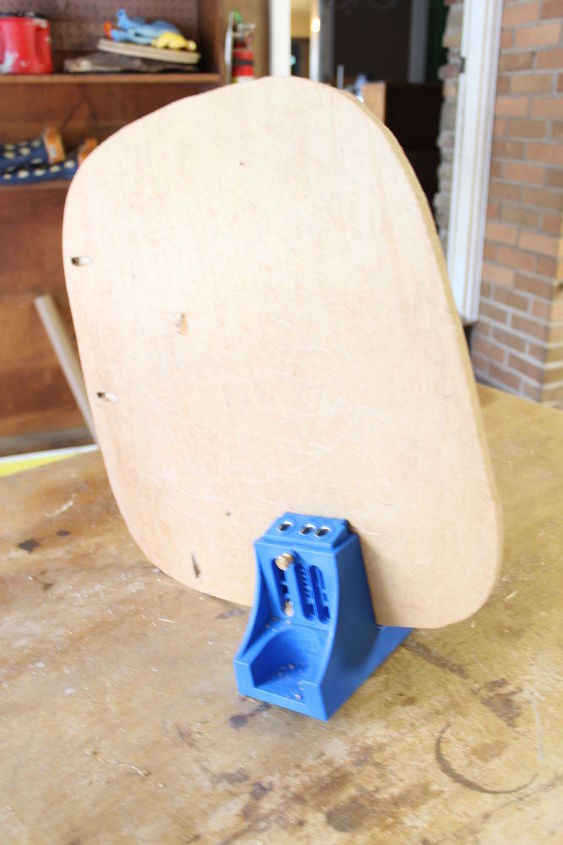
First what I had to do is cut out a base for the seat from some leftover plywood. Use a jig saw for curvy cuts and then pre-drill holes with a Kreg Jig. These will be used to attach the base onto the frame.
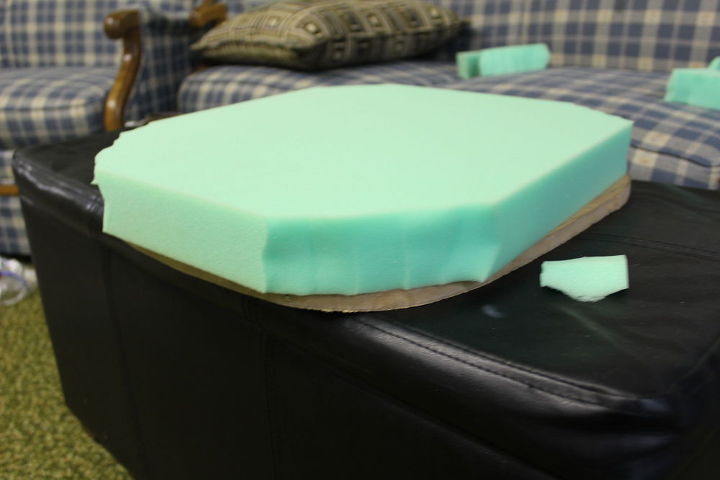
Next, cut some foam for the seat cushion.
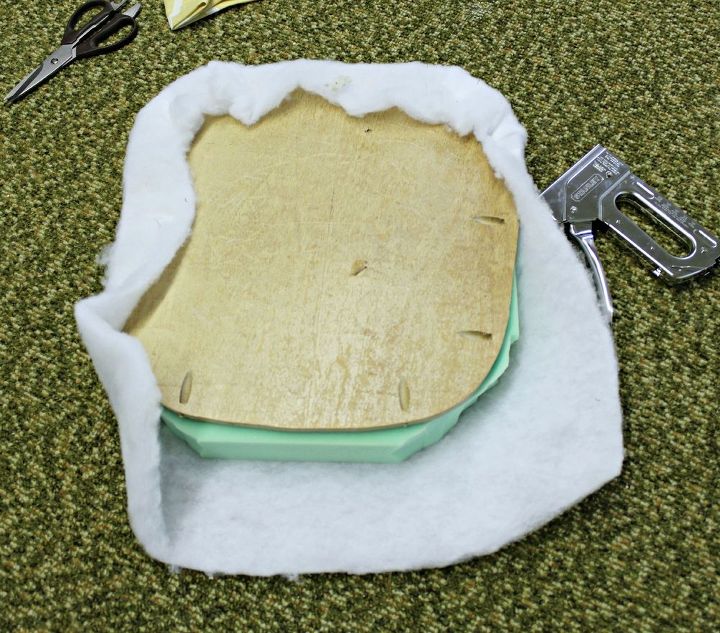
Upholstery is all about the layers, so the next is the batting. Staple that down to the wood.
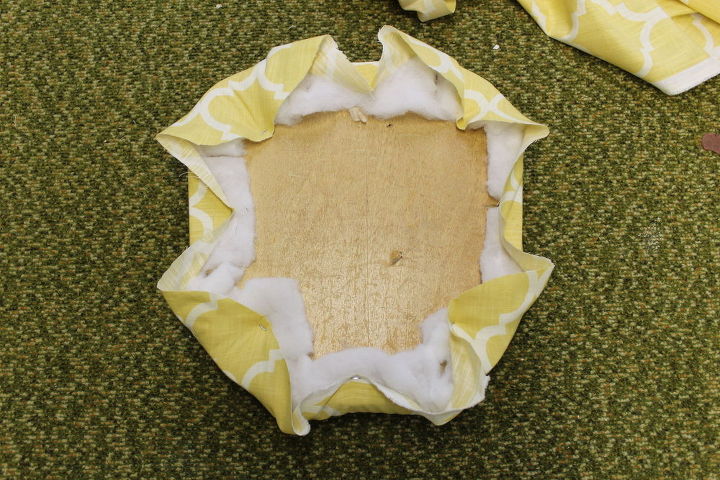
As you are stapling the fabric be sure to keep an eye out for those pocket holes! You'll need to access them to attach the seat to the chair. I found that stapling once on each side, then each corner, and in between those I was able to keep the tension even all around.
Once you have a comfy seat cushion, it’s time to get it attached to the frame by drilling the 1 ¼” screws into the pocket holes. Watch out for the batting which likes to twist around and create a stringy mess.
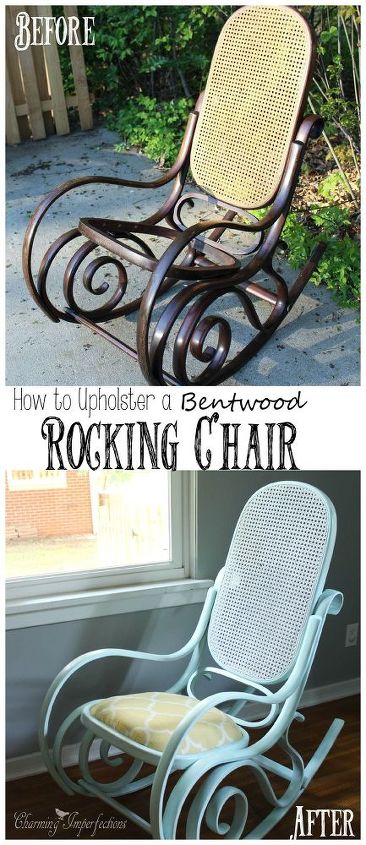
Though it was sad looking at first and a bit of a challenge to fix and paint, I’ve become quite fond of our bentwood rocking chair. The upholstered seat cushion was an easy project that involved a bit of jig saw work, pocket hole drilling, and stapling foam, batting, and material, and painting, while time consuming, was a rewarding process.

Want more details about this and other DIY projects? Check out my blog post!
Comments
Join the conversation
2 comments
-
Awesome! I love this makeover, the color and fabric are so perfect together.


Frequently asked questions
Have a question about this project?
We have a Bentwood rocker and have sanded down the wood. We planned to put a light stain to finish. I hope to do over the seat with a cushion as you have done. What finish do you recommend for the wood?
I was in a do it yourself group on Facebook and they had me confused because some people were saying don’t use spray paint and other people were saying don’t use paint in a can with a brush. I have the exact same rocker and I simply want to paint it all one color. Spray paint OK? I’m definitely not an expert and I’m not going to sell it. It’s just gonna sit on my front porch.
How hard it was to get all of those bends and creases with a paintbrush sprayer to apply the paint so I was just thinking about getting some good quality spray paint.
thanks!